
Set up the billing counter and printers
Who does this: the owner, once for each computer at the counter.
What you need:
- The computer at your counter: a Windows computer, or a Mac with an Apple M1 chip or newer.
- Your receipt printers, plugged in to this computer and switched on, with paper. Install each printer’s driver from its box or its maker’s website first.
- Your phone. A sign-in code comes to it on WhatsApp.
- About five minutes.
Install DineSure Counter
Section titled “Install DineSure Counter”-
On the computer at your counter, open Chrome, go to app.dinesure.in and sign in (Sign in).
-
Click Settings, then Computers and printers.
-
Under Set up your billing counter, click Download for Windows or Download for Mac.
-
Open the file you downloaded. Windows or macOS asks you to confirm the first time you open it. On Windows, click More info, then Run anyway. On a Mac, open System Settings, then Privacy & Security, and click Open Anyway.
DineSure Counter is free. It starts with this computer and keeps printing with its window closed.
Set up this computer as a counter
Section titled “Set up this computer as a counter”-
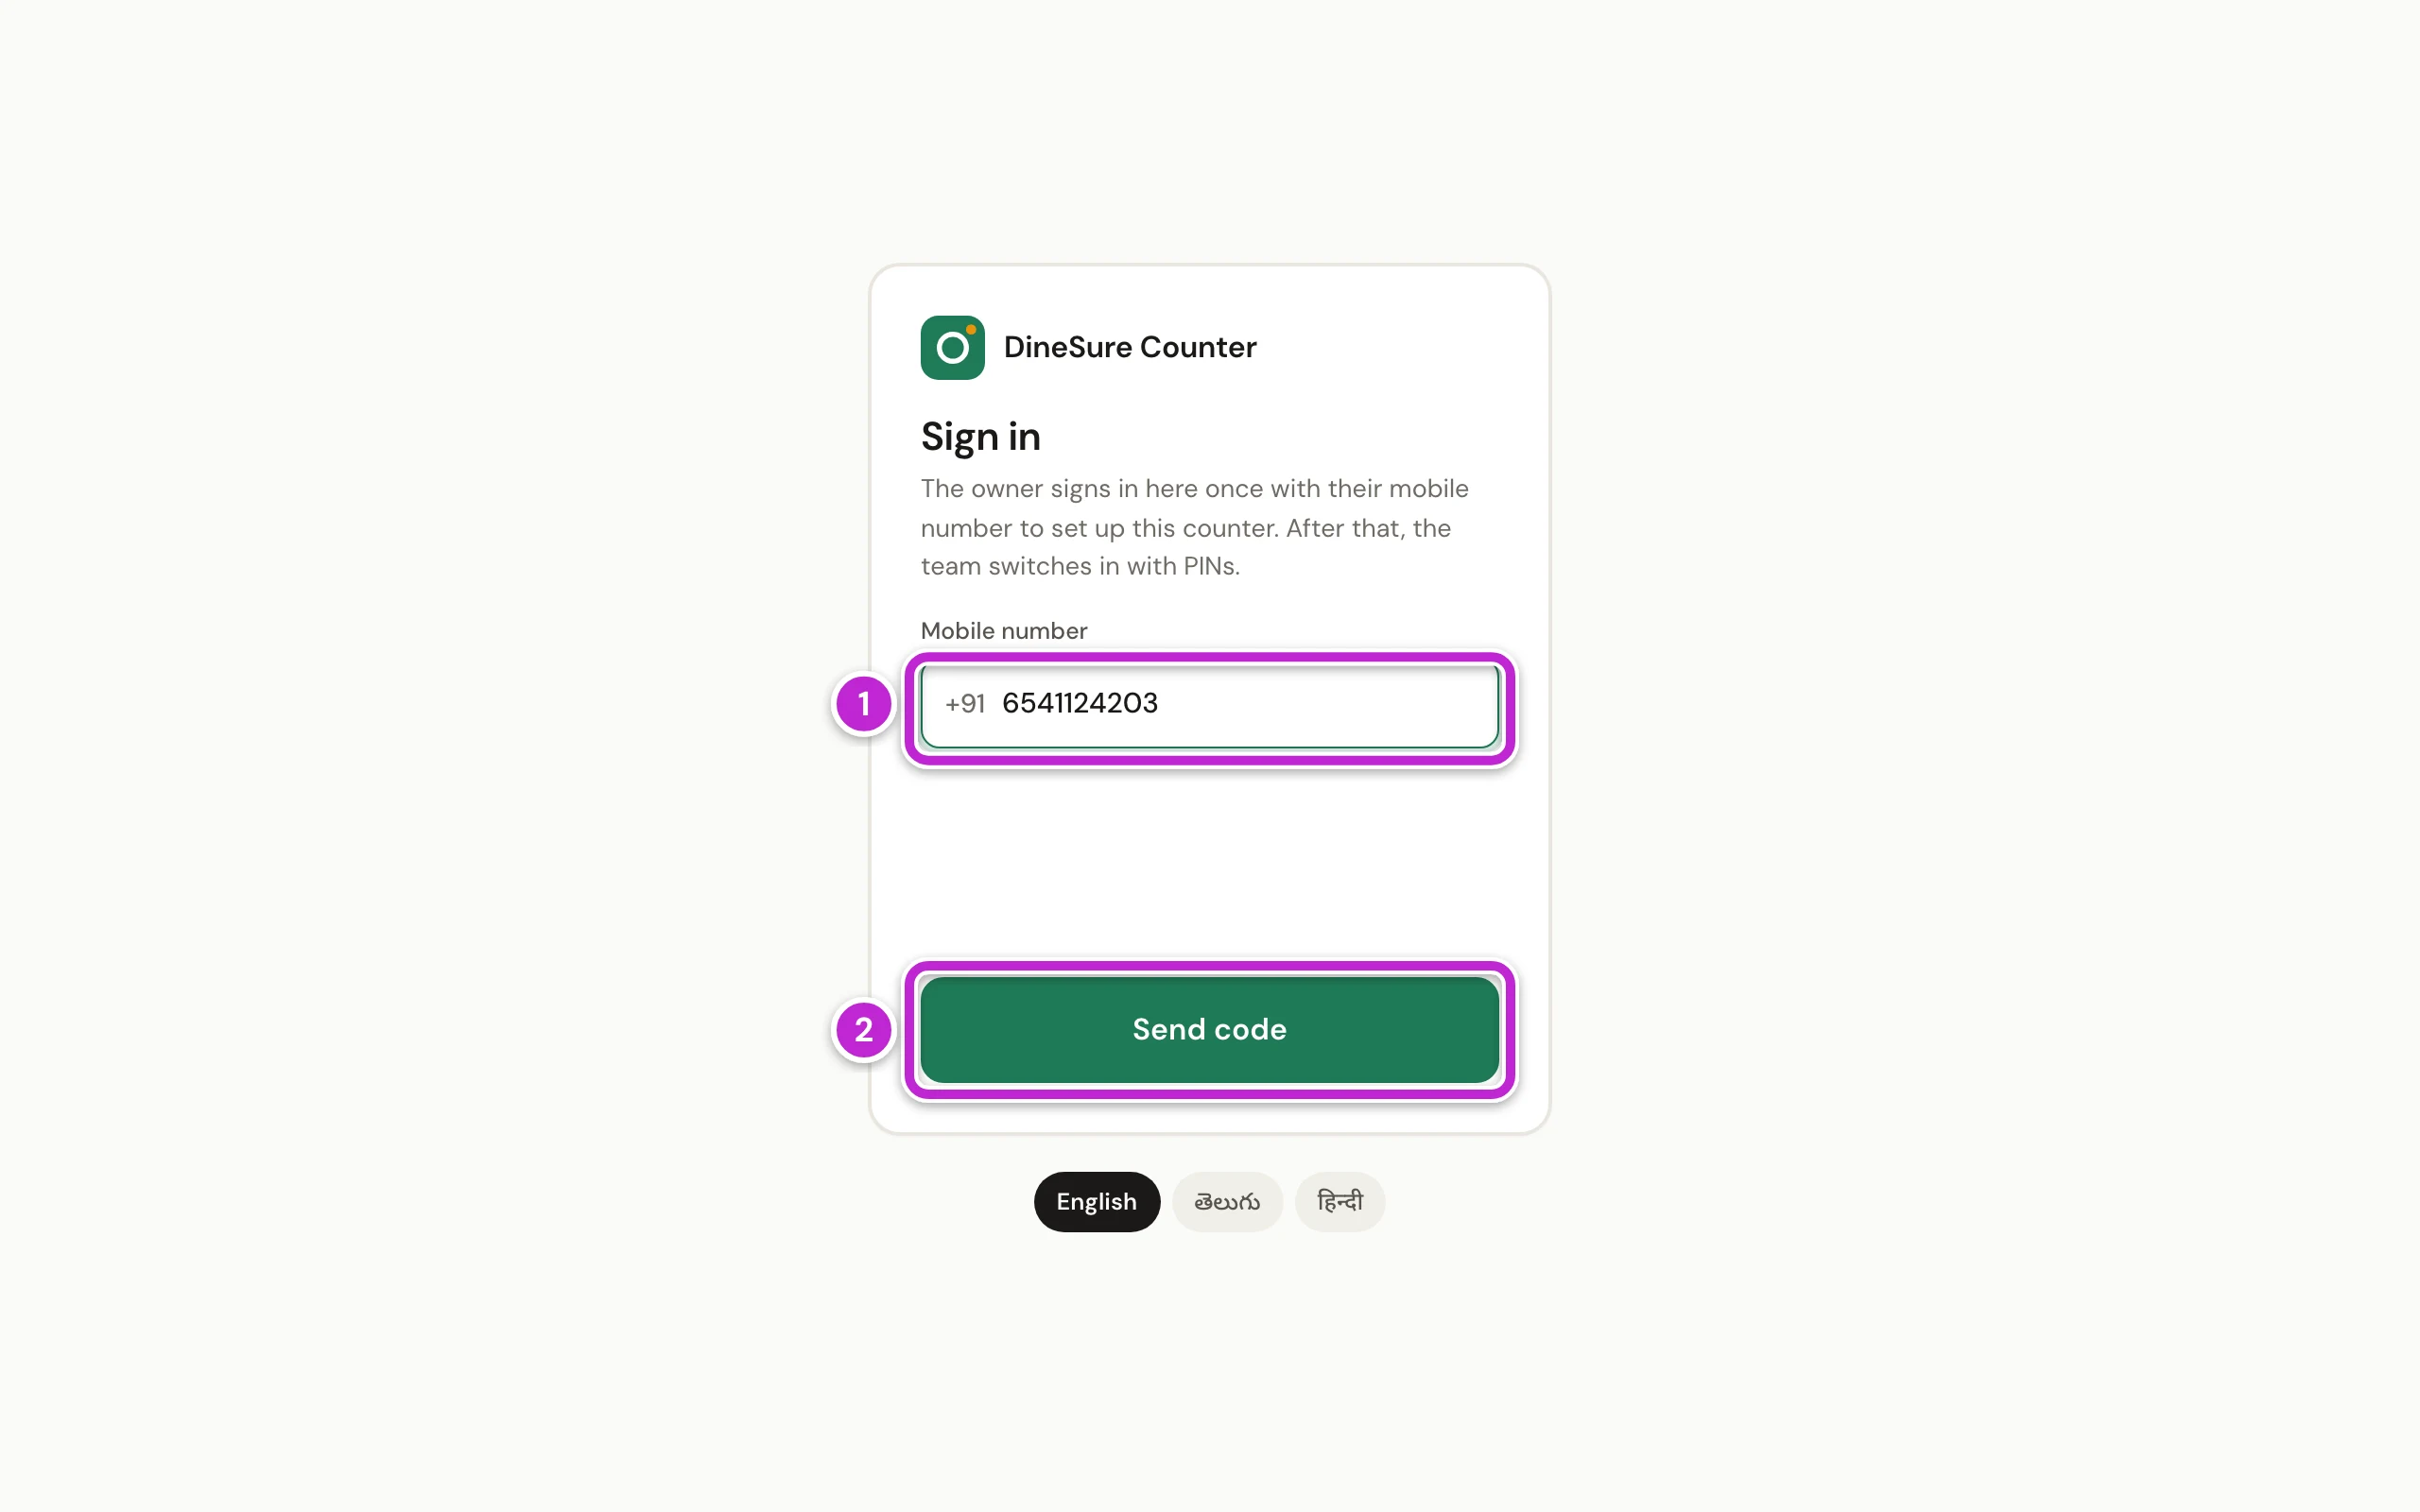
Open DineSure Counter. Type your 10-digit mobile number in Mobile number (1).
-
Click Send code (2).
-
Type the 6-digit code from the WhatsApp message.
-
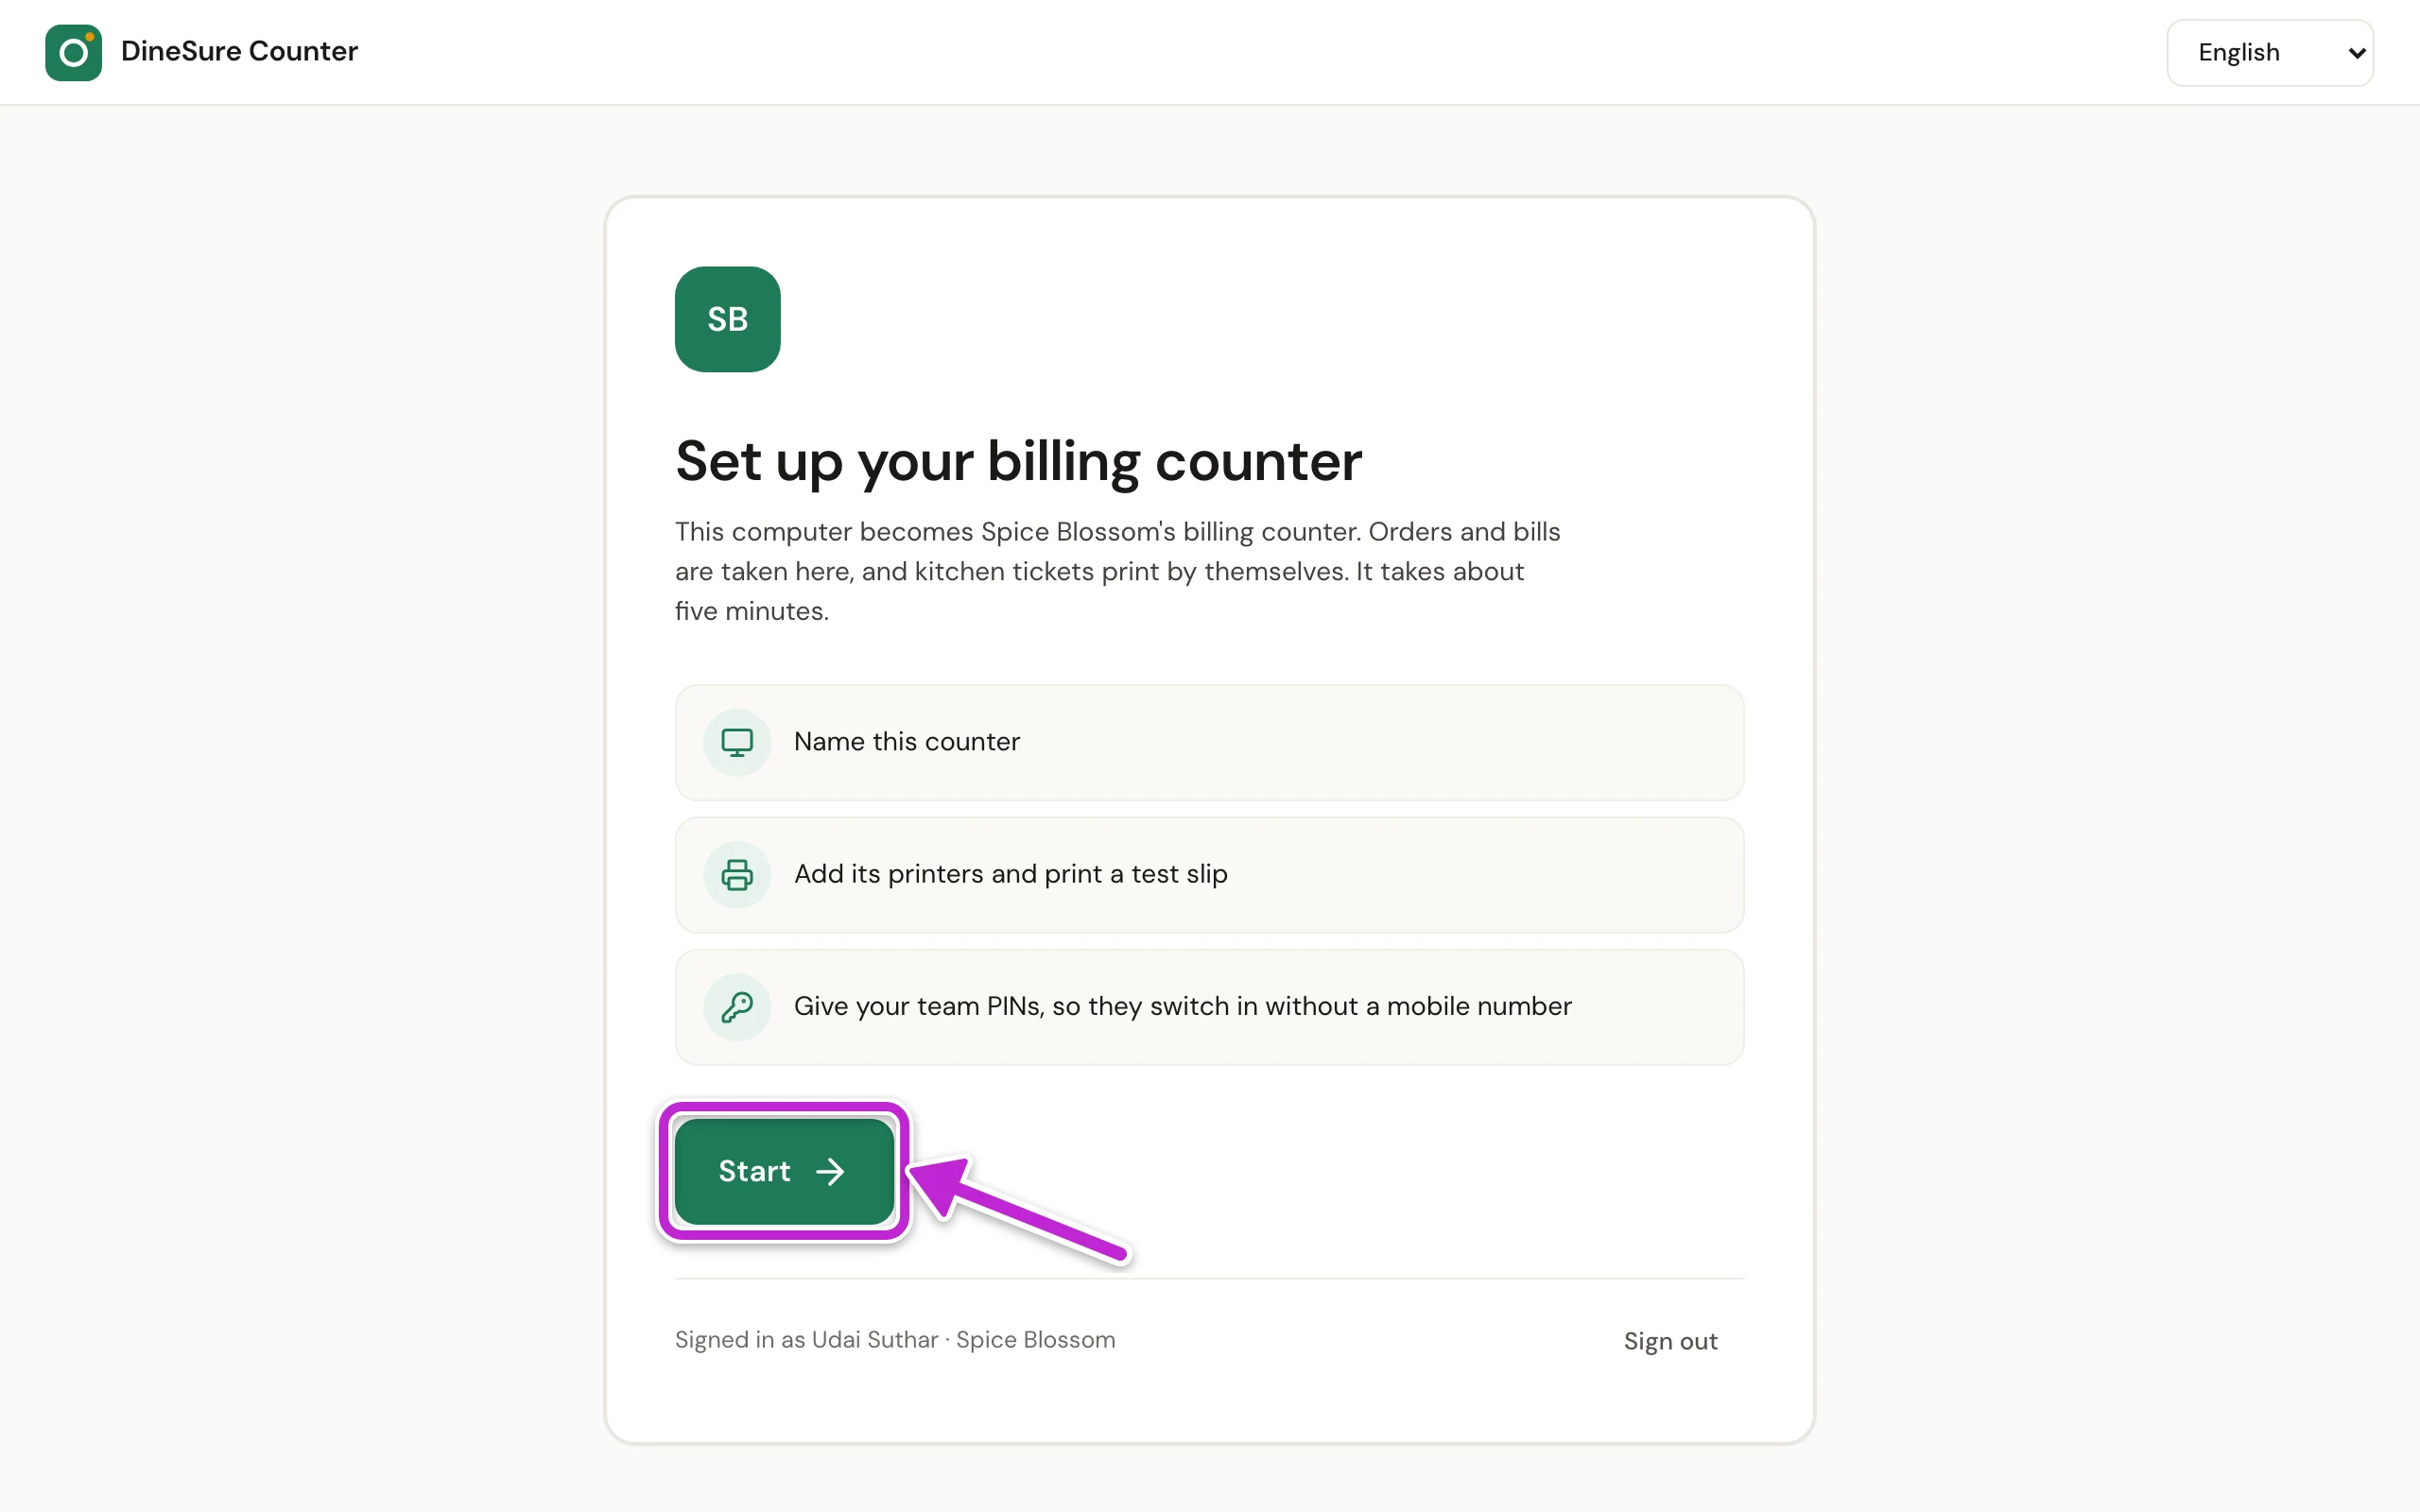
DineSure Counter shows Set up your billing counter. Click Start.
-
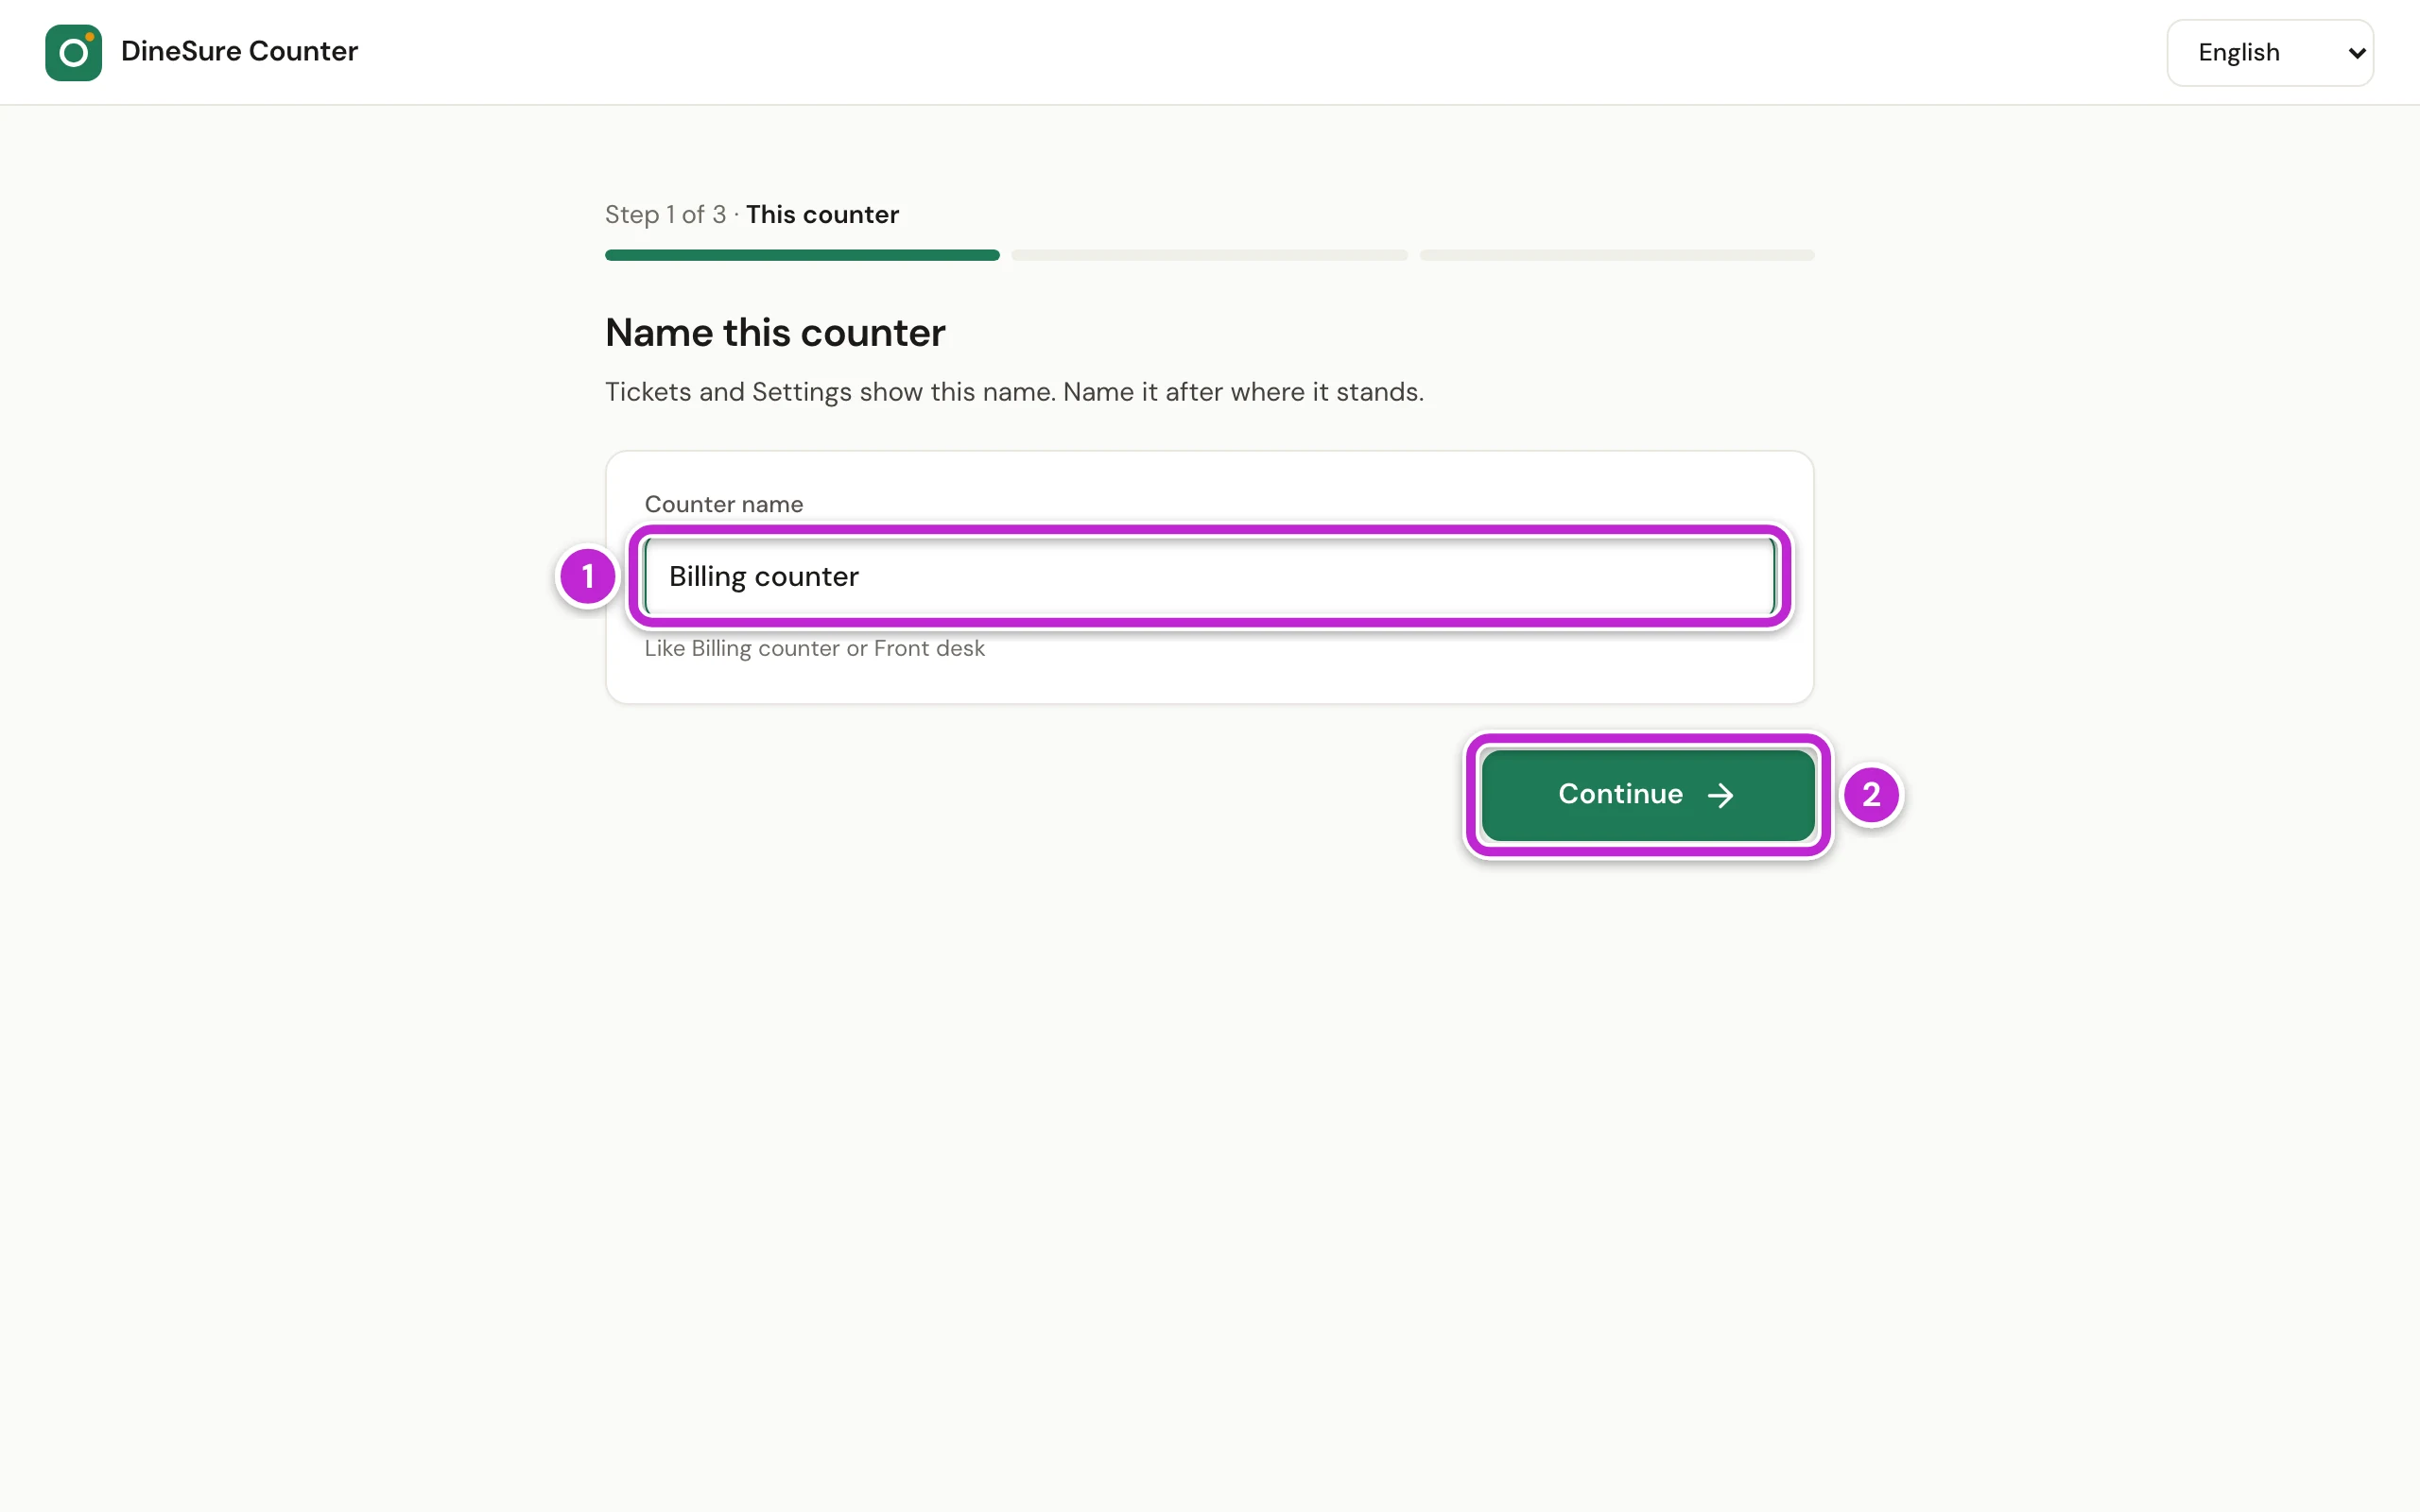
Type a name in Counter name (1). Name it after where it stands, like Billing counter or Front desk. Tickets and Settings show this name.
-
Click Continue (2).
-
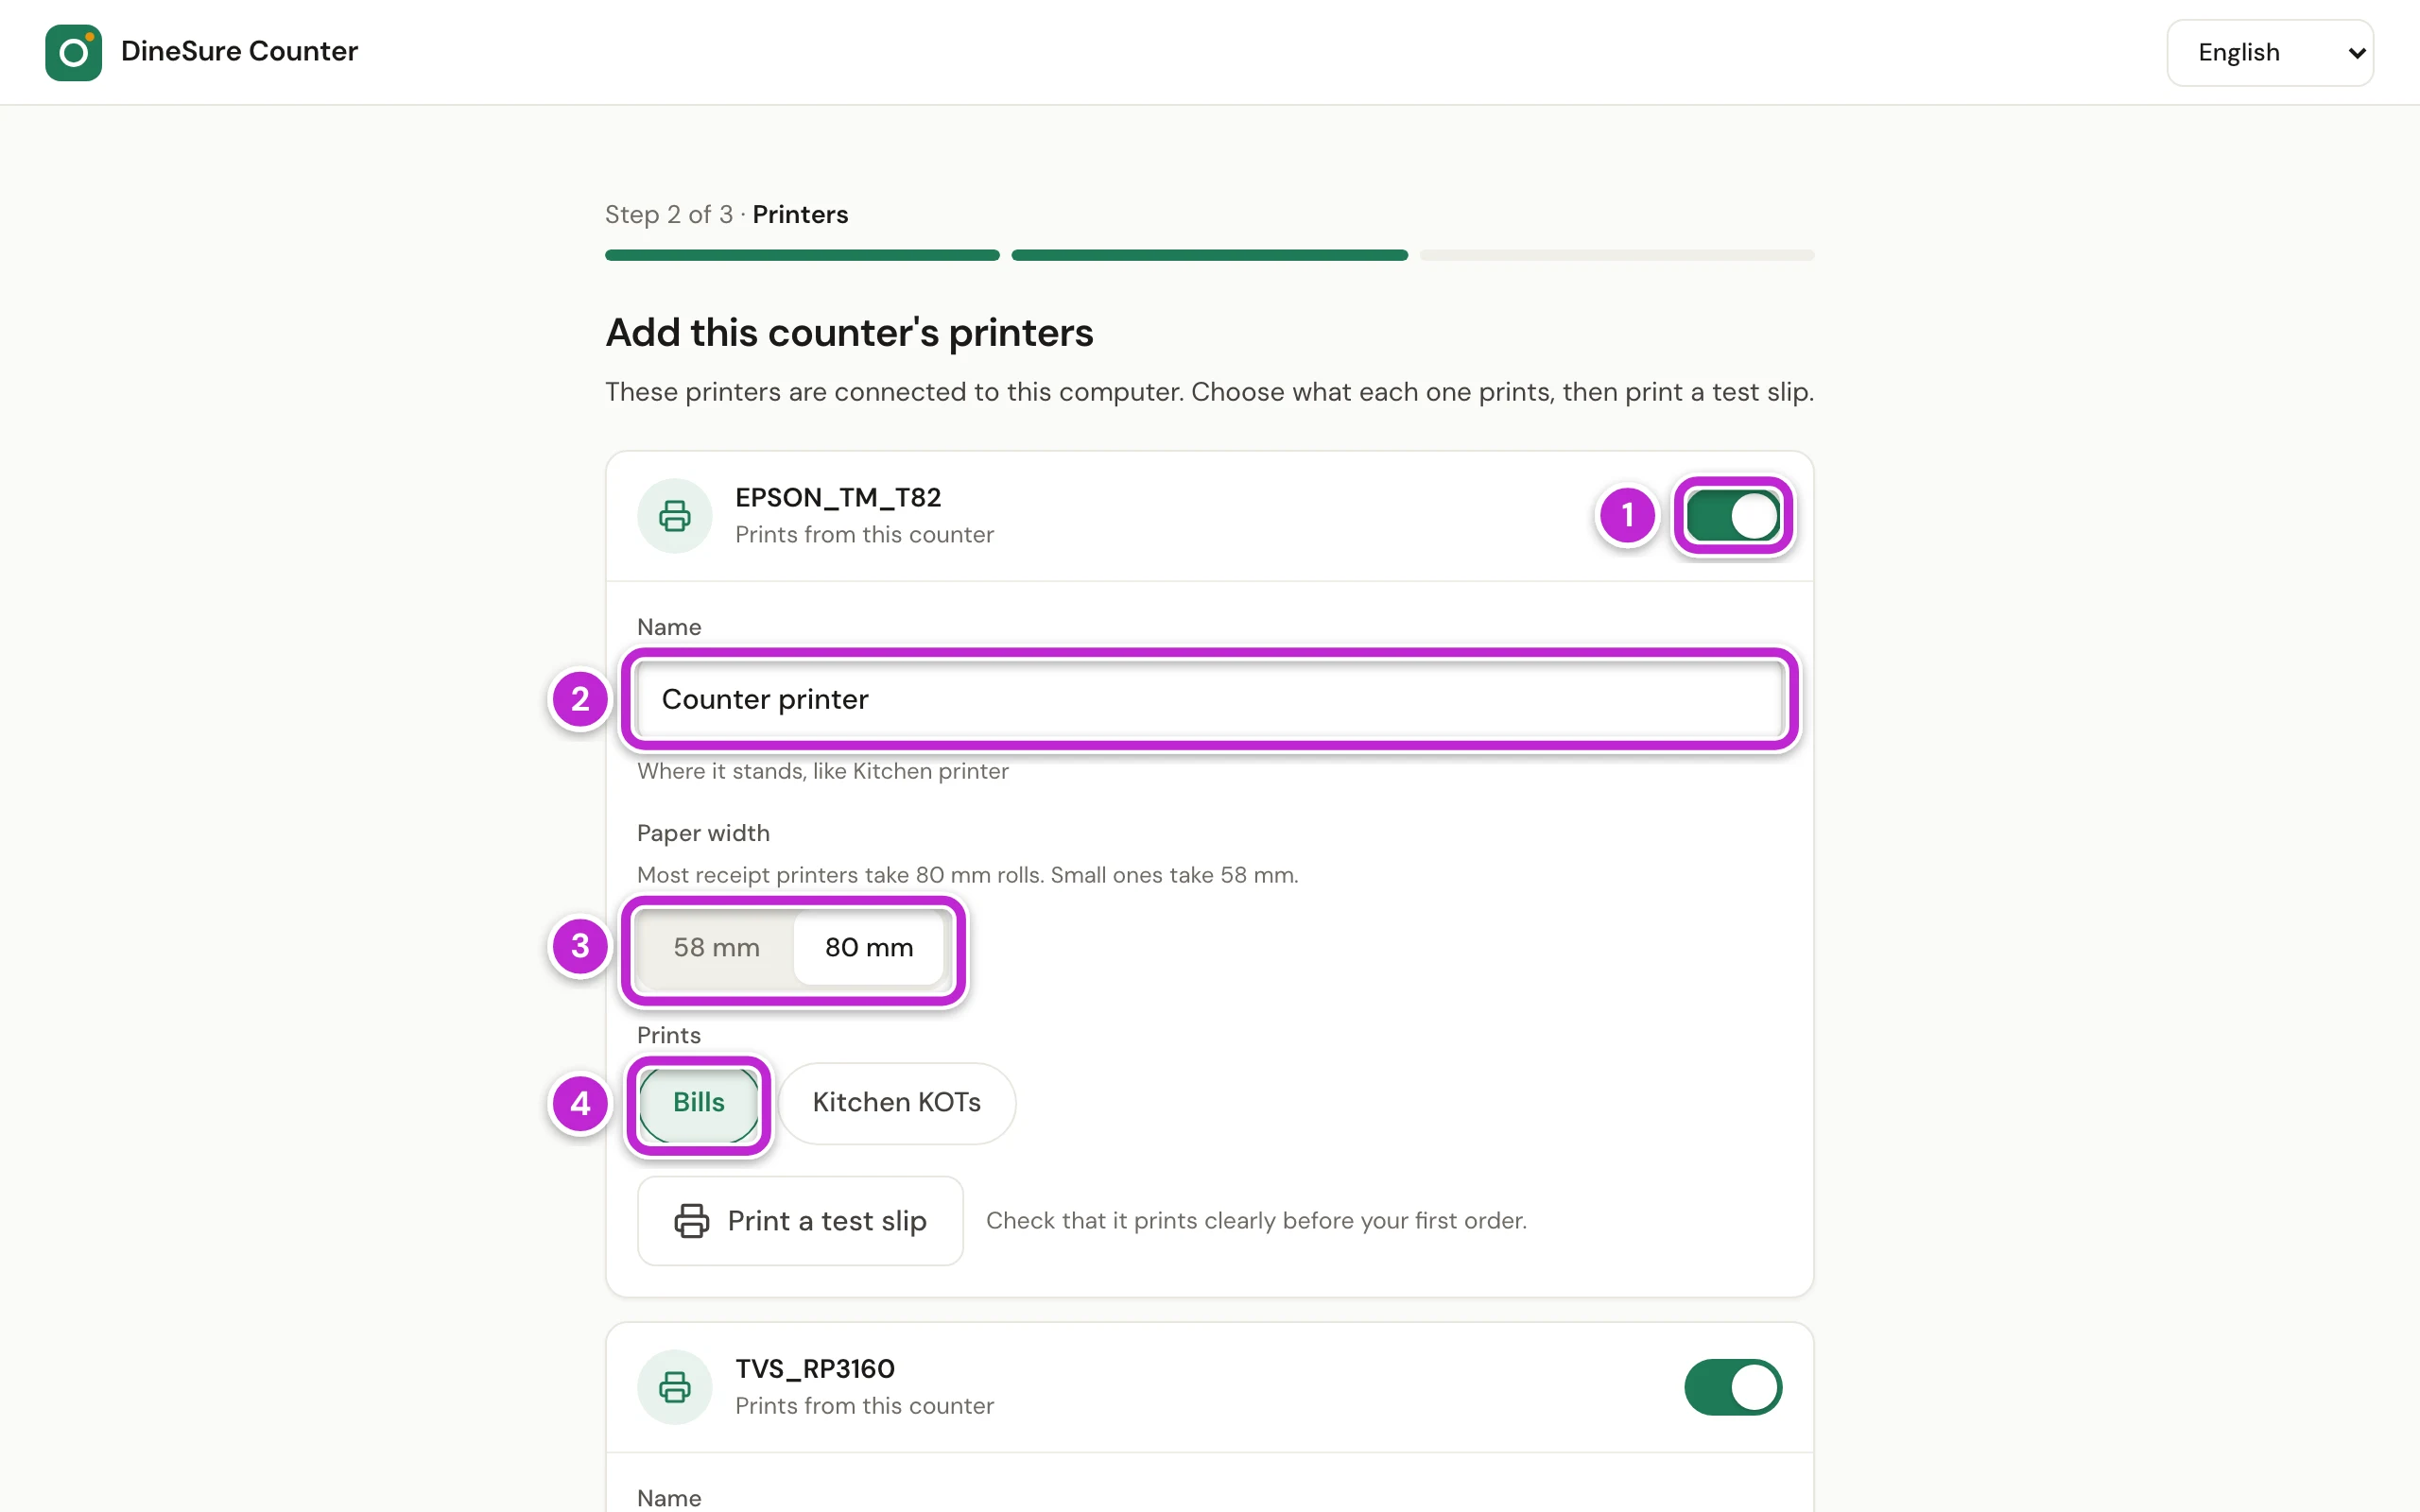
DineSure Counter lists the printers connected to this computer. Turn on the switch of each printer you want to use (1). It then reads Prints from this counter.
-
Type a name in Name (2) that says where the printer stands, like Counter printer or Kitchen printer.
-
Choose the Paper width (3). Most receipt printers take 80 mm rolls. Small ones take 58 mm.
-
Under Prints, choose what this printer prints (4): Bills, the KOTs of a kitchen station such as Kitchen KOTs, or both.
-
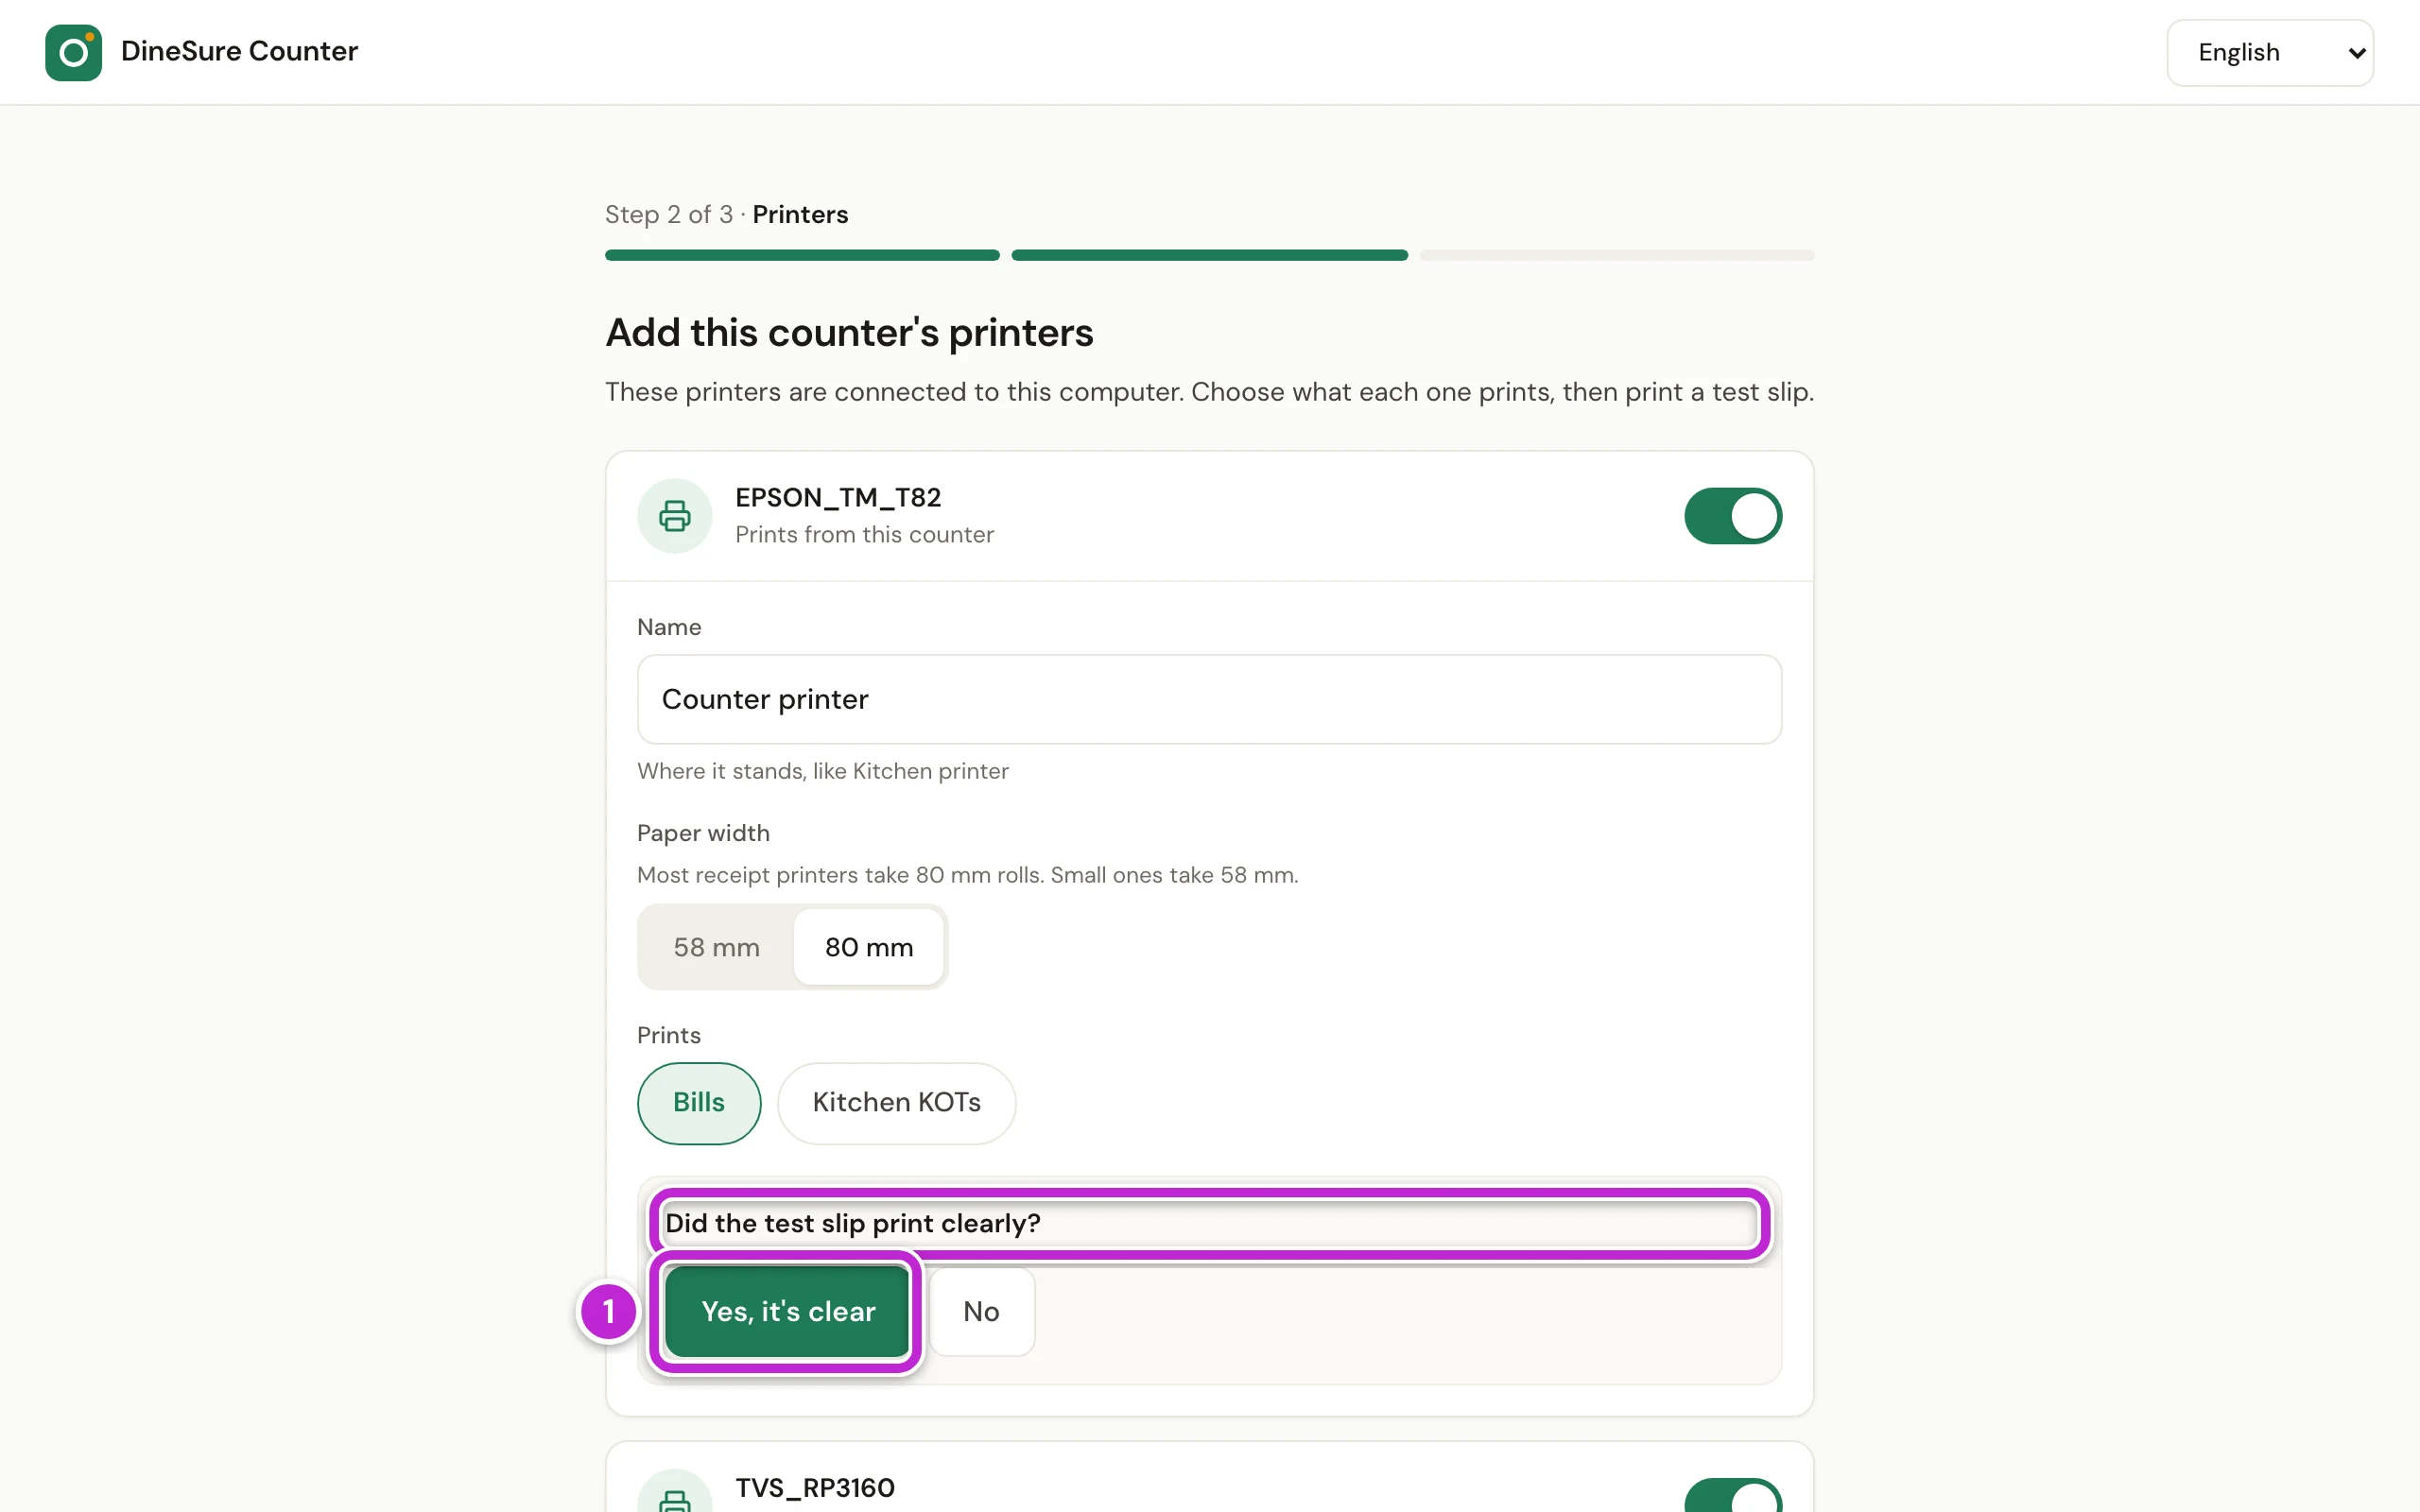
Click Print a test slip. A short slip comes out of the printer.
-
Look at the slip. If you can read it clearly, click Yes, it's clear (1). If not, click No and follow the tips on the screen.
-
Do steps 8 to 12 for every printer you turned on. Then click Continue.
-
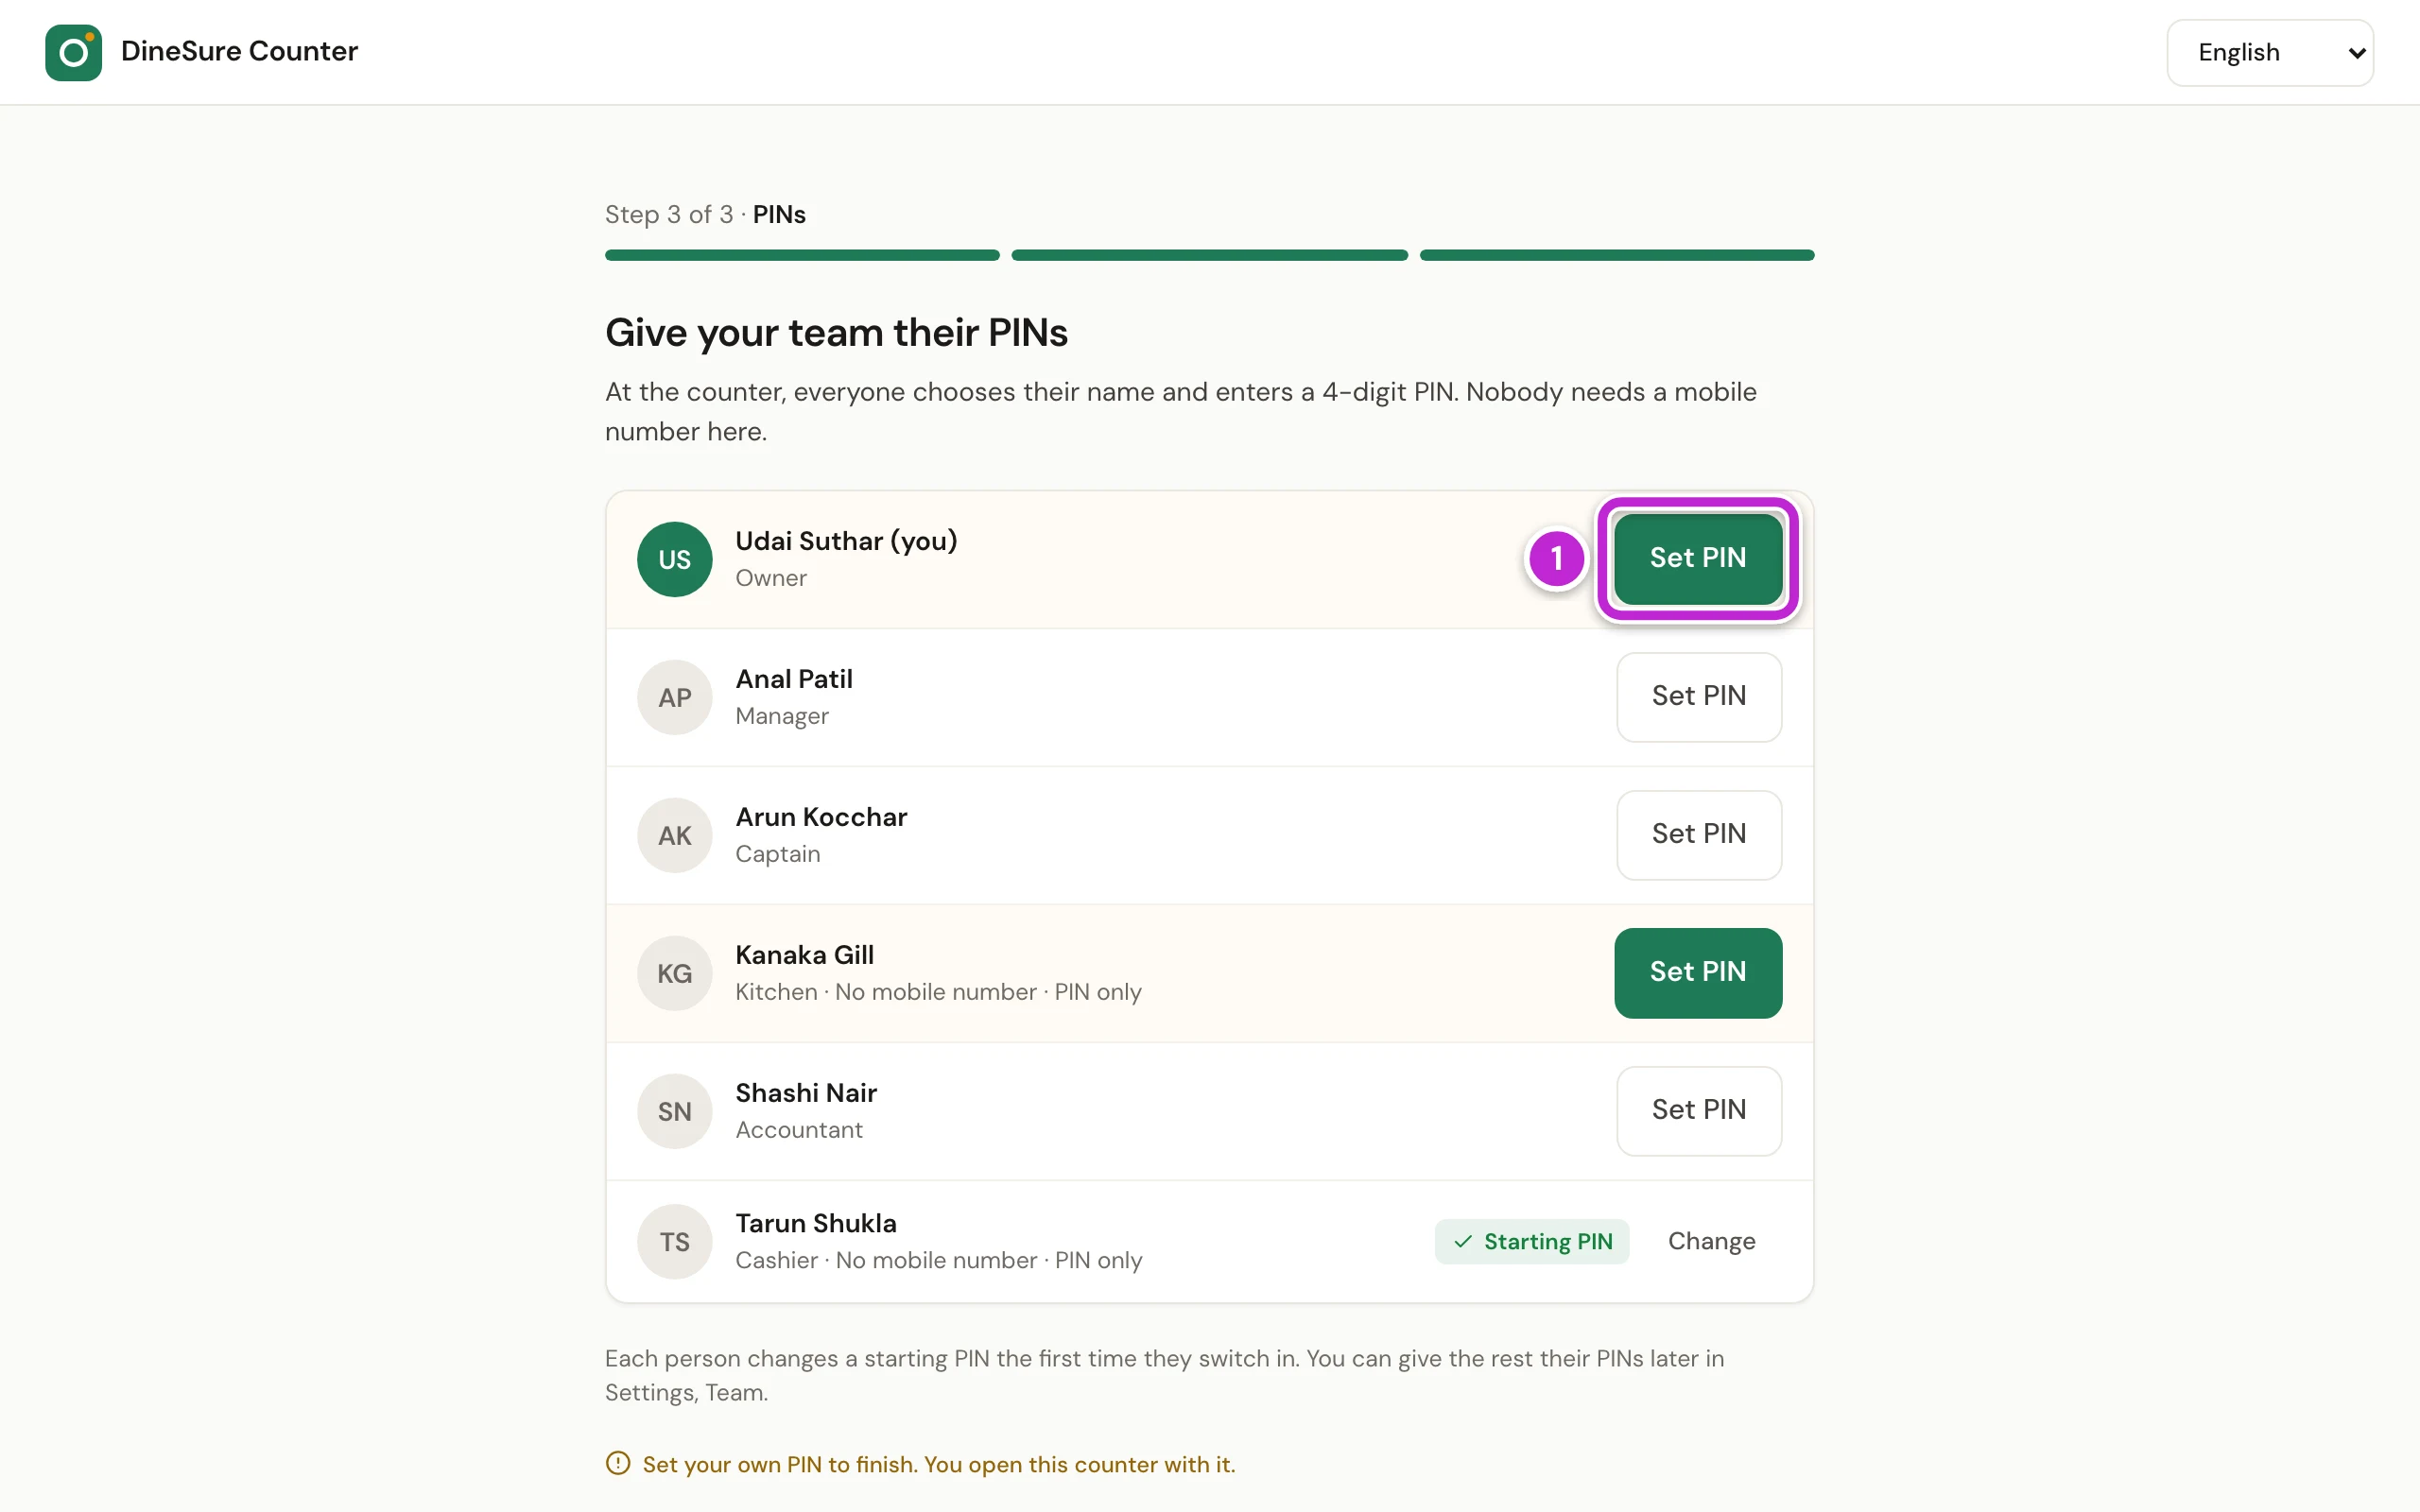
DineSure Counter shows Give your team their PINs. On your own row, click Set PIN (1).
-
Type a 4-digit PIN in PIN.
-
Click Save. You open this counter with your own PIN, so you cannot finish without it.
-
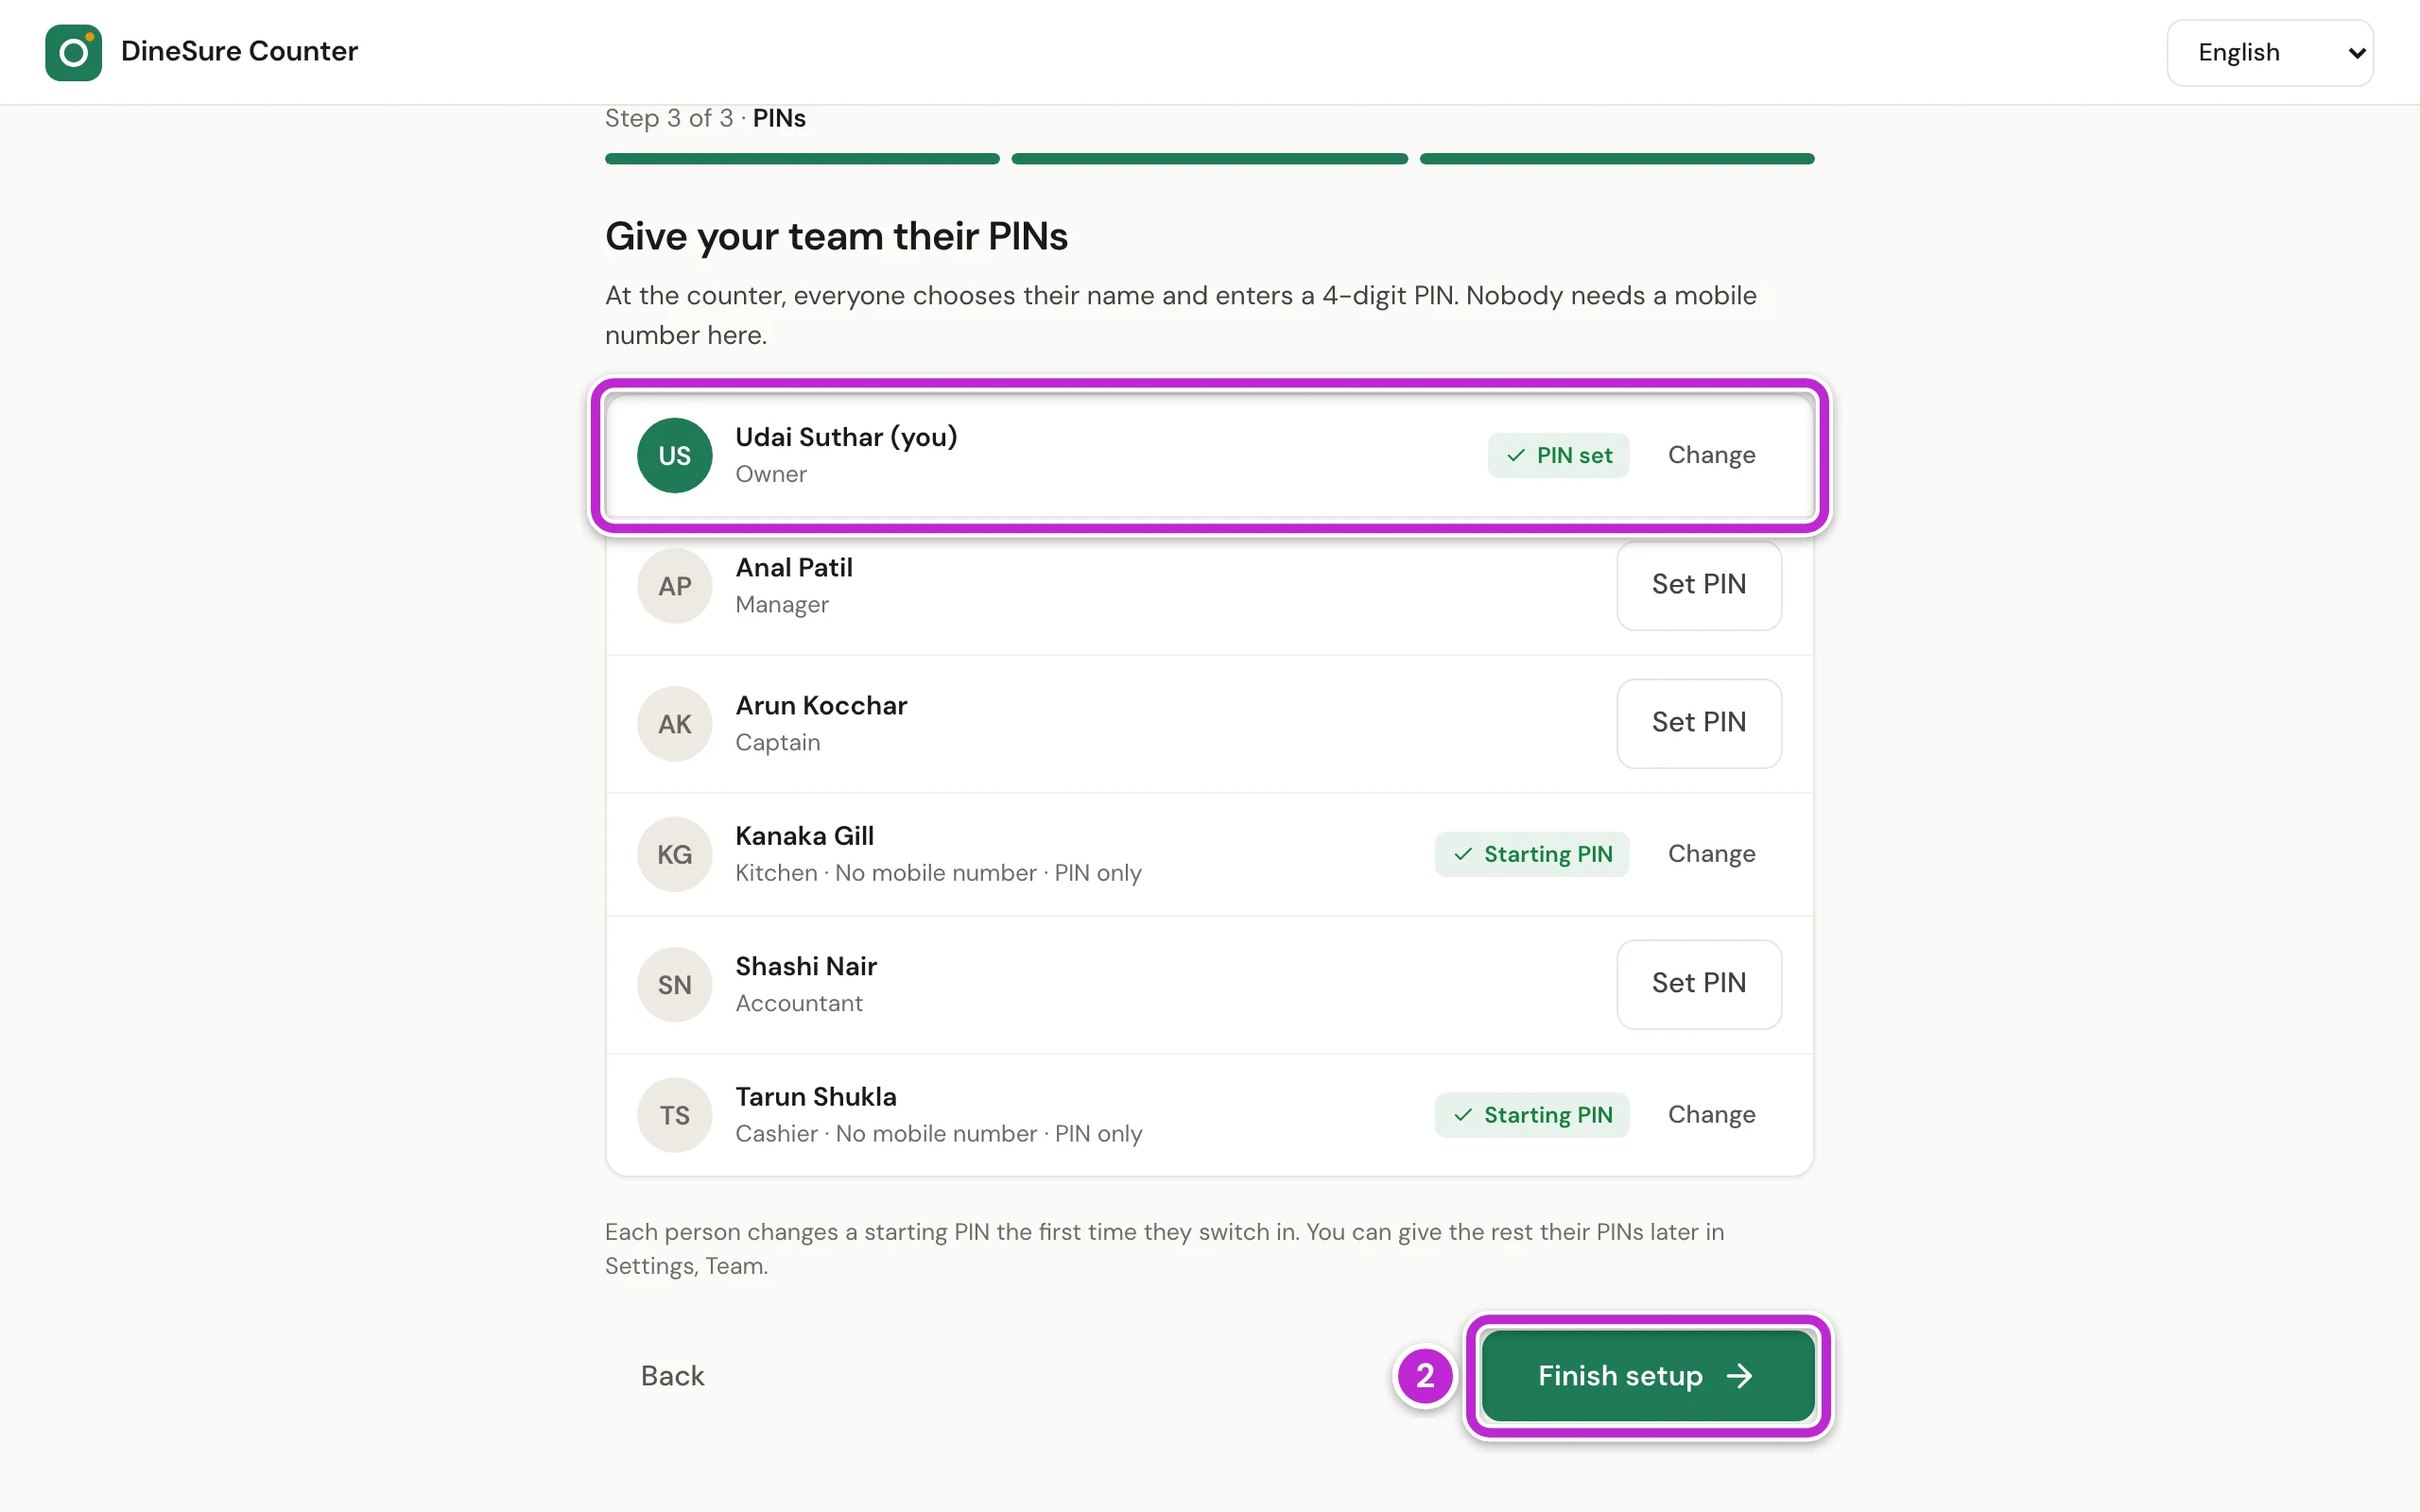
Click Set PIN on the row of each person who works at the counter, and give them a starting PIN in the same way. Each person changes their starting PIN the first time they switch in.
-
When your row shows PIN set, click Finish setup (2).
-
DineSure Counter shows Your billing counter is ready and how many printers are ready. Click Open the counter.
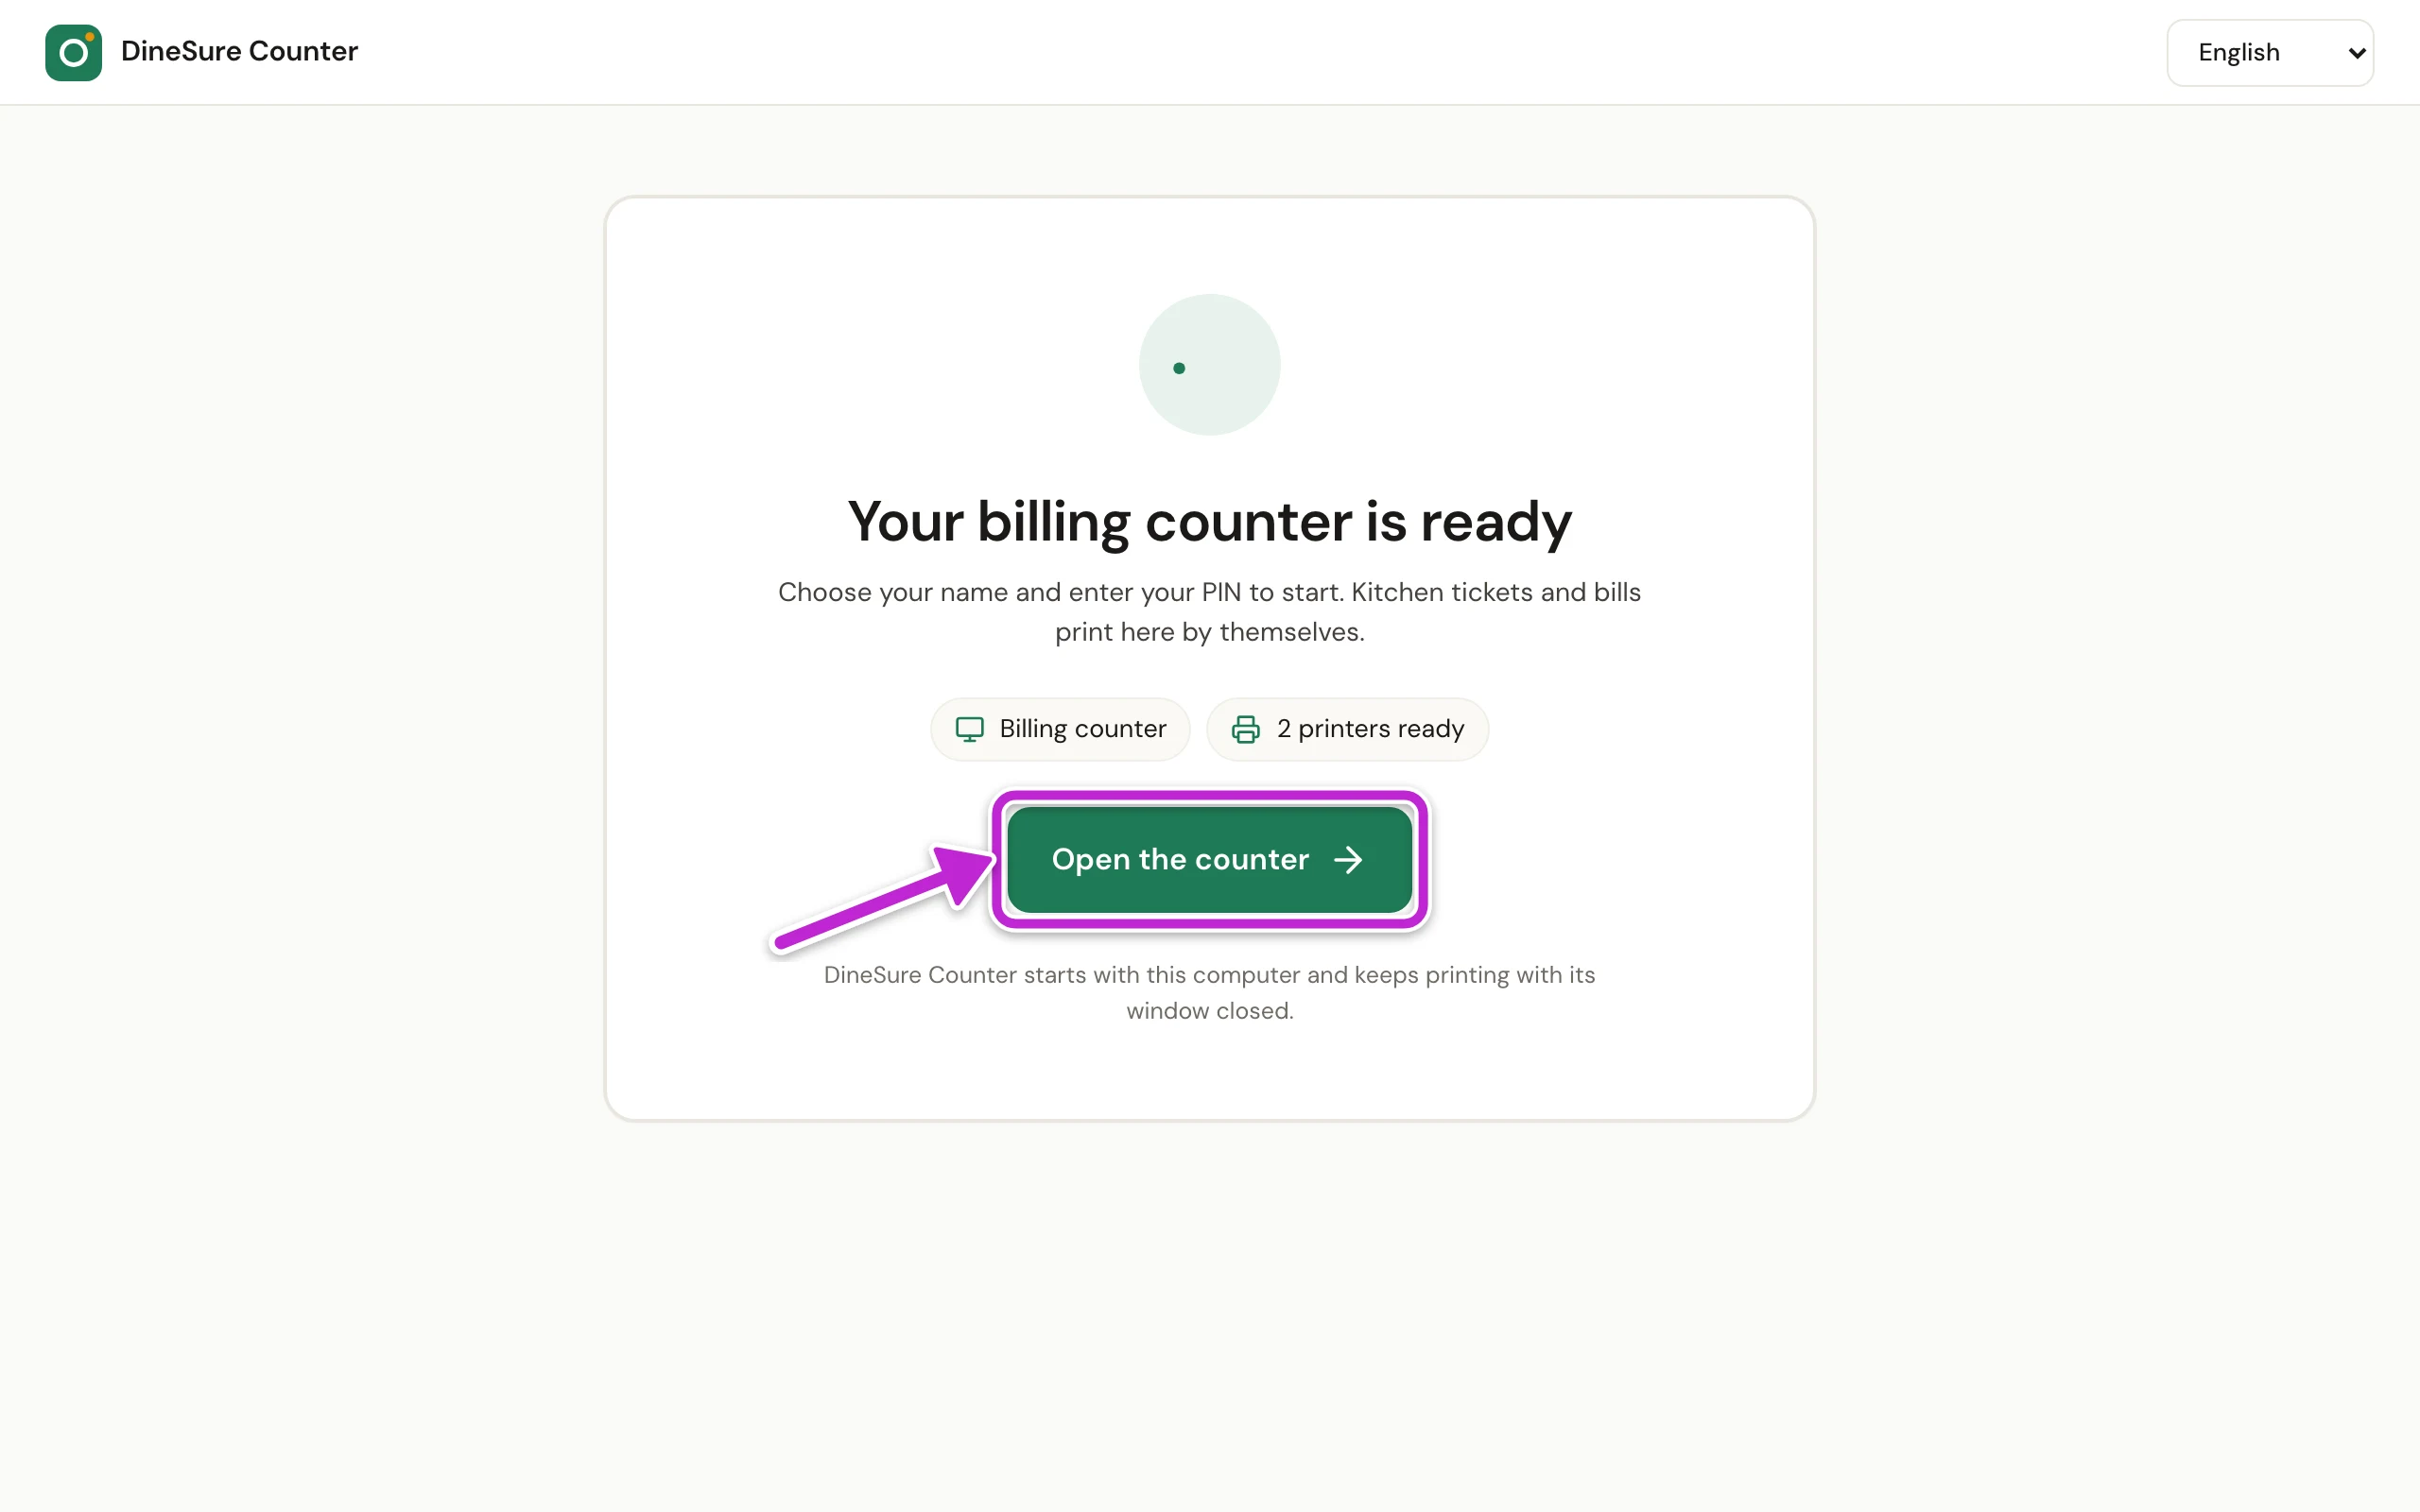
The counter is ready. From now on, each person chooses their name and enters their PIN to start (Switch person and lock the counter).
Choose where each kitchen’s KOTs print
Section titled “Choose where each kitchen’s KOTs print”A kitchen station is a place where food is made, like the kitchen, the tandoor or the bar. Each category’s KOTs print at its station. You choose a category’s station in Menu (Add your menu).
-
In DineSure Counter, click Settings, then Kitchen stations.
-
To add a station, click Add.
-
Type its name in Station name, like Bar or Tandoor.
-
Click Save.
-
Click Computers and printers.
-
Click the pencil button beside the printer that should print this station’s KOTs.
-
Under Prints, click the station’s name.
-
Click Save.
To add another printer later, open DineSure Counter on the computer it is connected to, click Settings, then Computers and printers, and click Add printer. Printers can only be added in DineSure Counter on their own computer.
If something goes wrong
Section titled “If something goes wrong”- Only the owner can set up a counter. Someone other than the owner signed in. Ask the owner to sign in on this computer with their mobile number.
- No receipt printer found. Plug the printer in, switch it on and install its driver. Then click Look for printers again. You can also click Continue without printers and add printers later in Settings.
- The test slip is blank. Thermal paper prints on one side only. Turn the paper roll over and print again.
- The text is cut off or too small. Choose the other paper width.
- Nothing came out. Check that the printer is on, has paper and its cable is in.
- Get the new DineSure Counter first. This computer has an older DineSure Counter. Download the new one and install it over the old one. You stay signed in.
- Kitchen printer is not connected at the top of the counter. The computer that this printer belongs to is off, or DineSure Counter is not running on it. Switch that computer on and open DineSure Counter on it. The waiting tickets print when it connects again.
- This computer was set up before. On the name step, click its old name, such as It's Billing counter, to keep its printers.