
Arrange tables and print QR stickers
Who does this: the owner and managers.
What you need:
- You are signed in (Sign in).
- A computer with an A4 printer for the QR stickers, and A4 sticker paper or plain paper.
- For QR stickers, the QR ordering add-on, in Settings, Plan and add-ons. Without it, tables still take orders at the counter and from captains, and the QR buttons stay hidden.
Open Edit floor
Section titled “Open Edit floor”-
Click Floor in the menu on the left.
-
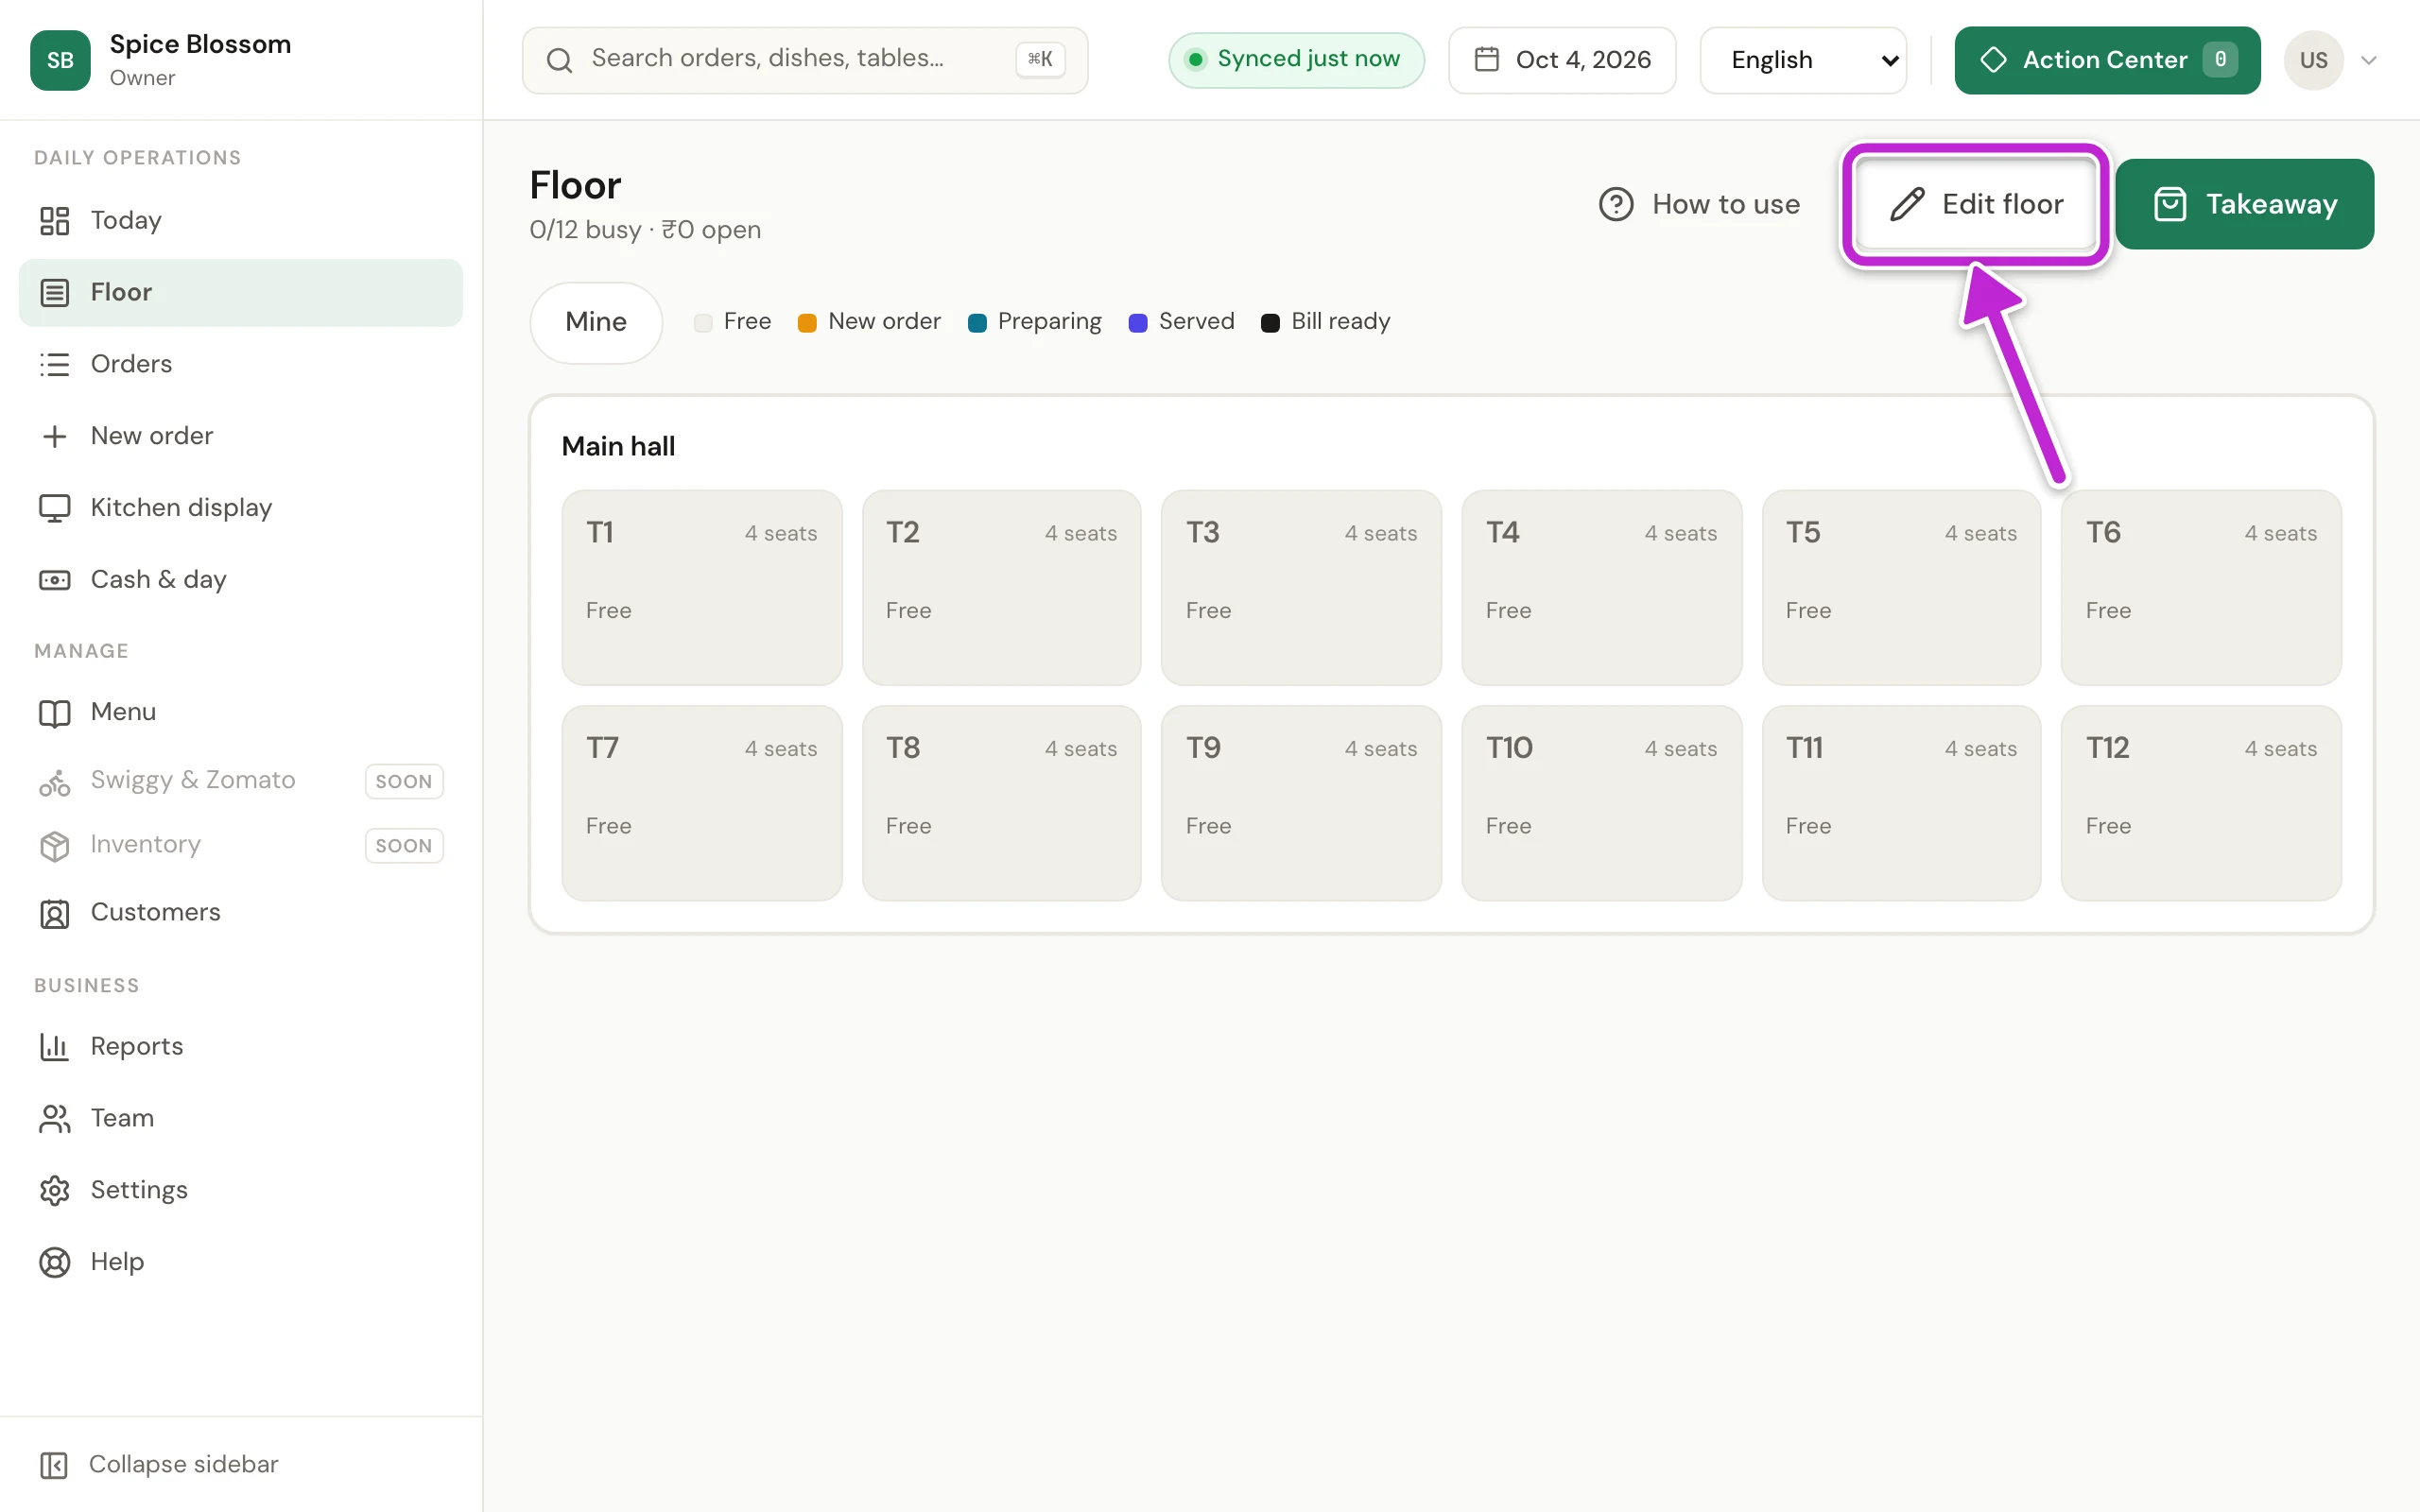
Click Edit floor.
-
The Floor changes to edit mode. Each area shows its tables, with Add tables (1) at the end. Add area (2) is at the top.
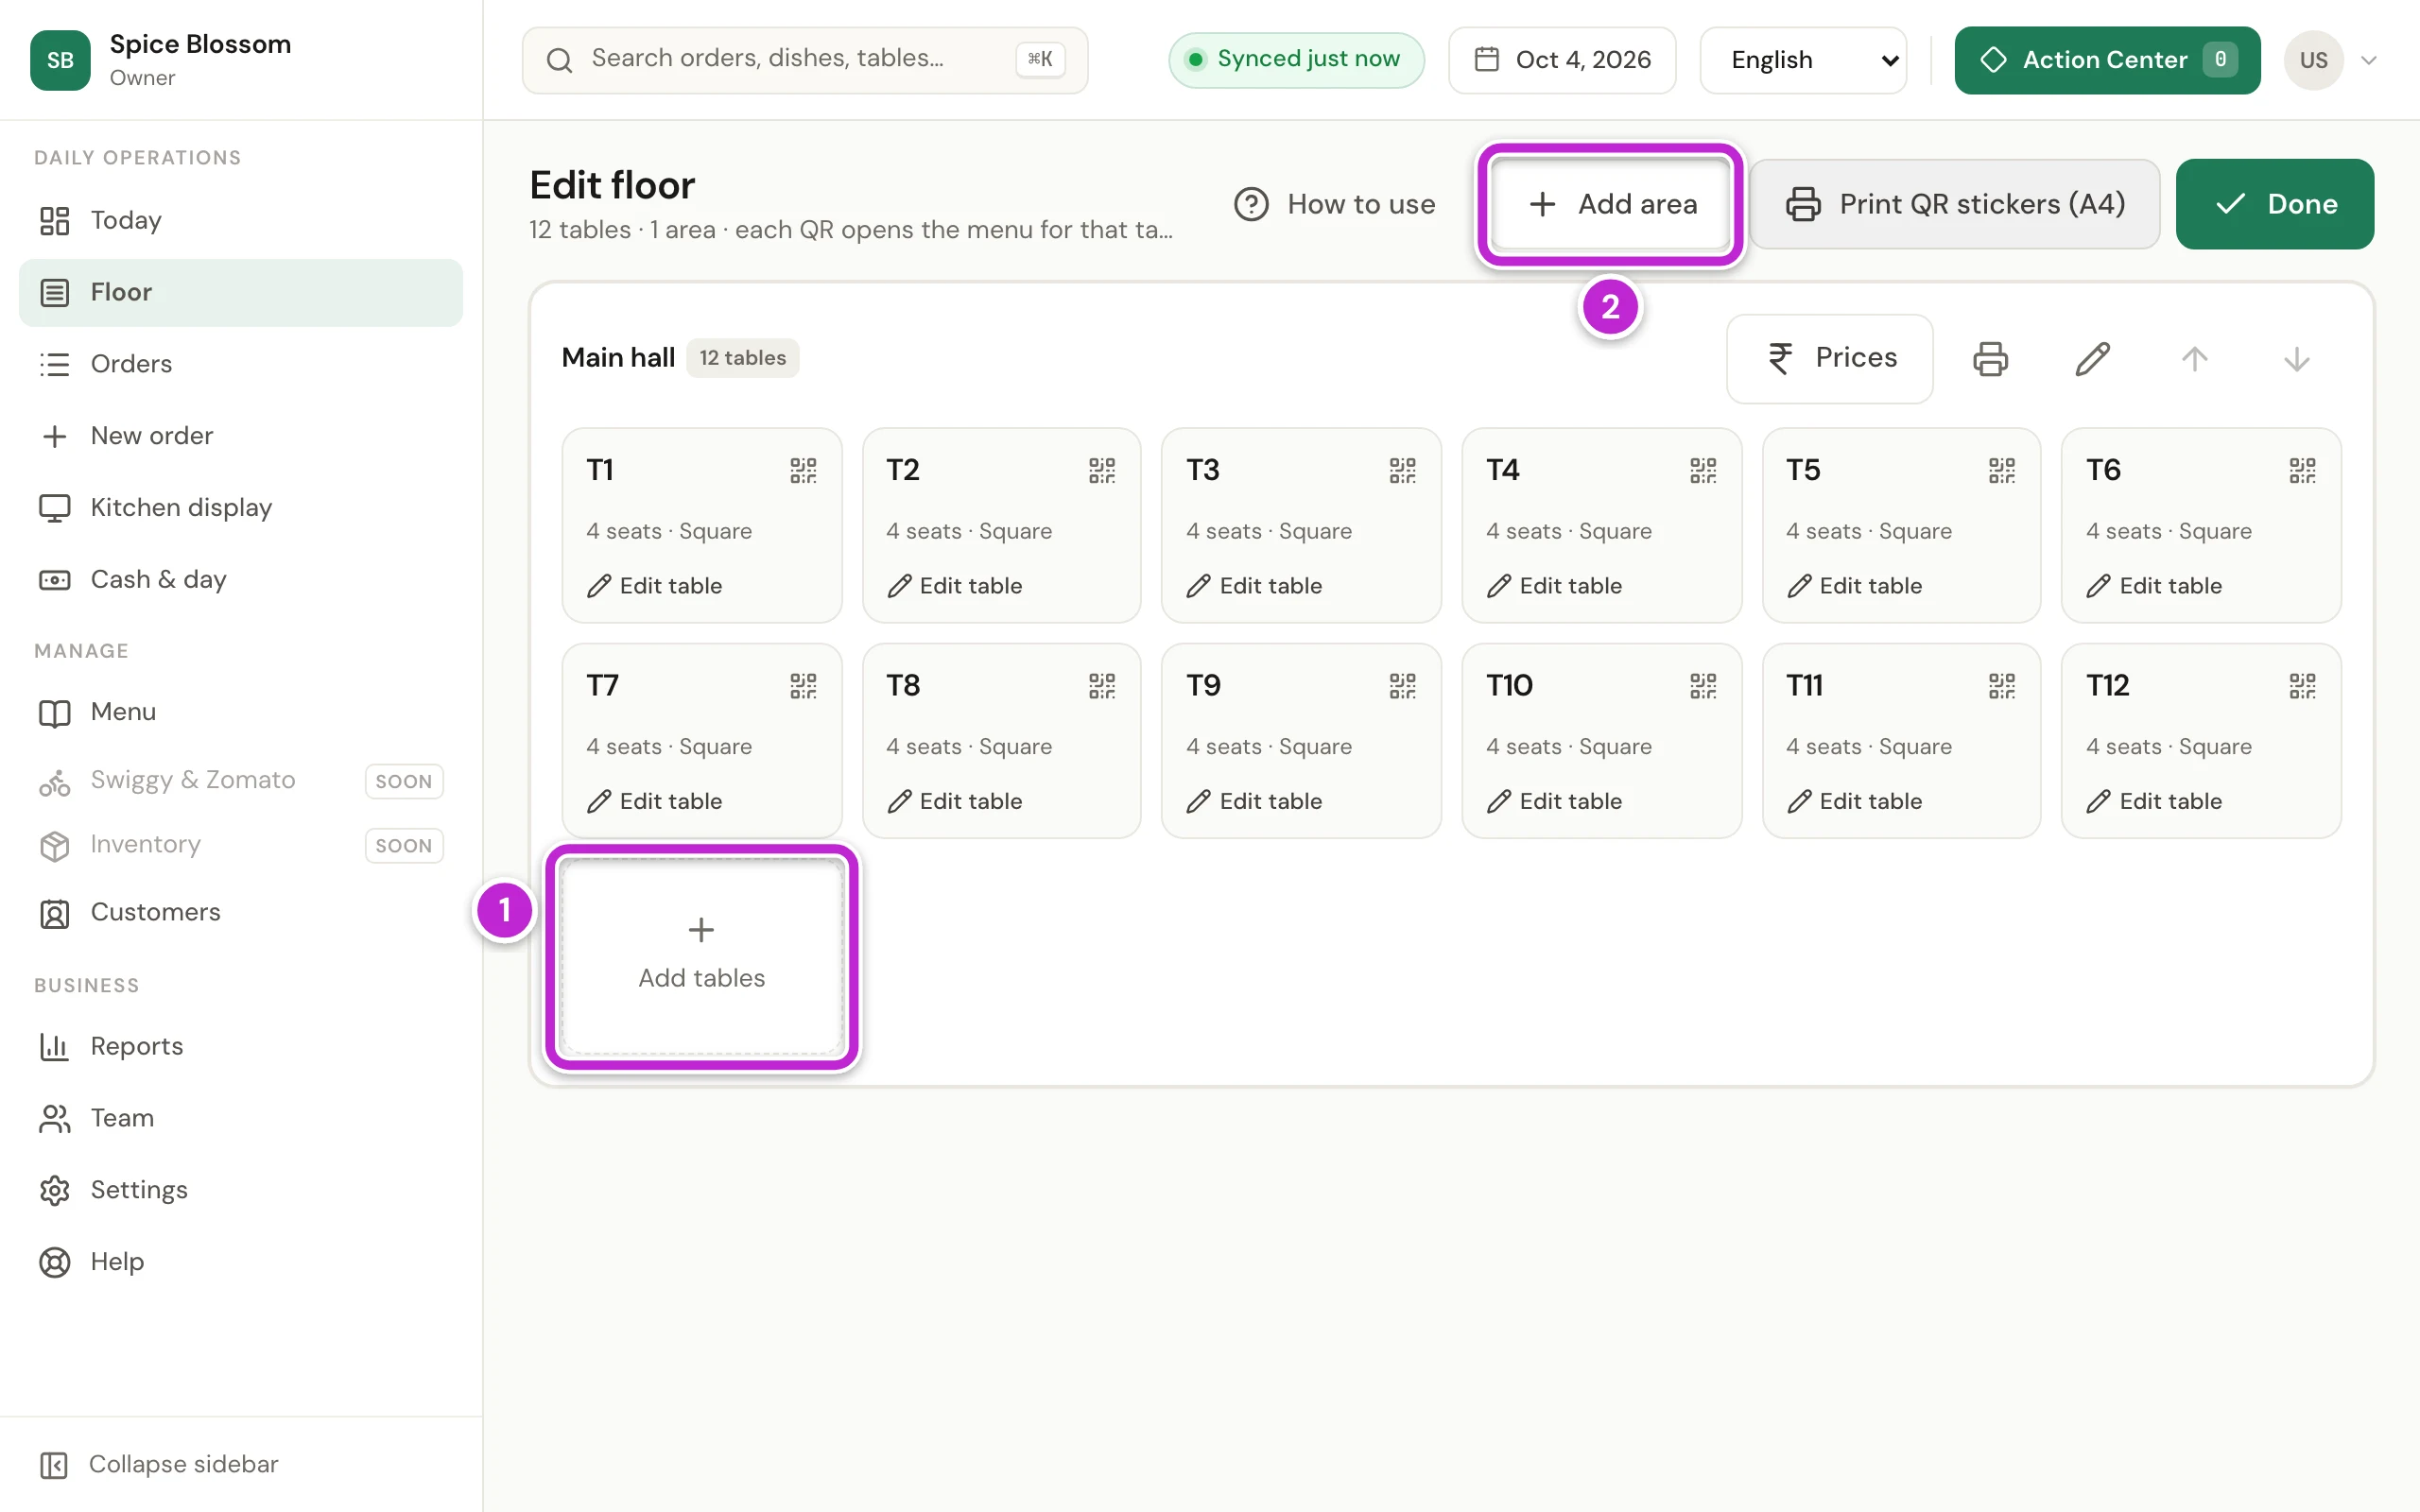
Each table has its own QR code. A guest who scans it opens the menu for that table.
Add tables to an area
Section titled “Add tables to an area”-
In the area, click Add tables.
-
Type how many in Tables to add. The new tables take the next numbers.
-
Type the number of Seats at each table.
-
Click Add tables.
Add an area
Section titled “Add an area”An area is a hall, a room or a terrace. Its tables show together on the Floor.
-
Click Add area.
-
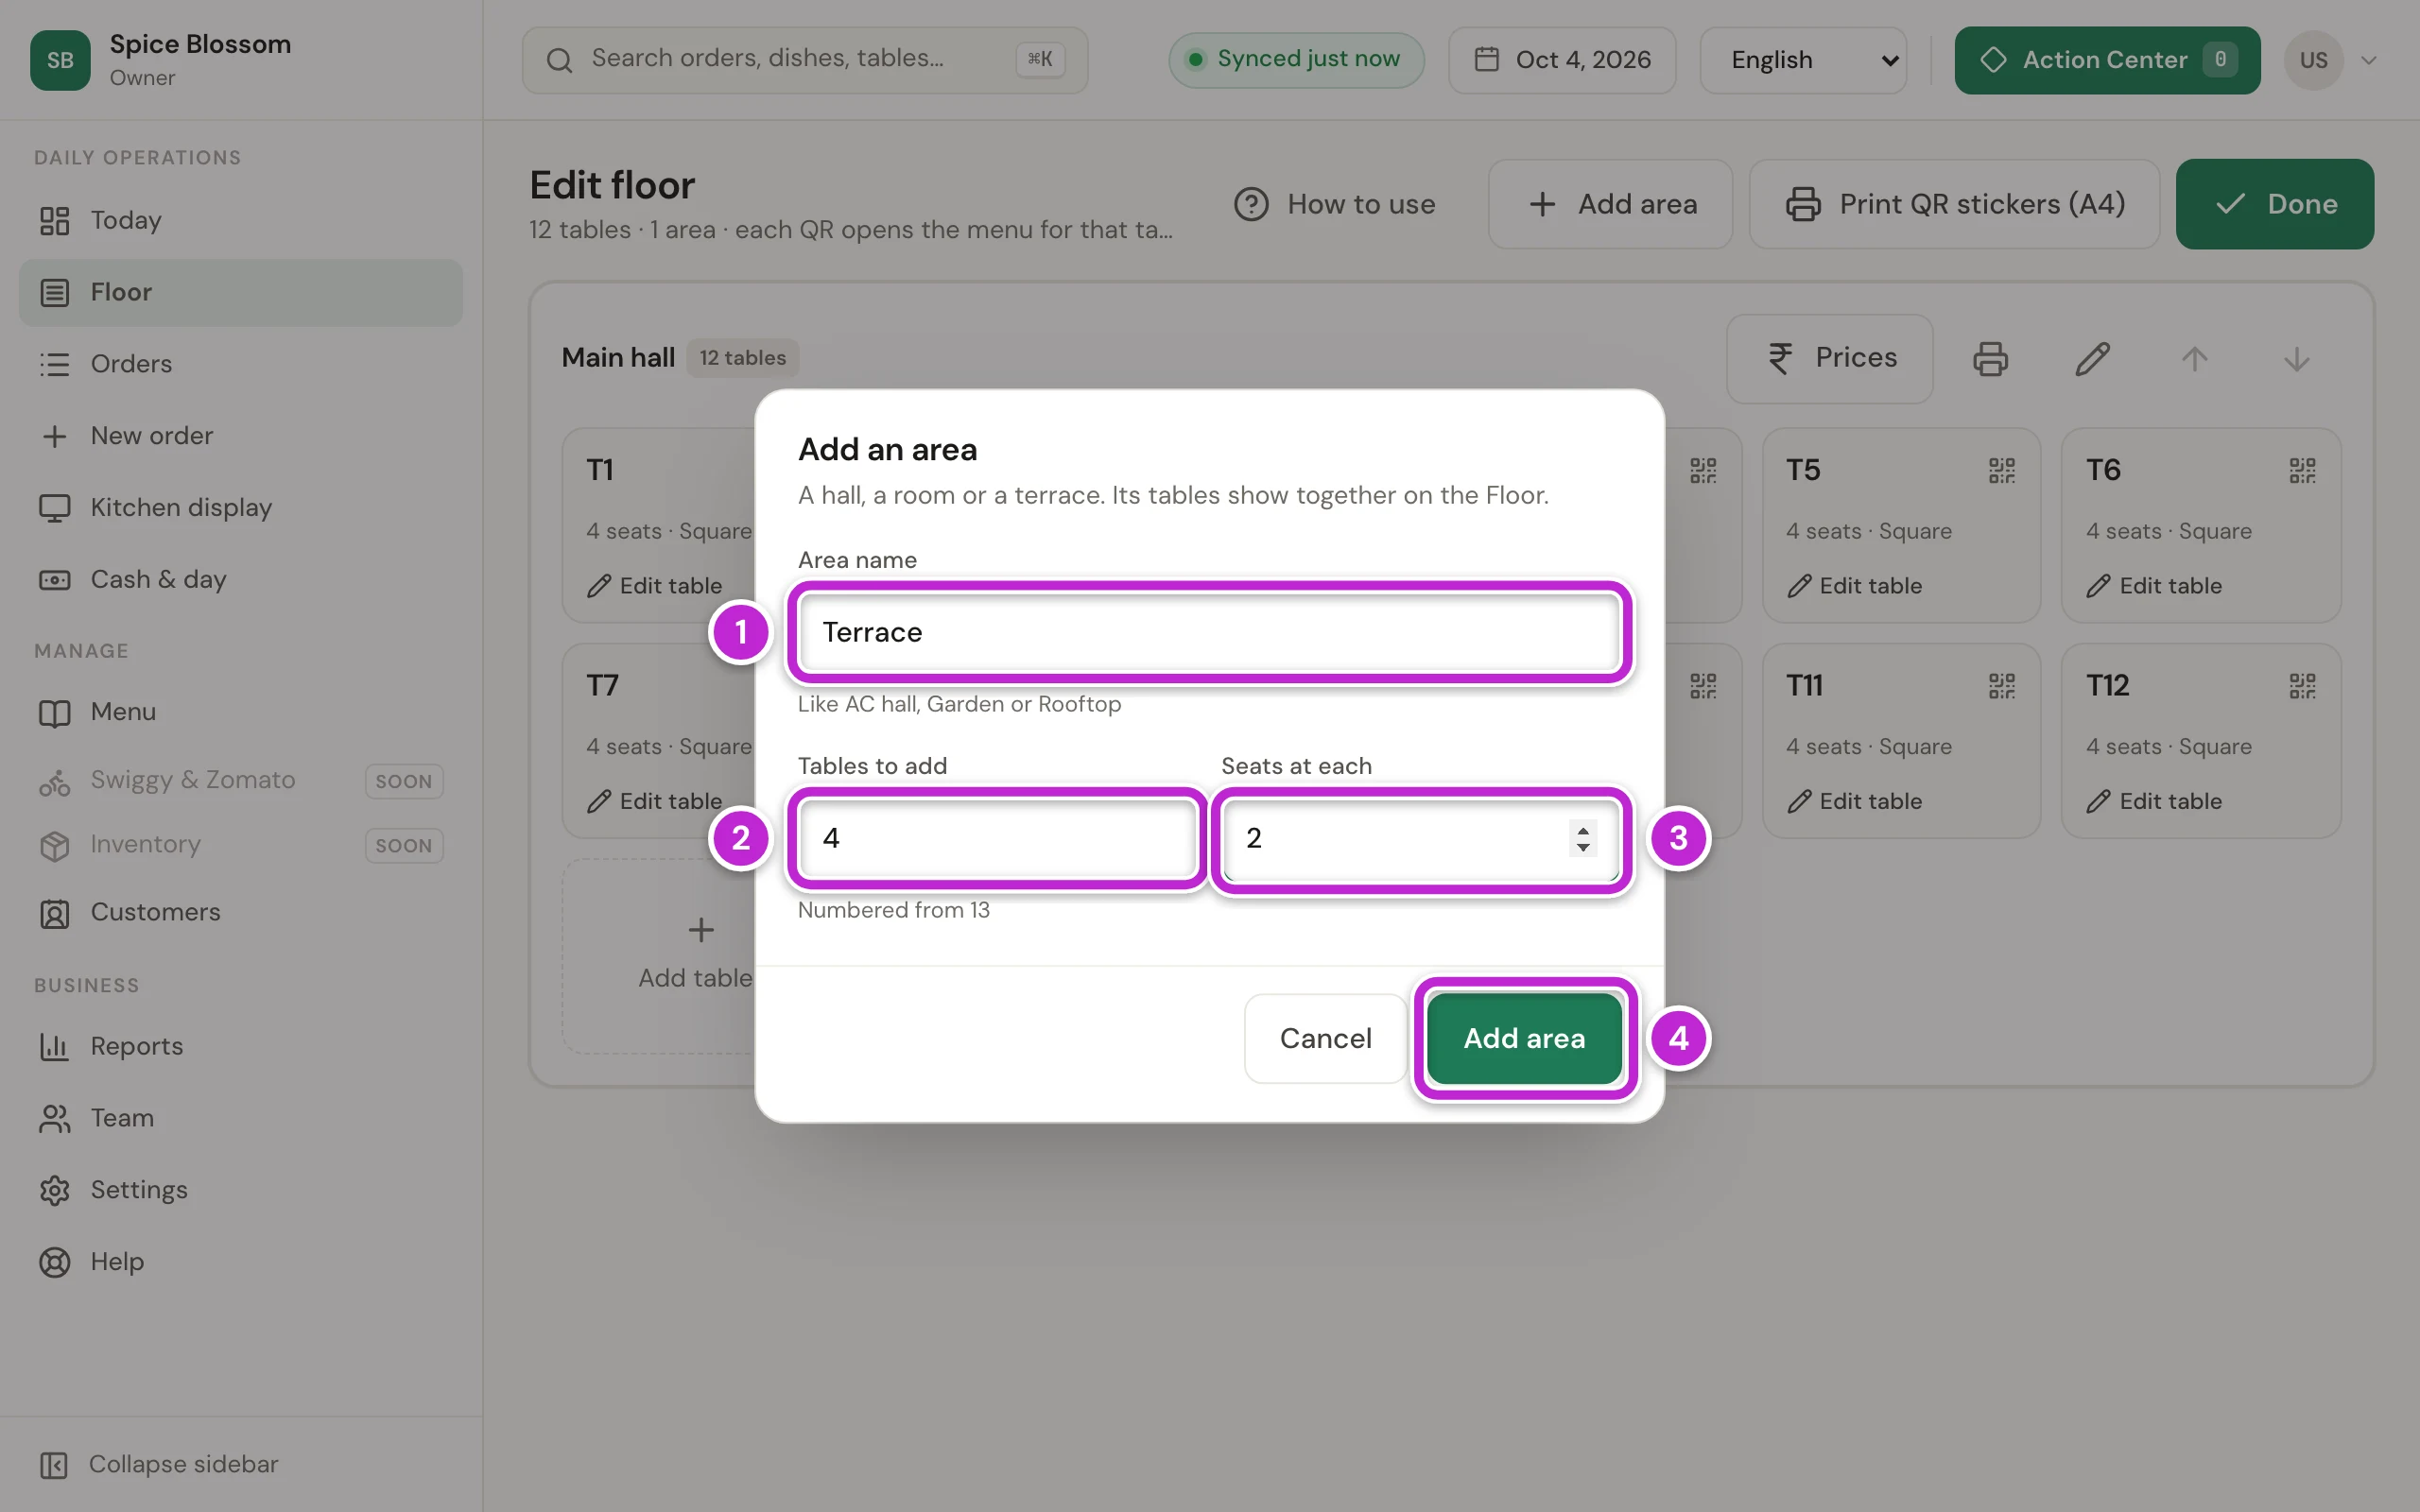
Type the Area name (1), for example Terrace.
-
Type how many tables it has in Tables to add (2). The line below shows the number the first new table gets.
-
Type the number of Seats at each table (3).
-
Click Add area (4).
Change one table
Section titled “Change one table”-
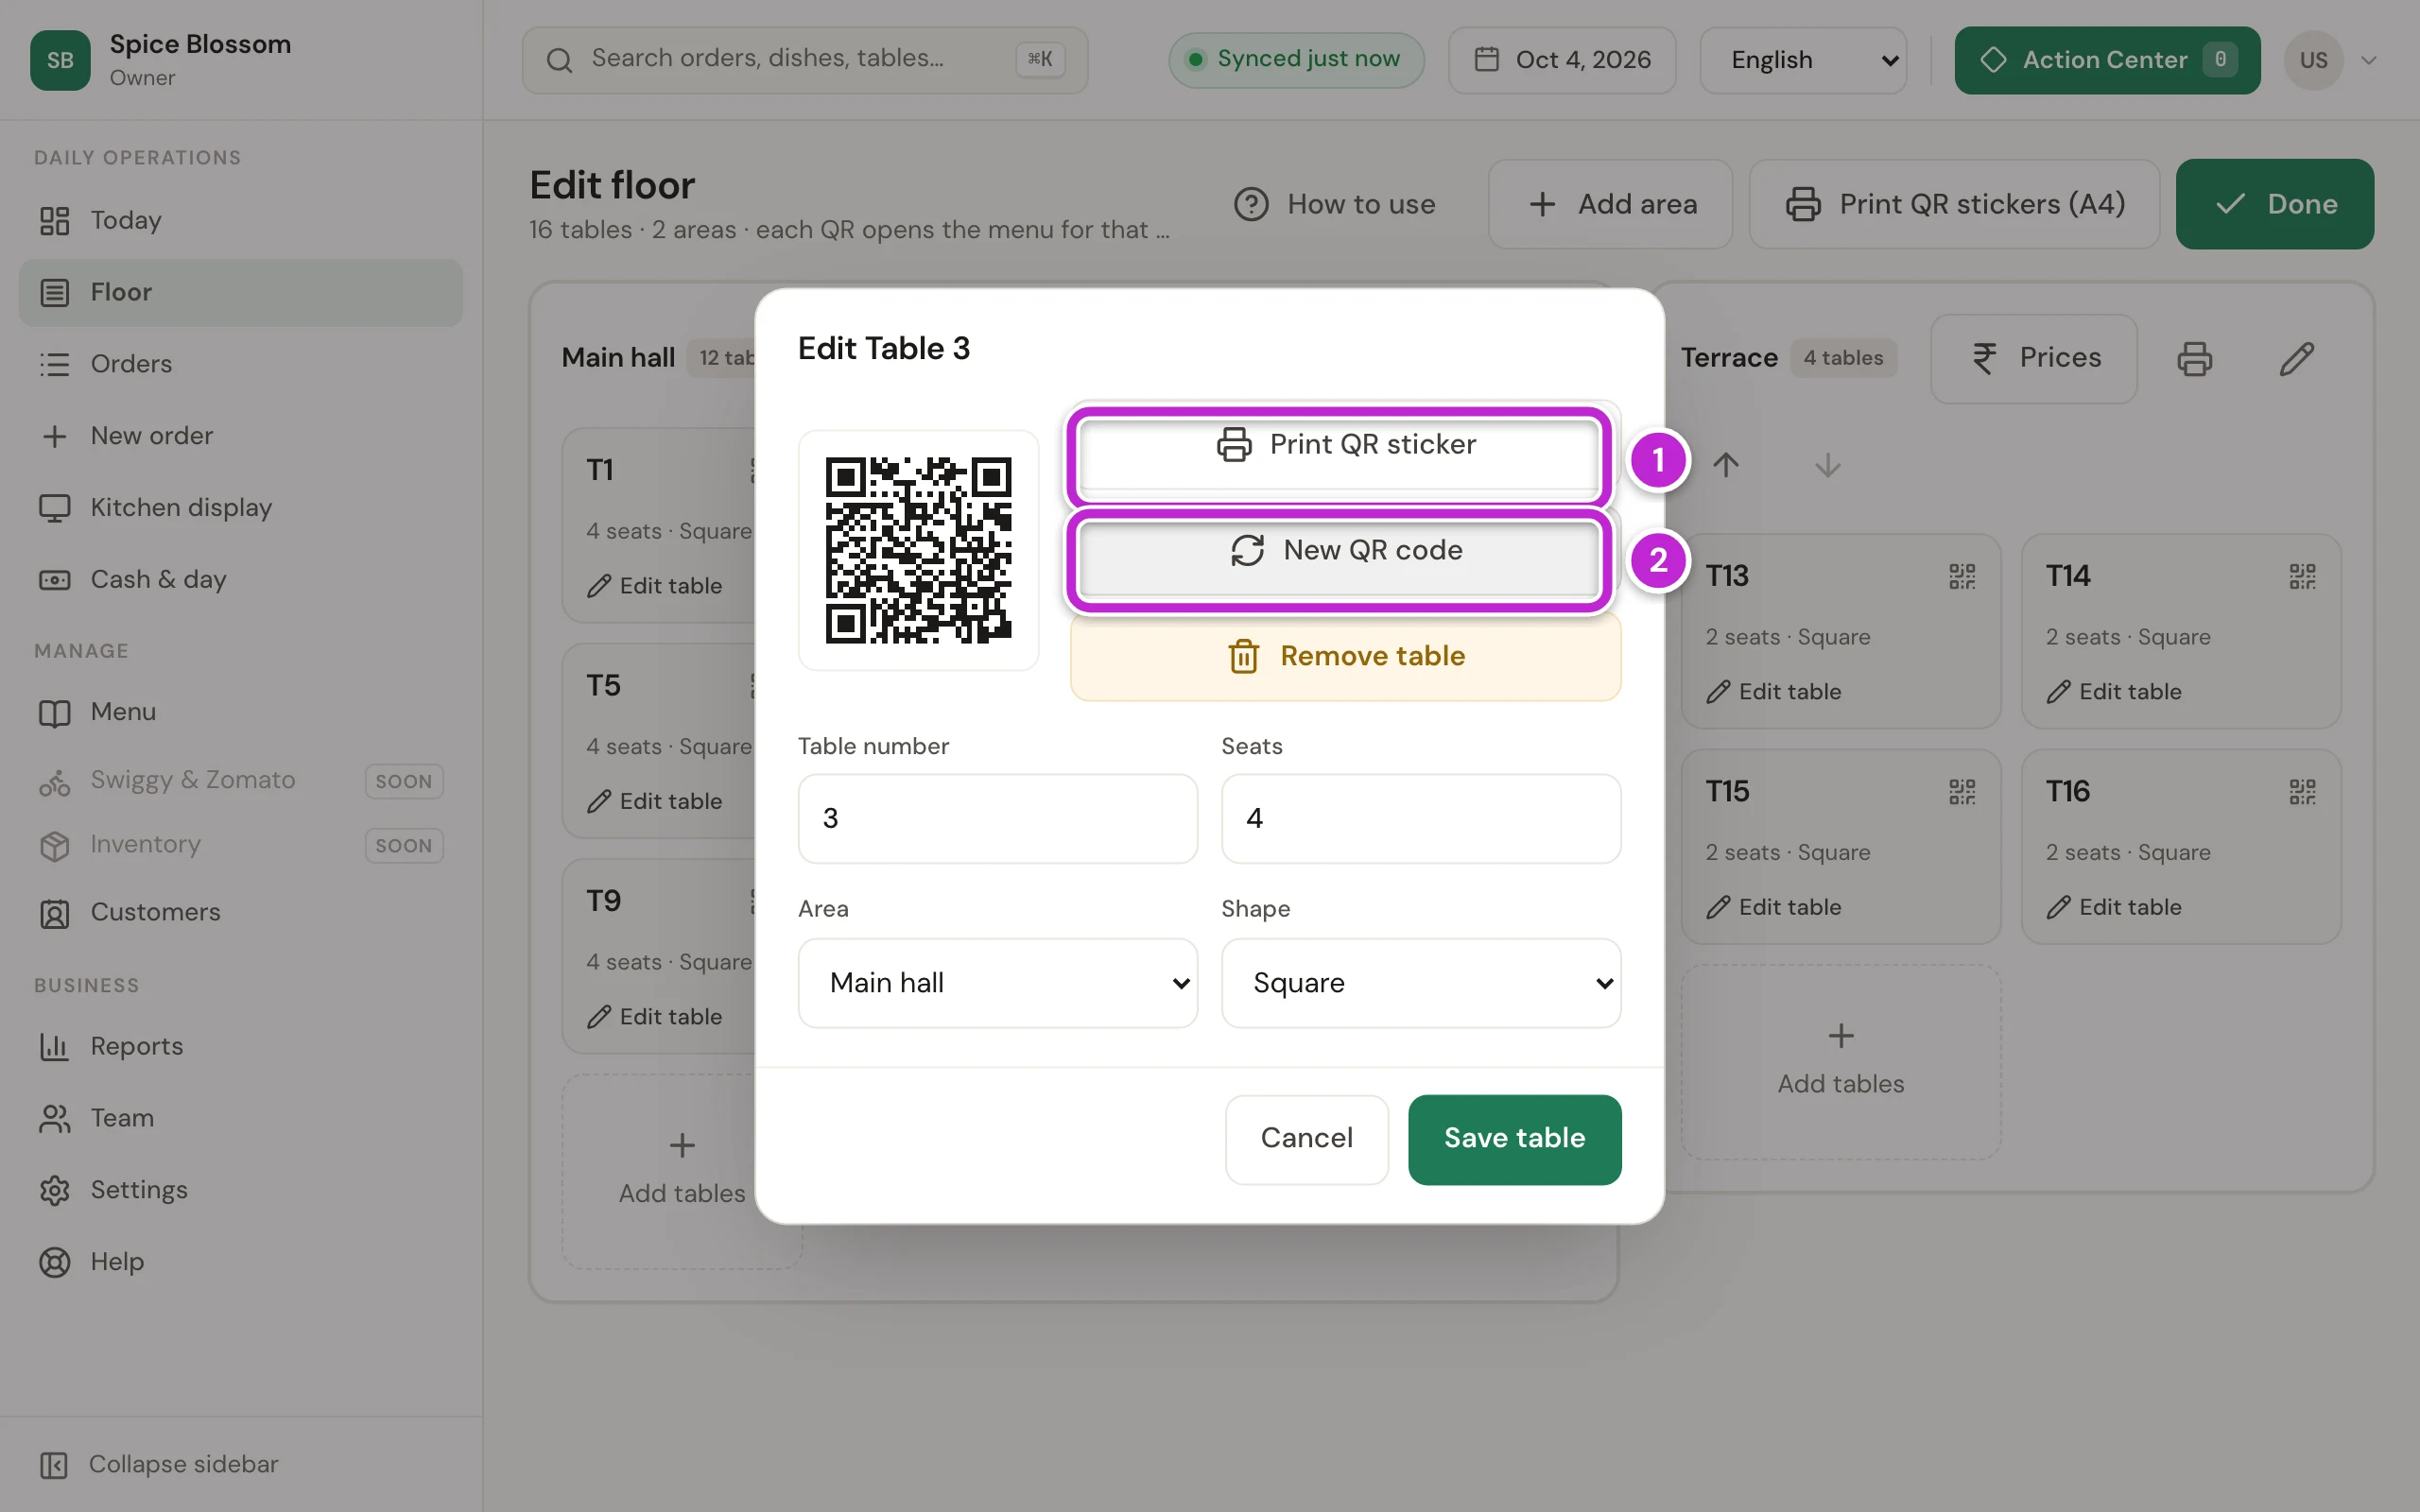
Click the table. A window with its QR code opens.
-
To change its Table number, Seats, Area or Shape, change the box and click Save table.
-
To print the sticker for this table only, for example when it is torn, click Print QR sticker (1).
-
If the old sticker must stop working, click New QR code (2), then click Make a new QR code.
Print the QR stickers
Section titled “Print the QR stickers”-
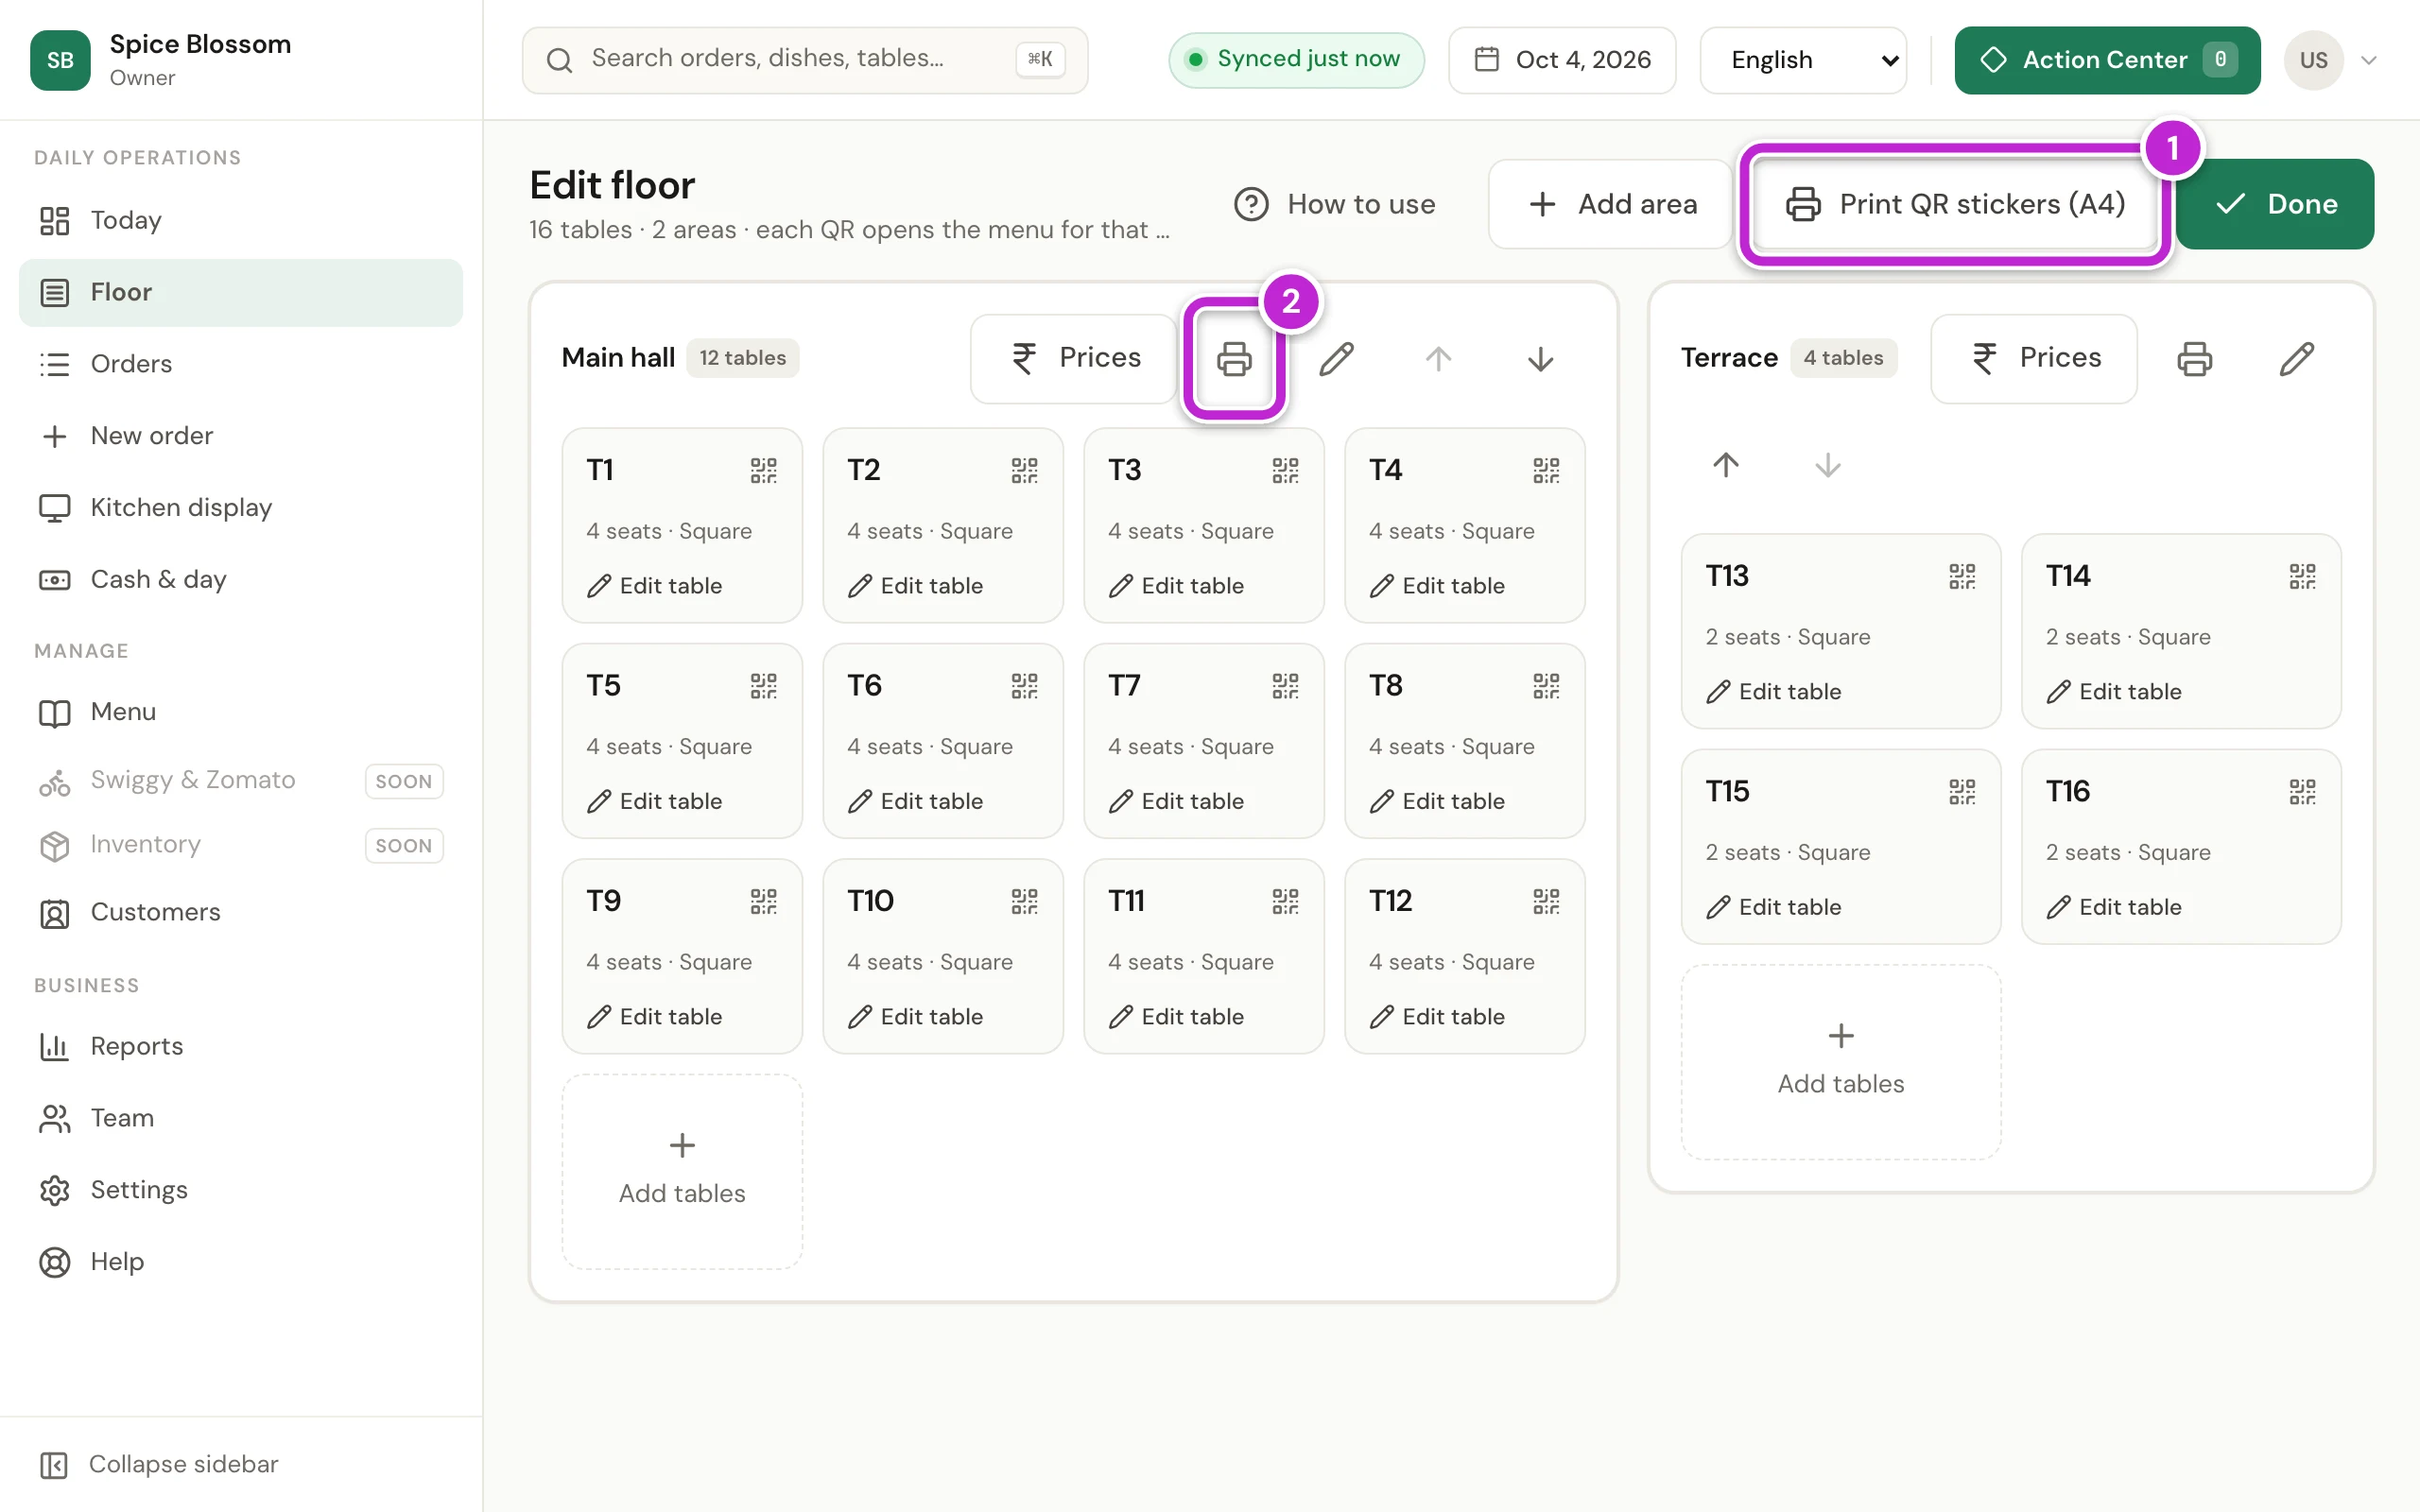
Click Print QR stickers (A4) (1) to print stickers for every table. To print only one area, click the printer button on that area (2).
-
The print window of the browser opens. Choose your A4 printer, not the small bill printer.
-
Click Print.
-
Cut the stickers along the dashed lines. Each sticker shows your restaurant’s name, Scan to order from your table, the QR code, the table number and what guests can do from their phone: See the menu and order, Track your order and call staff and Ask for the bill and pay by UPI. Paying by UPI shows only when Show it on guests' phones is on. With Guests only see the menu on, the sticker says Scan to see the menu and Our staff will take your order at the table.
-
Stick each one on the table with the same number.
-
Click Done to leave edit mode.
Guests can scan the stickers and see the menu, but they can order only after you open QR orders in Settings (Accept QR orders). Once you print their bill, the same sticker lets them pay it by UPI from their phone (Print the bill and take the payment).
If something goes wrong
Section titled “If something goes wrong”- No Edit floor button. Only the owner and managers arrange tables. Ask one of them.
- Another table already has that number. Choose a number no other table uses.
- Another area already has that name. Give the area a different name.
- Close this table's bill before removing it. Guests are at the table. Finish their bill first (Print the bill and take the payment), then click Remove table.
- Move or remove this area's tables first. An area with tables cannot be removed. Move each table to another area, or remove it, then remove the area.
- A sticker no longer works. Someone made a new QR code for that table. Open the table and click Print QR sticker to print its current sticker.