
GST and bill details
Who does this: the owner.
What you need:
- Your GST certificate, if the restaurant is registered for GST. You need the 15-character GSTIN printed on it.
- Your FSSAI licence number.
- A computer with DineSure open (Sign in).
Set up GST on your bills
Section titled “Set up GST on your bills”Every new restaurant starts as Not registered: bills carry no GST. Change it only if the restaurant has a GSTIN.
-
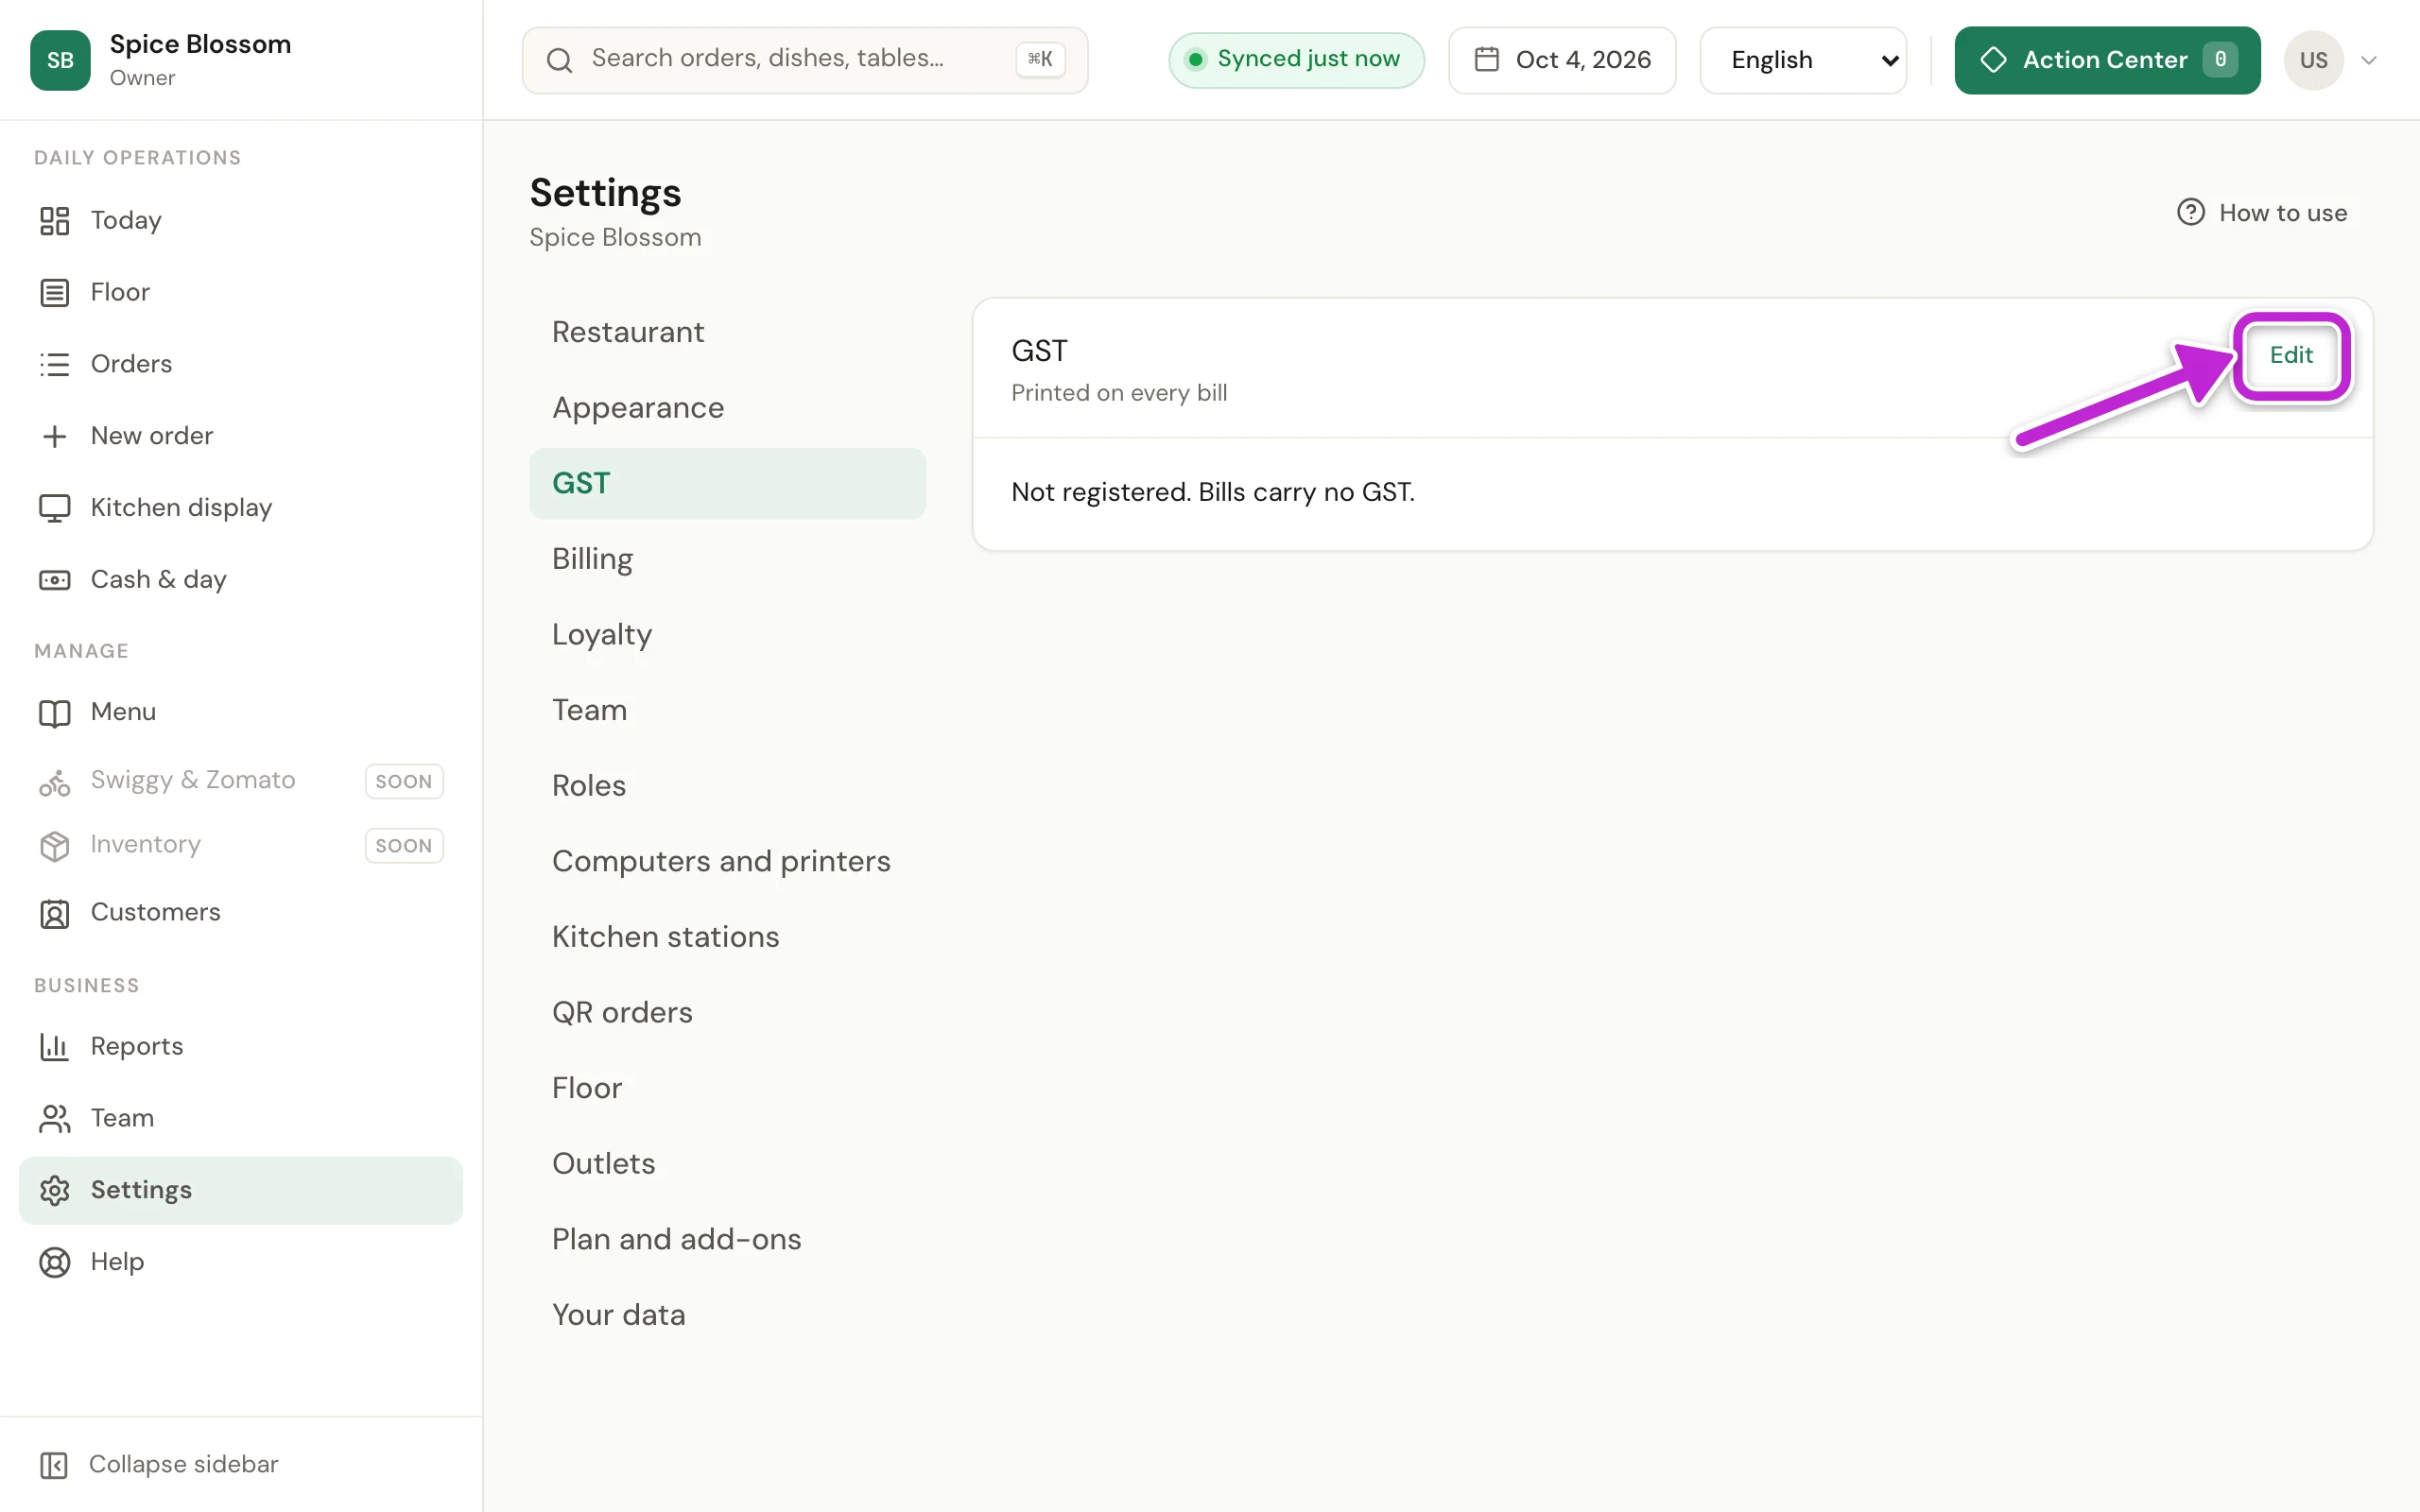
Click Settings, then GST.
-
The card shows how your bills are set up now. Click Edit.
-
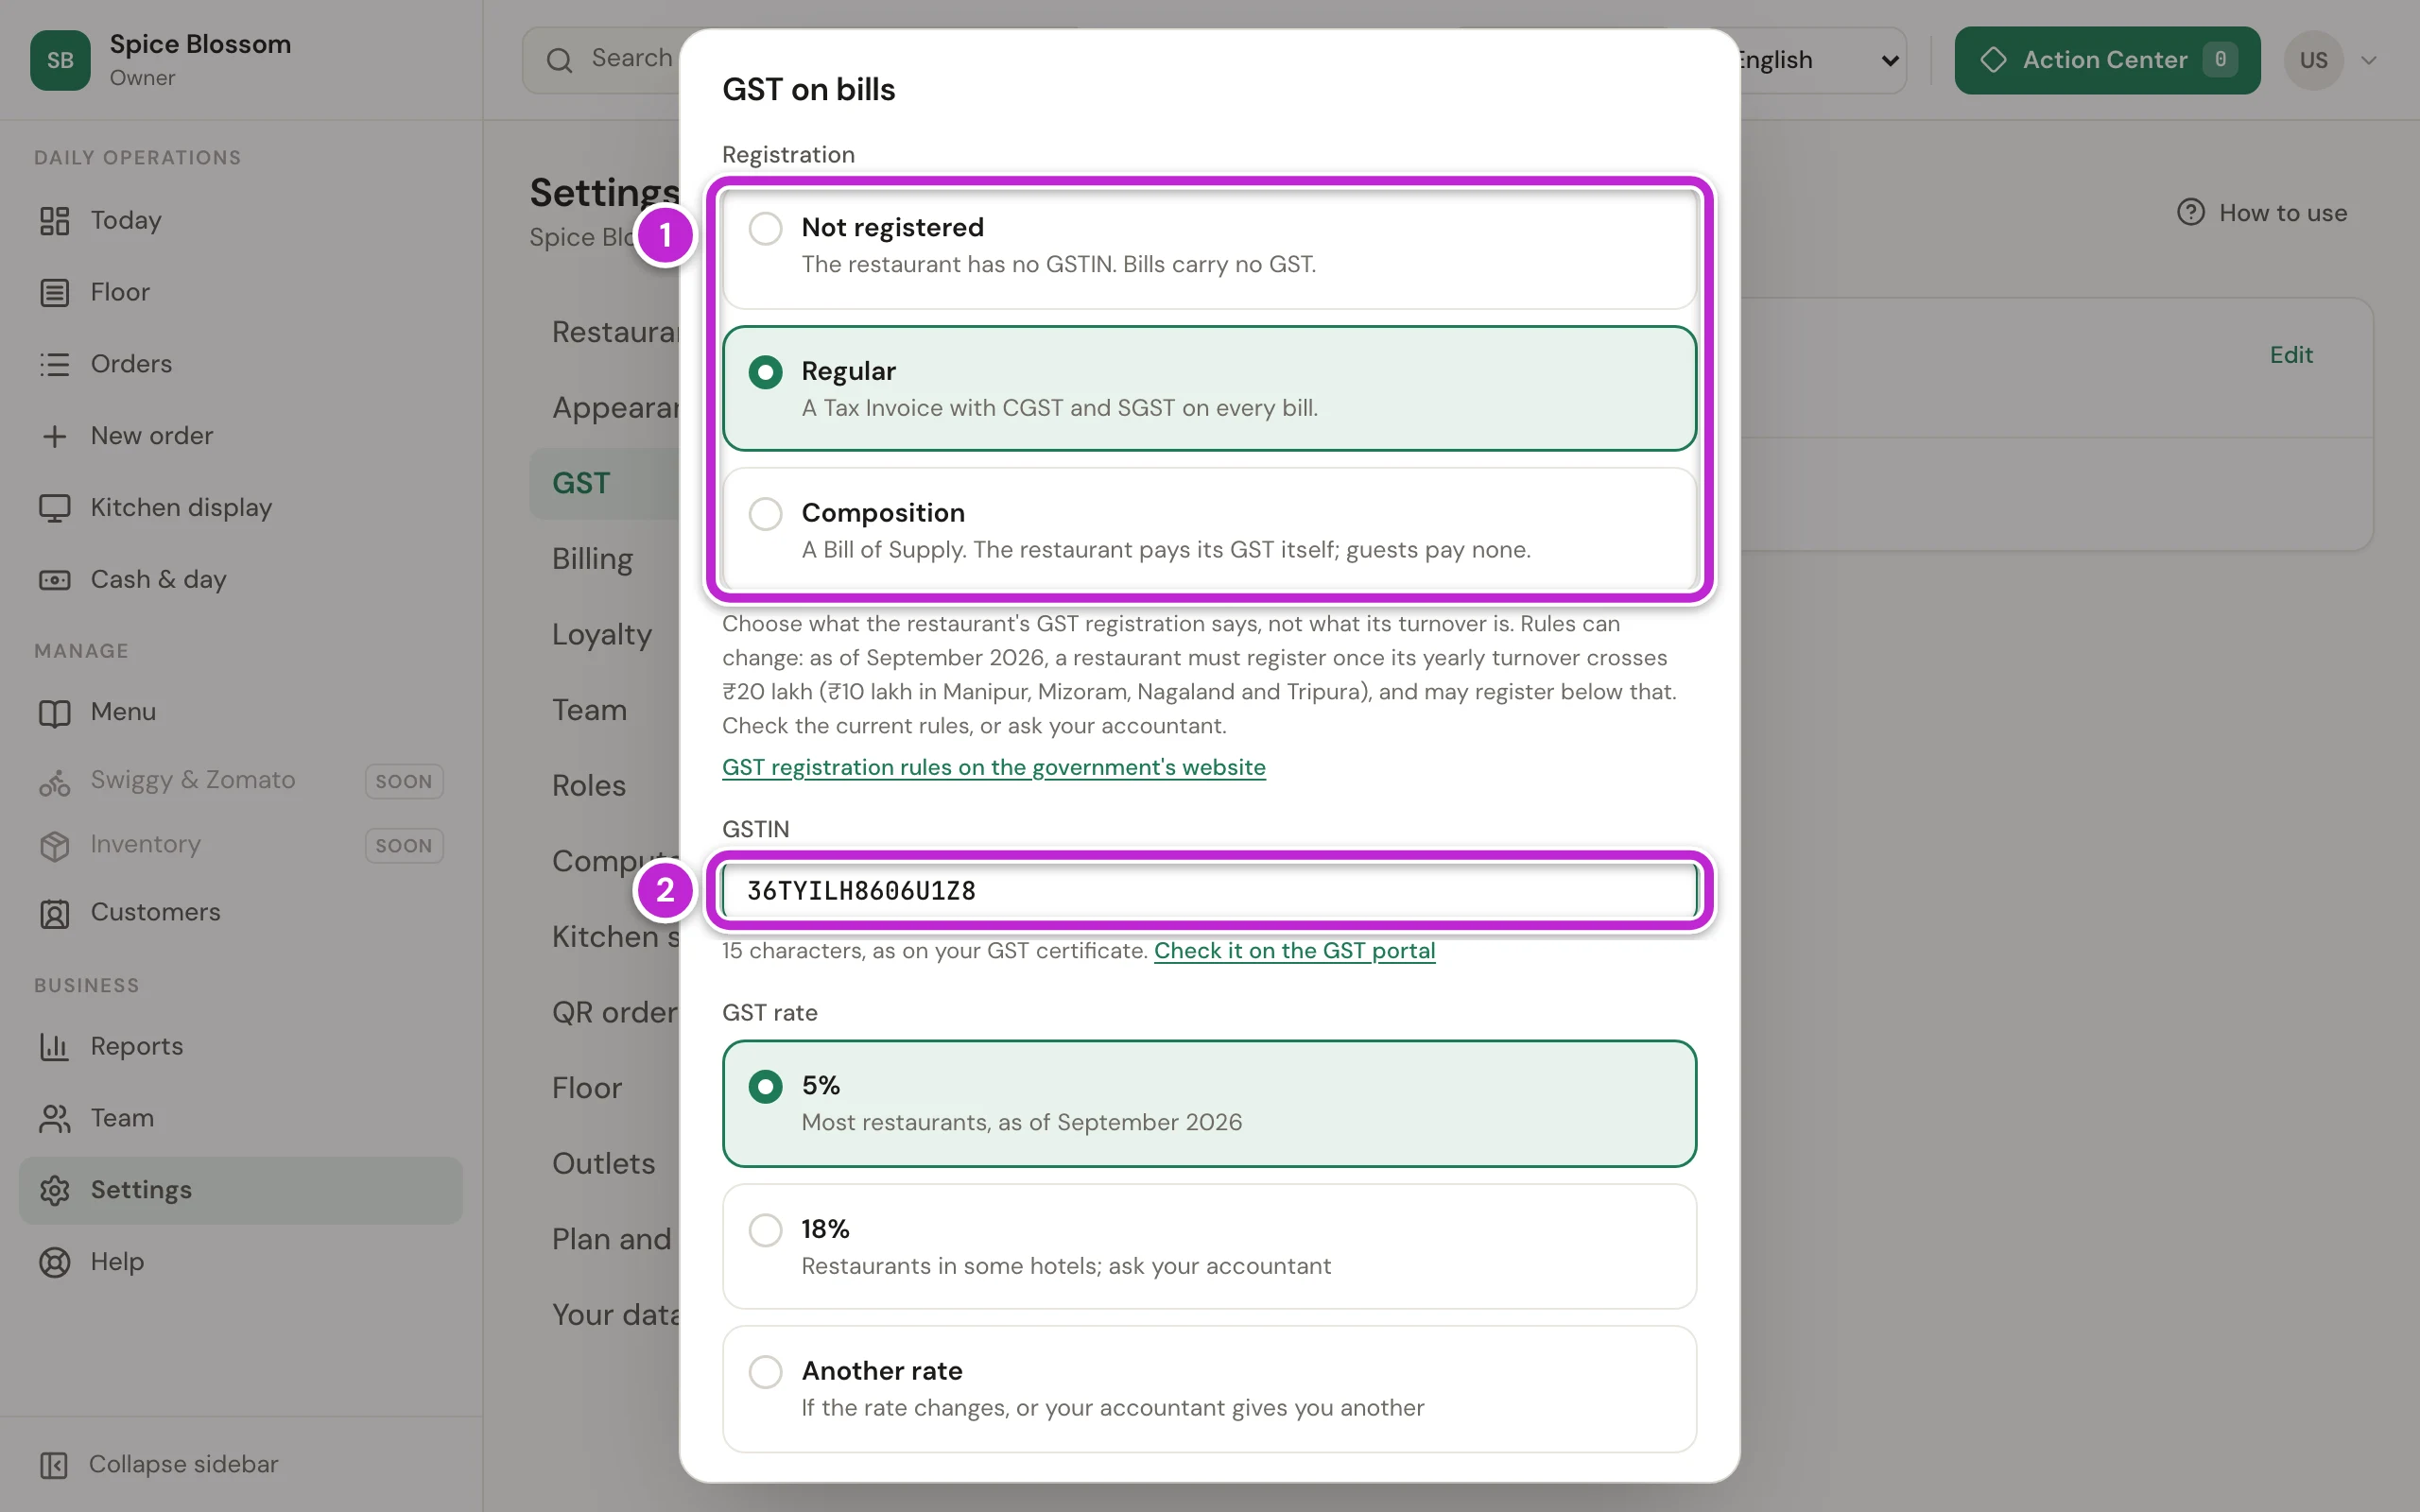
Under Registration (1), choose what your GST registration says:
- Not registered: the restaurant has no GSTIN. Bills carry no GST.
- Regular: a Tax Invoice with CGST and SGST on every bill.
- Composition: a Bill of Supply. The restaurant pays its GST itself, and guests pay none.
-
Type your GSTIN in GSTIN (2), exactly as it is on your GST certificate. To make sure it is right, click Check it on the GST portal.
-
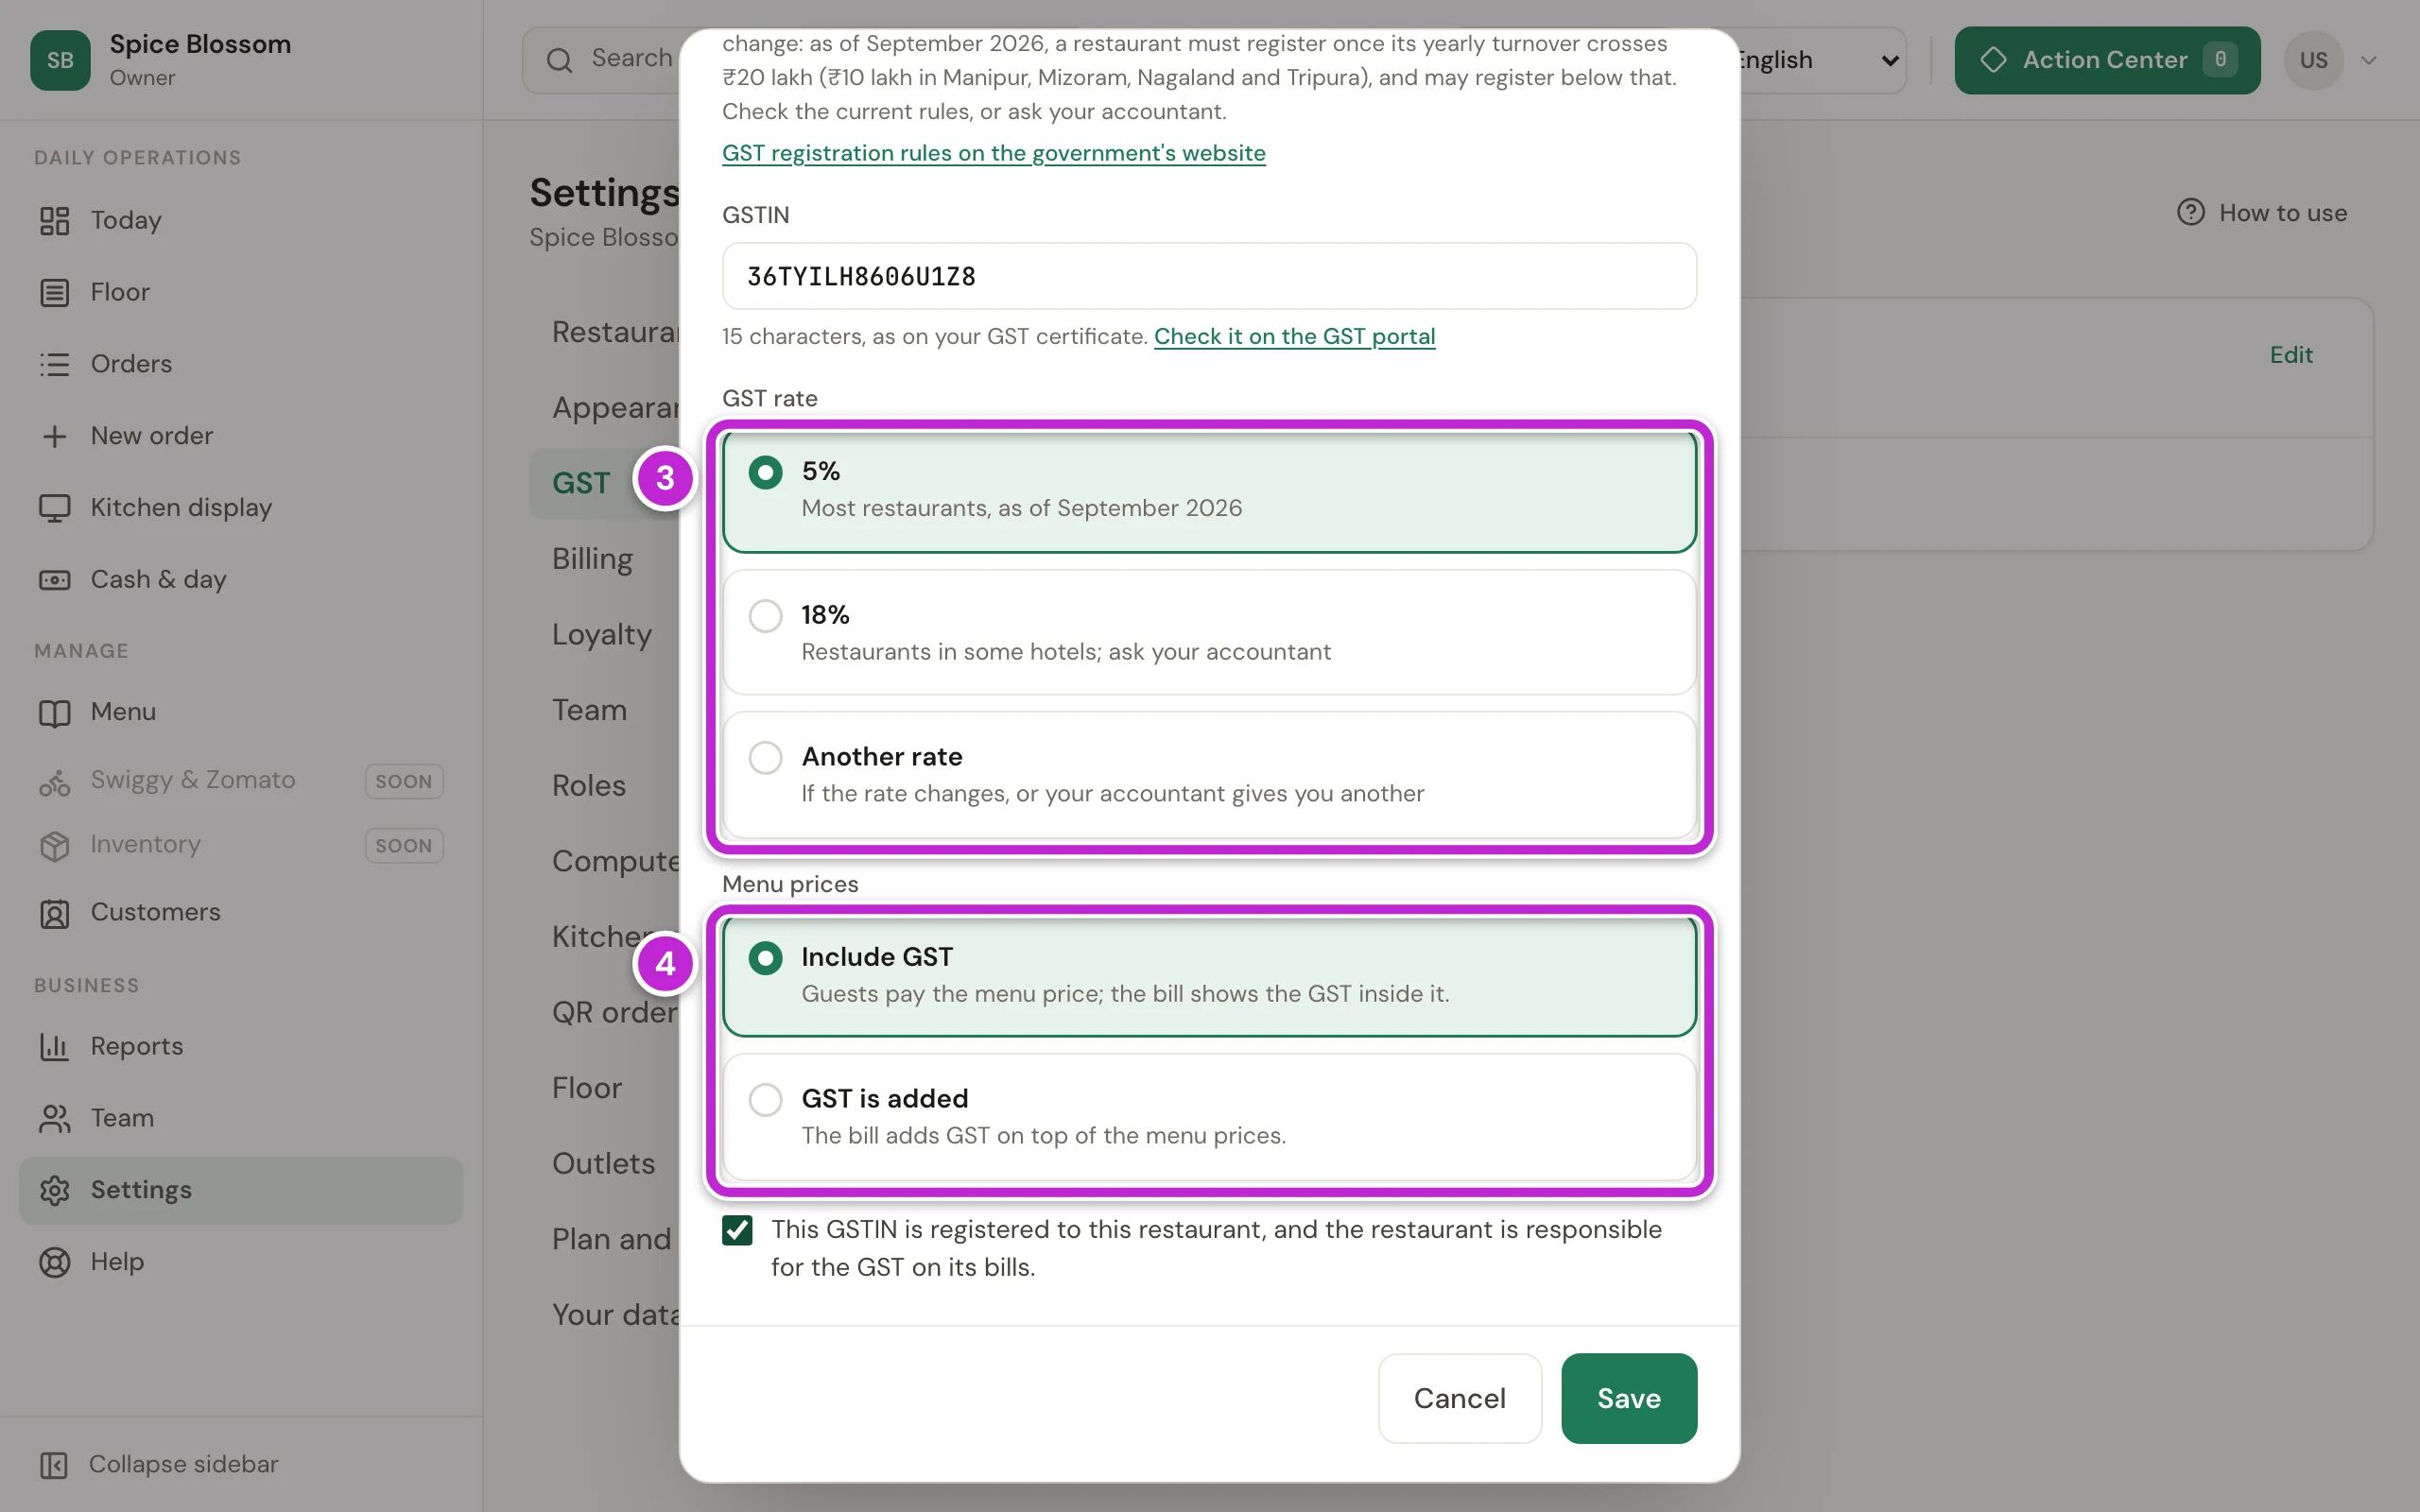
If you chose Regular, choose the GST rate (3). The screen says 5% is for most restaurants and 18% is for restaurants in some hotels. If your accountant gives you another rate, choose Another rate and type it.
-
Under Menu prices (4), choose one:
- Include GST: guests pay the menu price, and the bill shows the GST inside it.
- GST is added: the bill adds GST on top of the menu prices.
-
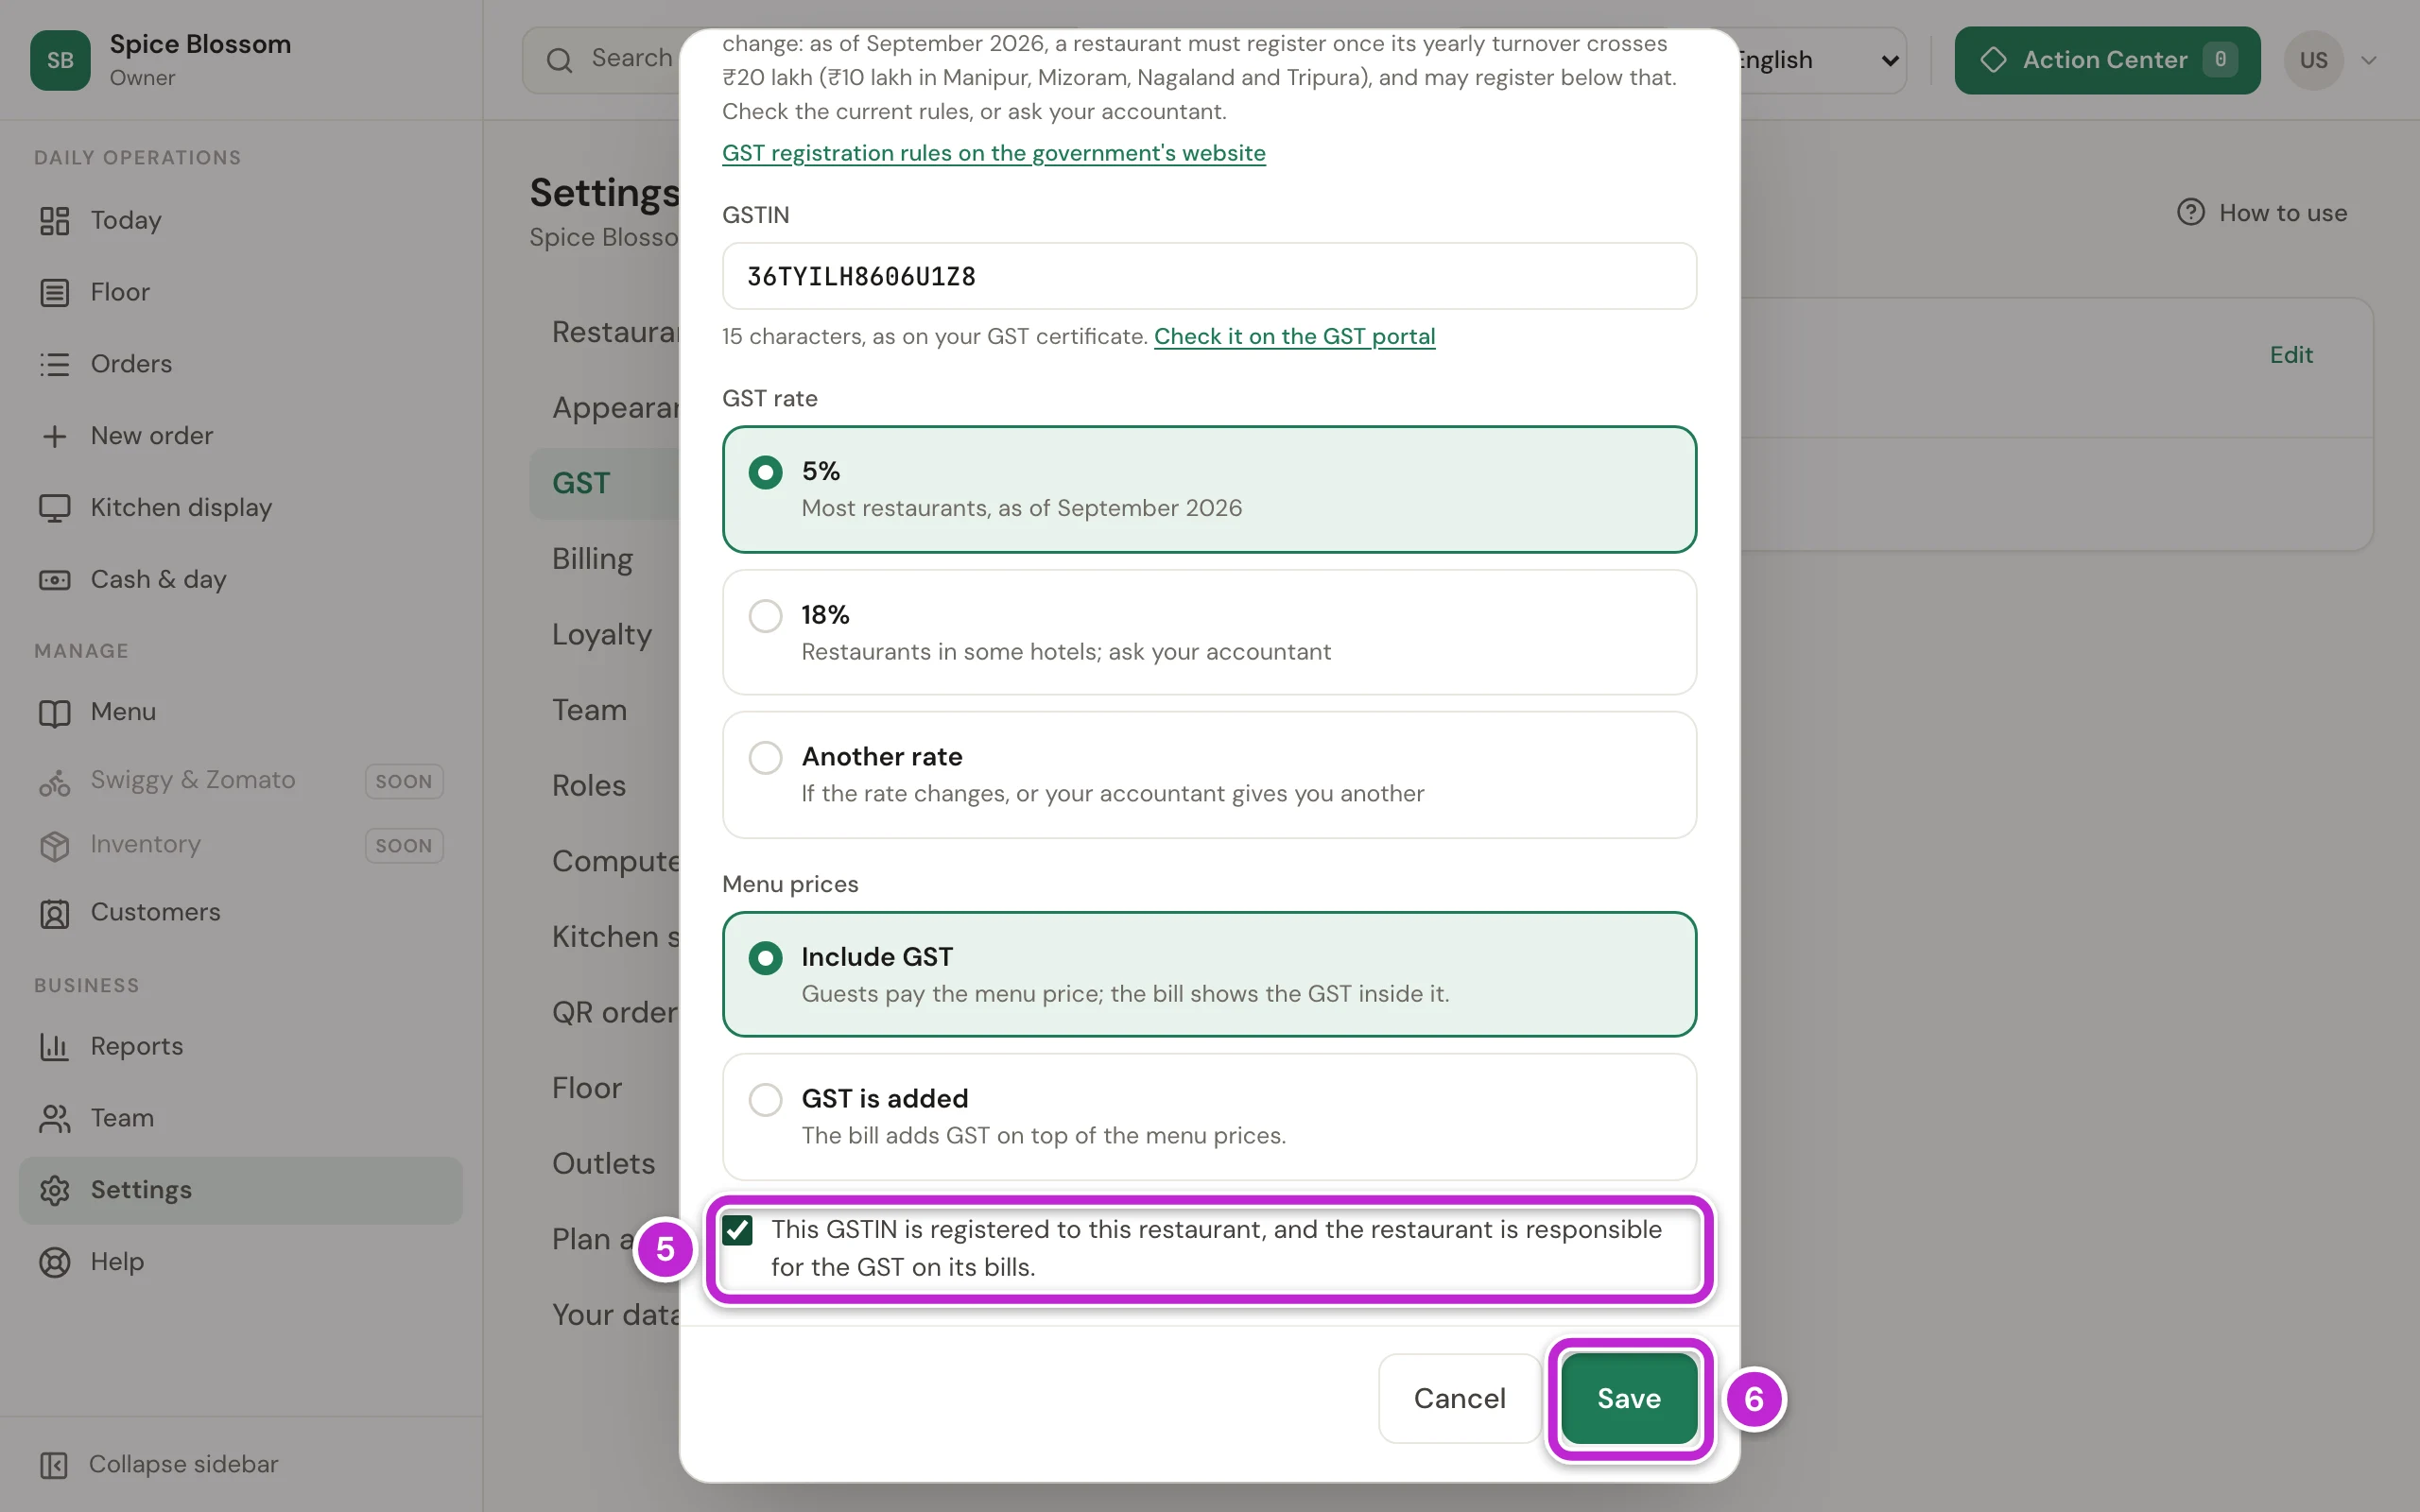
Read the sentence beside the box (5) and tick it. It says the GSTIN is registered to this restaurant, and the restaurant is responsible for the GST on its bills. DineSure does not save GST without it.
-
Click Save (6).
DineSure shows “GST saved. It applies from the next bill.” Bills you issued before stay as they were printed. The words Tax Invoice, Bill of Supply, GSTIN, CGST and SGST stay in English on every bill, in every language.
Check the other details on your bills
Section titled “Check the other details on your bills”-
Click Settings, then Restaurant.
-
Check Name, Phone, Address and FSSAI licence no.. They are shown on the QR menu and the bill.
-
Click Save changes.
-
Click Billing.
-
Under Bill rules, choose how to Round the total to. Add a Service charge or a Packaging charge only if your restaurant charges one.
-
Click Save changes.
When the cashier adds a guest’s mobile number to a bill, the printed bill also shows that number with only its last 4 digits, and the guest’s coins (Customers and coins).
Let guests pay by UPI
Section titled “Let guests pay by UPI”Guests can pay the exact amount of a bill to your own UPI ID, from a QR printed on the bill, a QR on the counter’s screen, or a button on their phone. The money goes straight to your bank account and never through DineSure.
-
Click Settings, then Billing.
-
On the UPI payments card, click Add UPI ID.
-
Type your UPI ID in UPI ID (1), exactly as your soundbox or UPI app shows it. Use a business UPI ID if you have one: some UPI apps refuse a set amount sent to a personal UPI ID.
-
Leave Name guests see (2) empty to show the restaurant’s name, or type the name guests should see.
-
Choose where the QR shows (3): Print the QR on bills and Show it on guests' phones.
-
Scan the Try it with ₹1 QR (4) with your own phone and pay. Check that the ₹1 reaches your bank account.
-
Click Save (5).
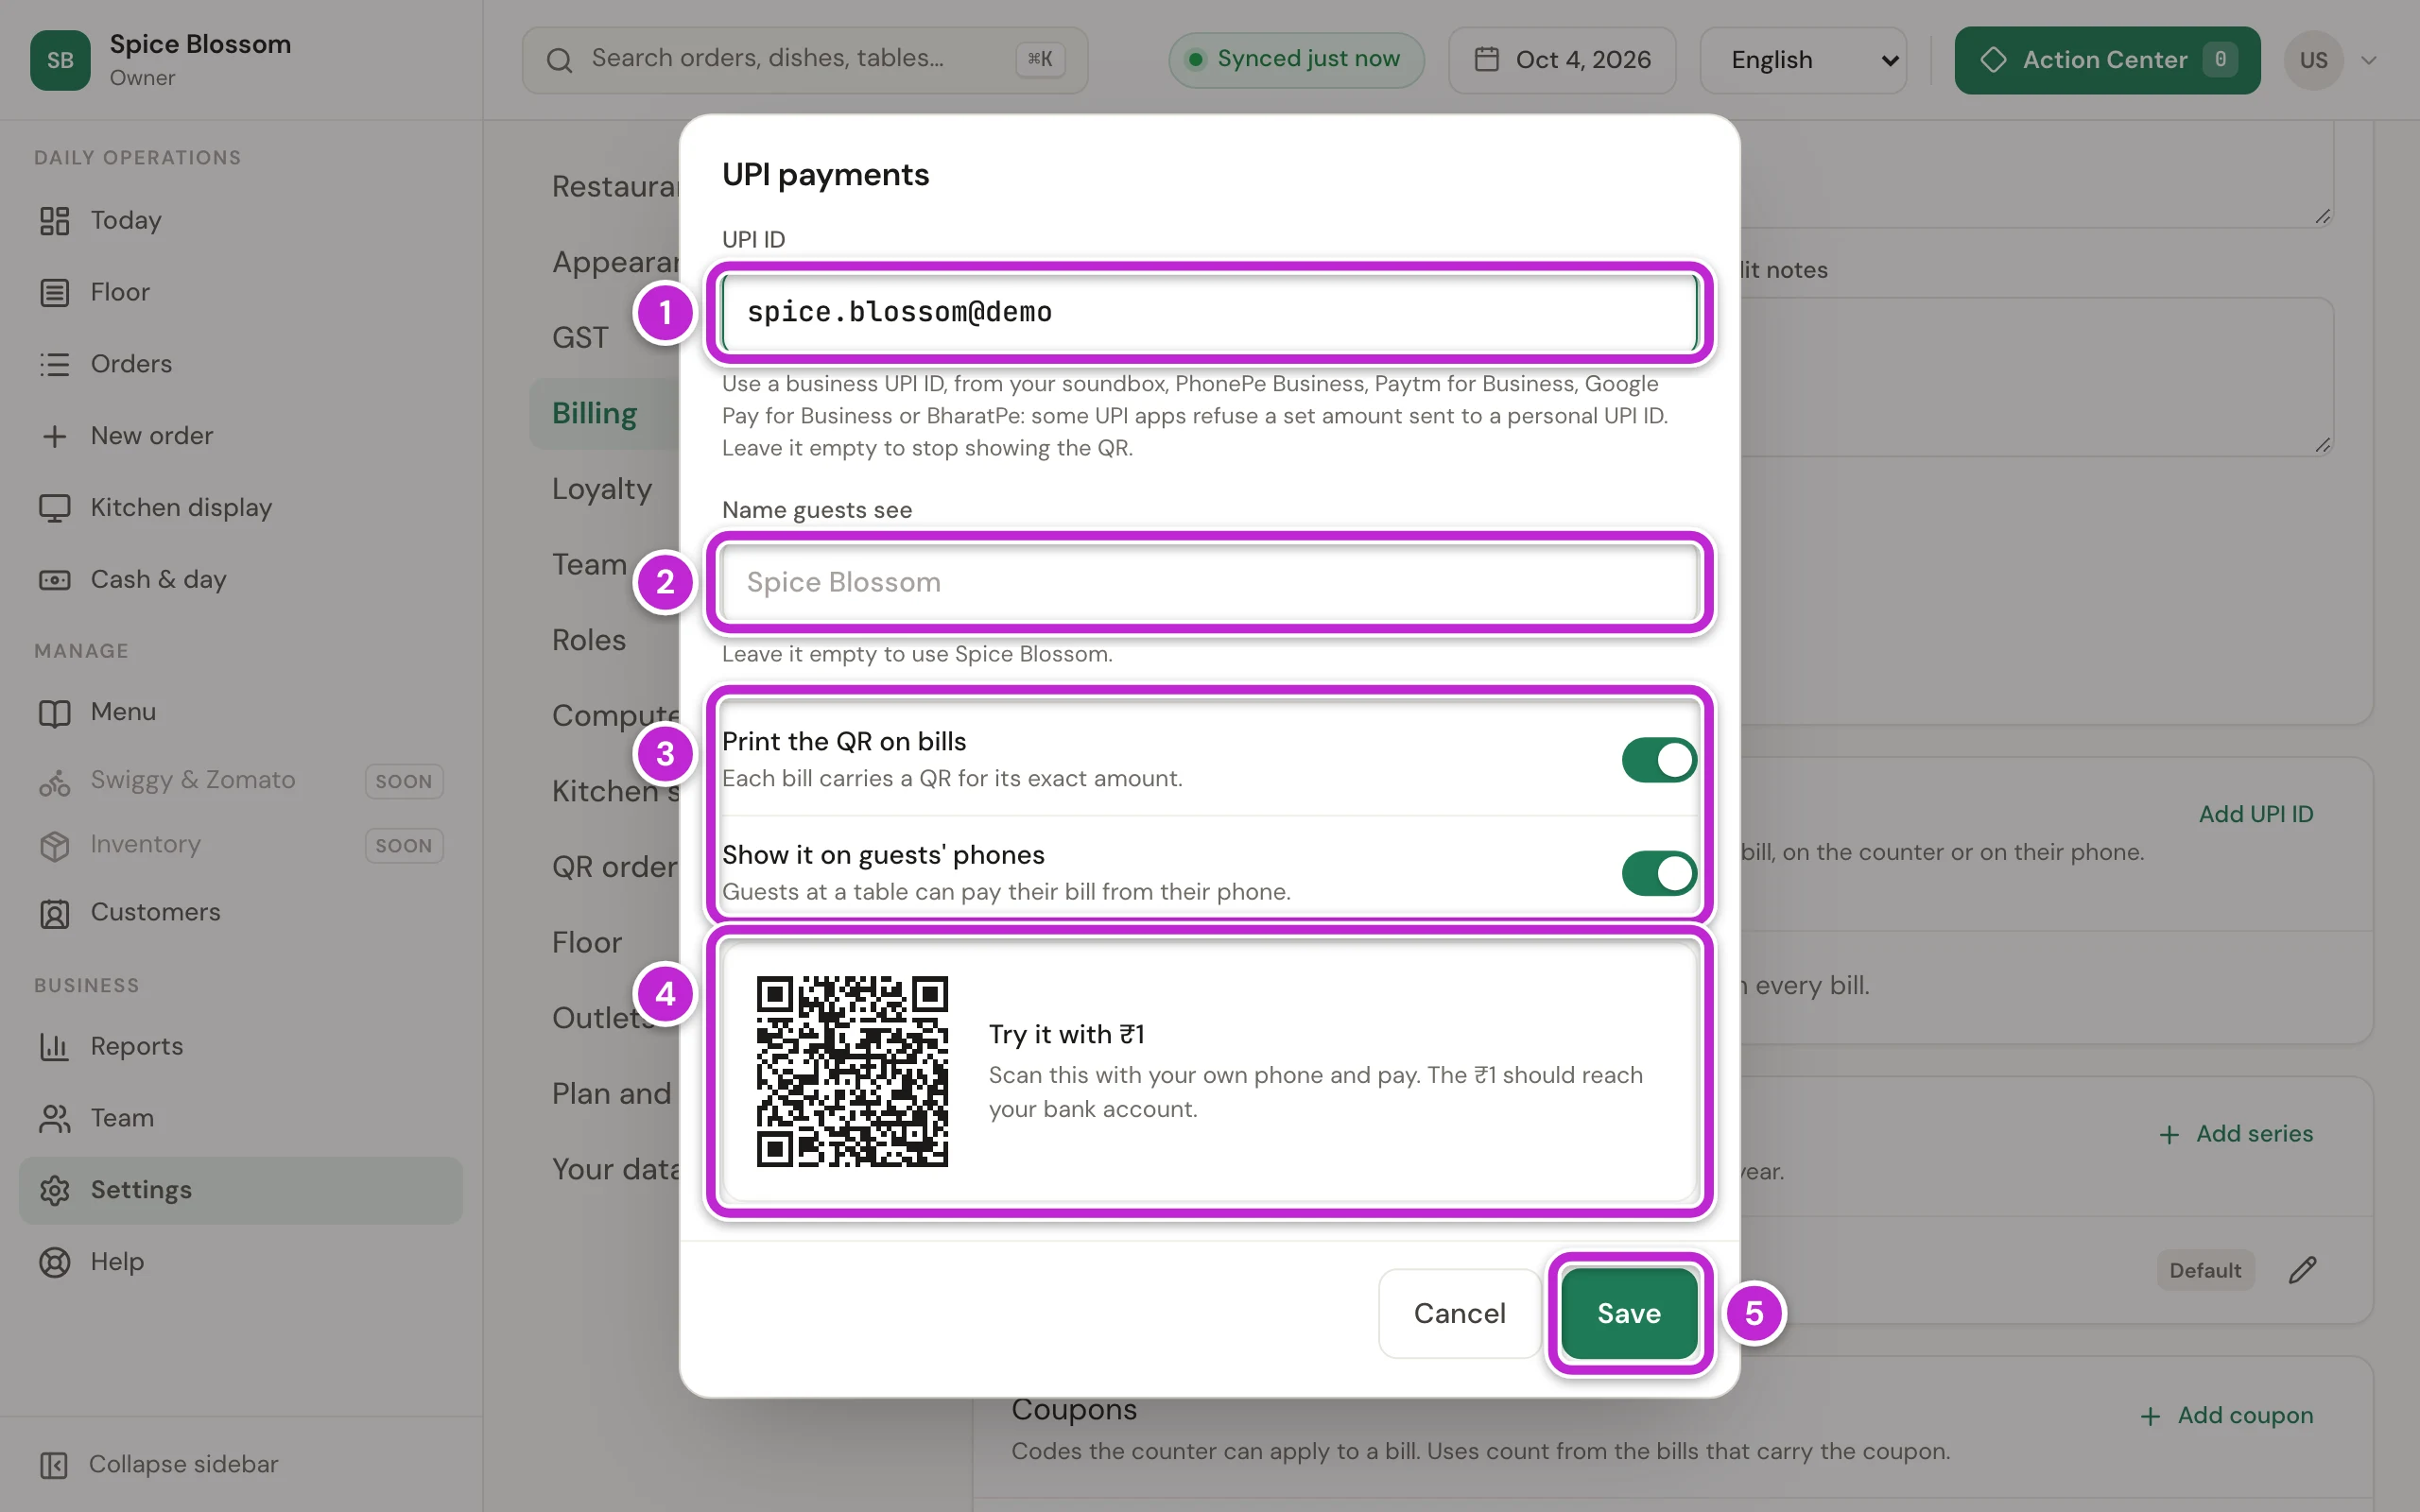
Only the owner adds or changes the UPI ID. To stop showing the QR, click Edit, empty UPI ID and save. To take the payments, see Print the bill and take the payment.
Choose how QR orders reach the kitchen
Section titled “Choose how QR orders reach the kitchen”-
Click Settings, then QR orders.
-
Under When a QR order arrives (1), choose one:
- Counter accepts first: the counter checks each QR order first, then the KOT prints. Choose this to stop prank orders.
- Auto-accept and print KOT: faster. The KOT prints in the kitchen as soon as the order arrives.
-
Turn on Open for QR orders (2). When it is off, guests see that you are closed.
-
Click Save changes (3).
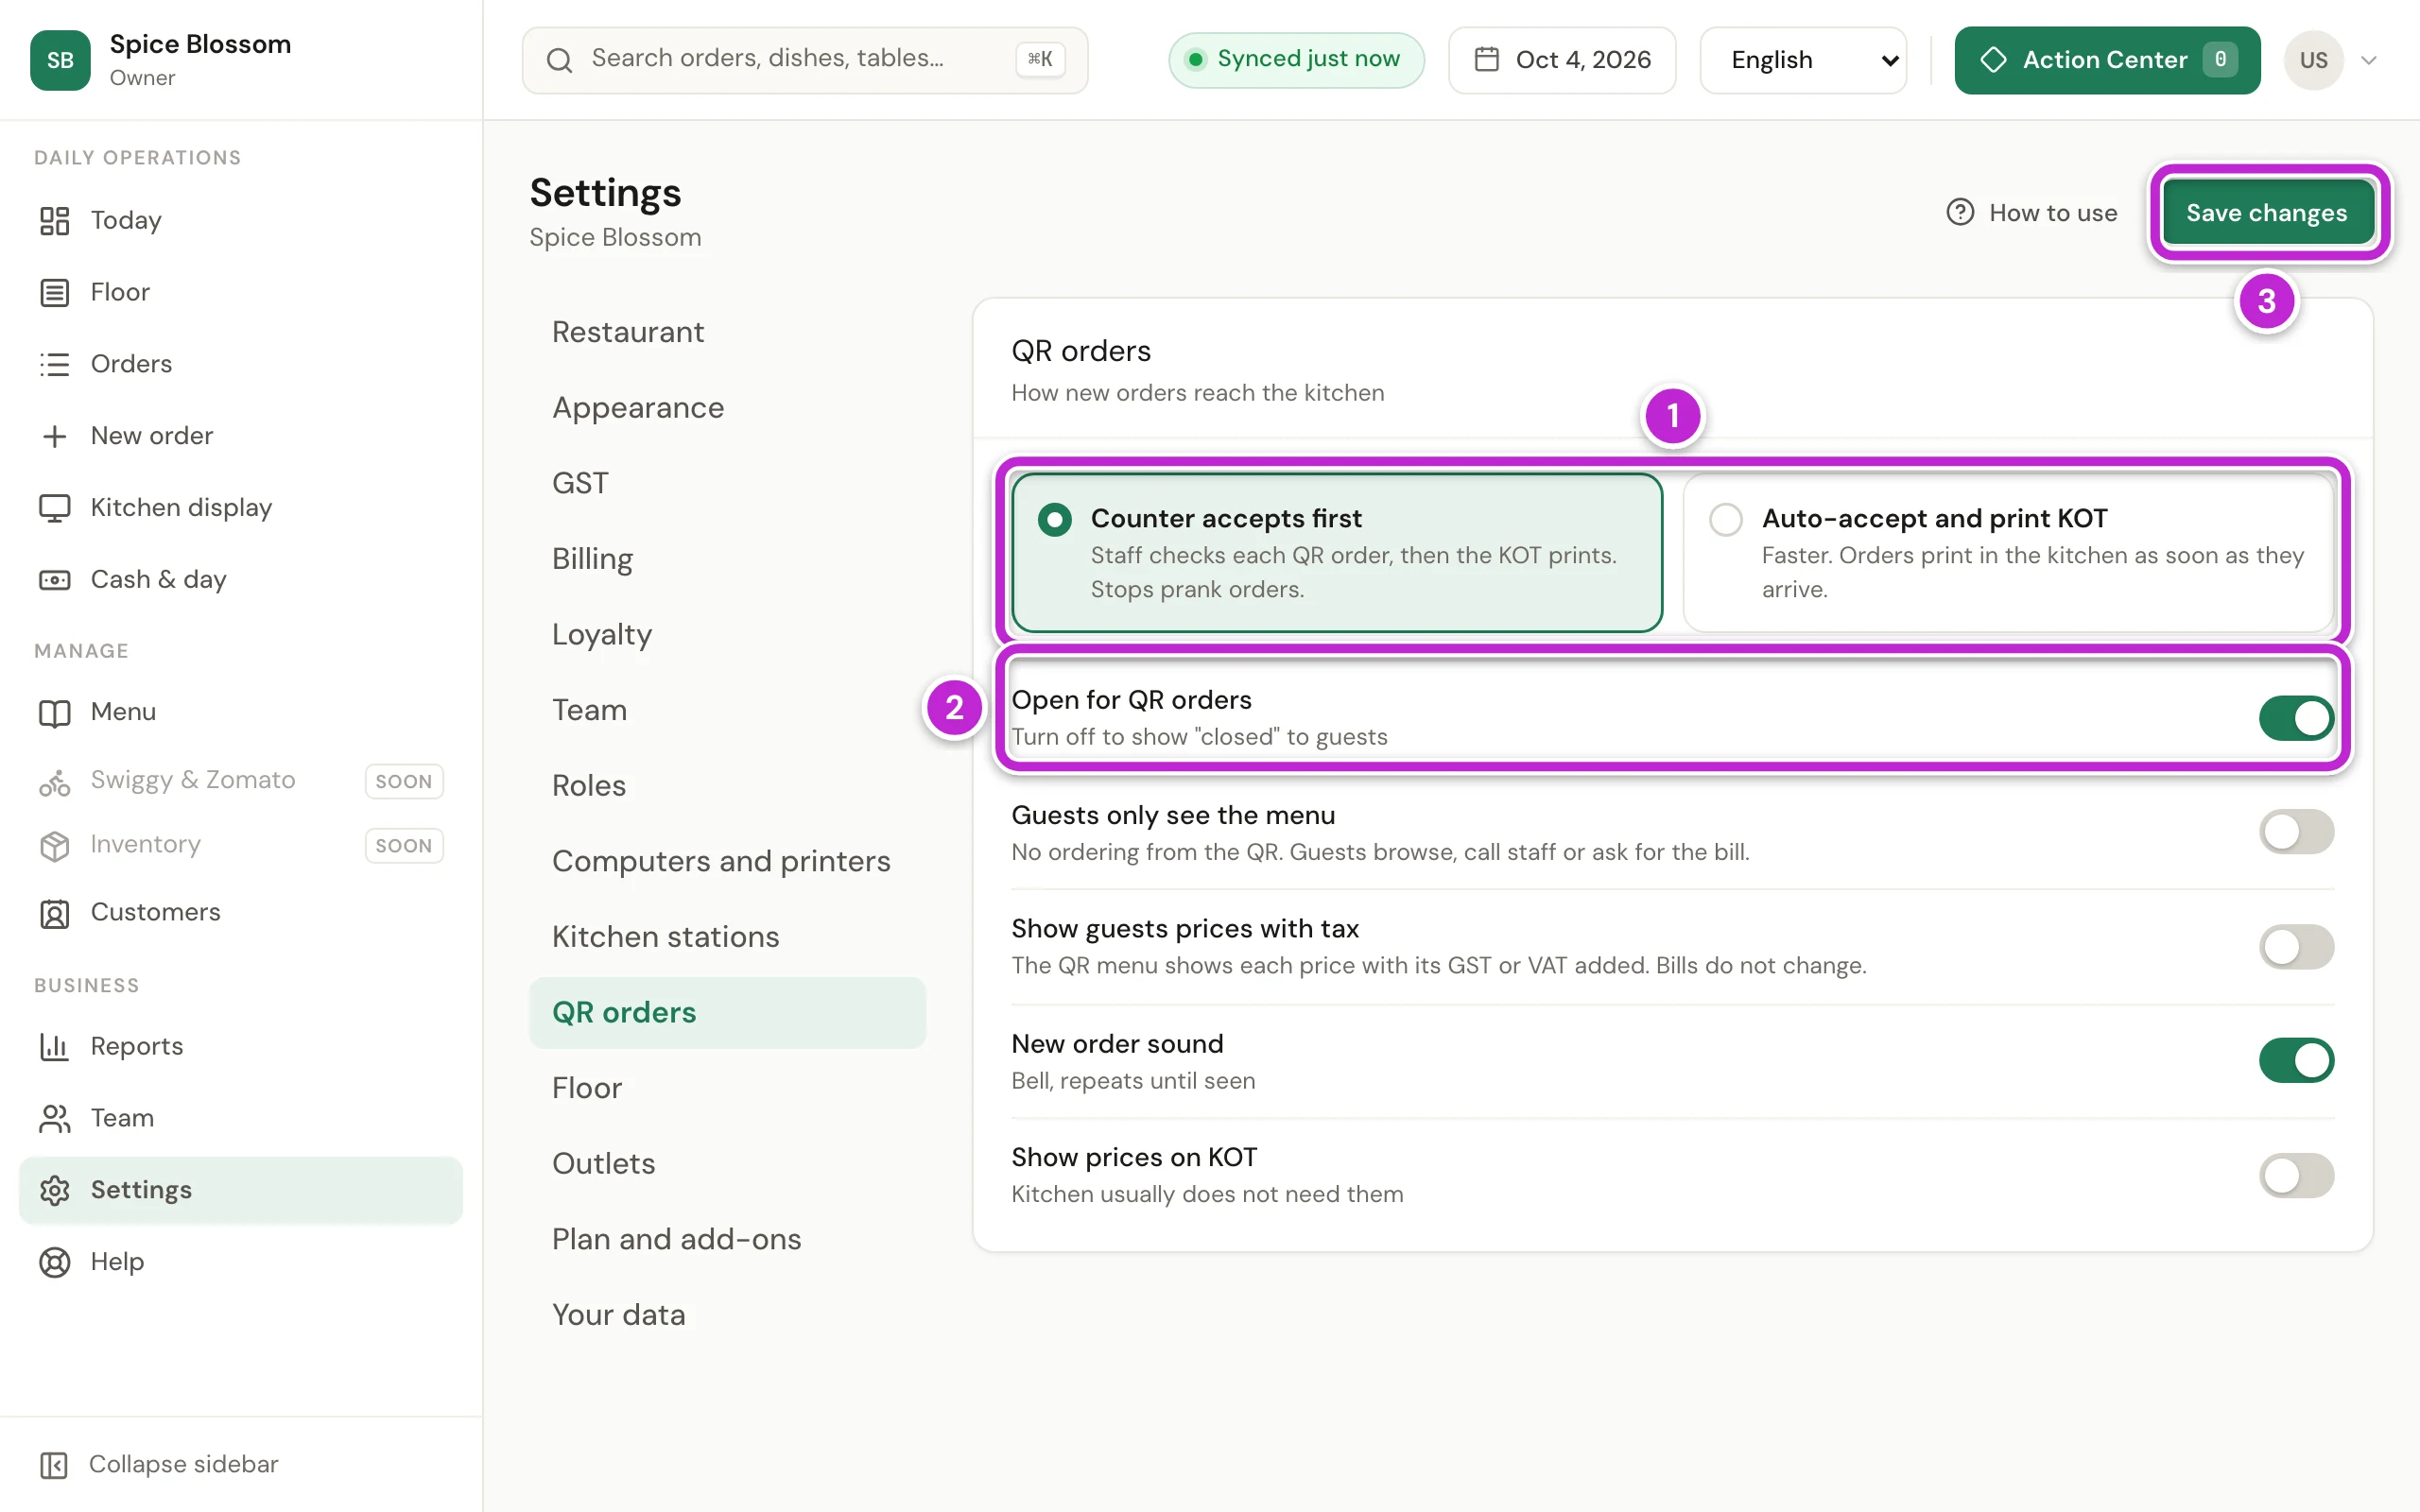
To accept the orders that guests send, see Accept QR orders.
If something goes wrong
Section titled “If something goes wrong”- Check the GSTIN: 15 characters, as on the GST certificate. The GSTIN has a typing mistake. Type it again from the certificate, letter by letter.
- Choose whether your menu prices include GST. You chose Regular. Choose one of the two choices under Menu prices.
- Confirm this to charge GST. Tick the box under the GST choices, then click Save.
- Enter a whole number from 1 to 40. The rate under Another rate must be a whole number, like 12.
- A bill shows the old GST. A GST change applies from the next bill. Bills issued before the change keep the GST they had.
- You do not see GST in Settings. Only the owner, or someone the owner allows, changes GST. Ask the owner.
- Enter a UPI ID like name@bank. The UPI ID has a typing mistake. Copy it again from your UPI app or the sticker on your soundbox. It looks like name@bank.
- You do not see Add UPI ID. Only the owner changes the UPI ID. Ask the owner.