
Set up your restaurant
Who does this: the owner, once, after signing in for the first time.
What you need:
- You are signed in as the owner (Sign in).
- A computer with the Chrome browser. A phone also works.
- The names and mobile numbers of the people who work with you.
- Your restaurant’s address, phone number and FSSAI licence number, if you want them on your bills.
Start setup
Section titled “Start setup”-
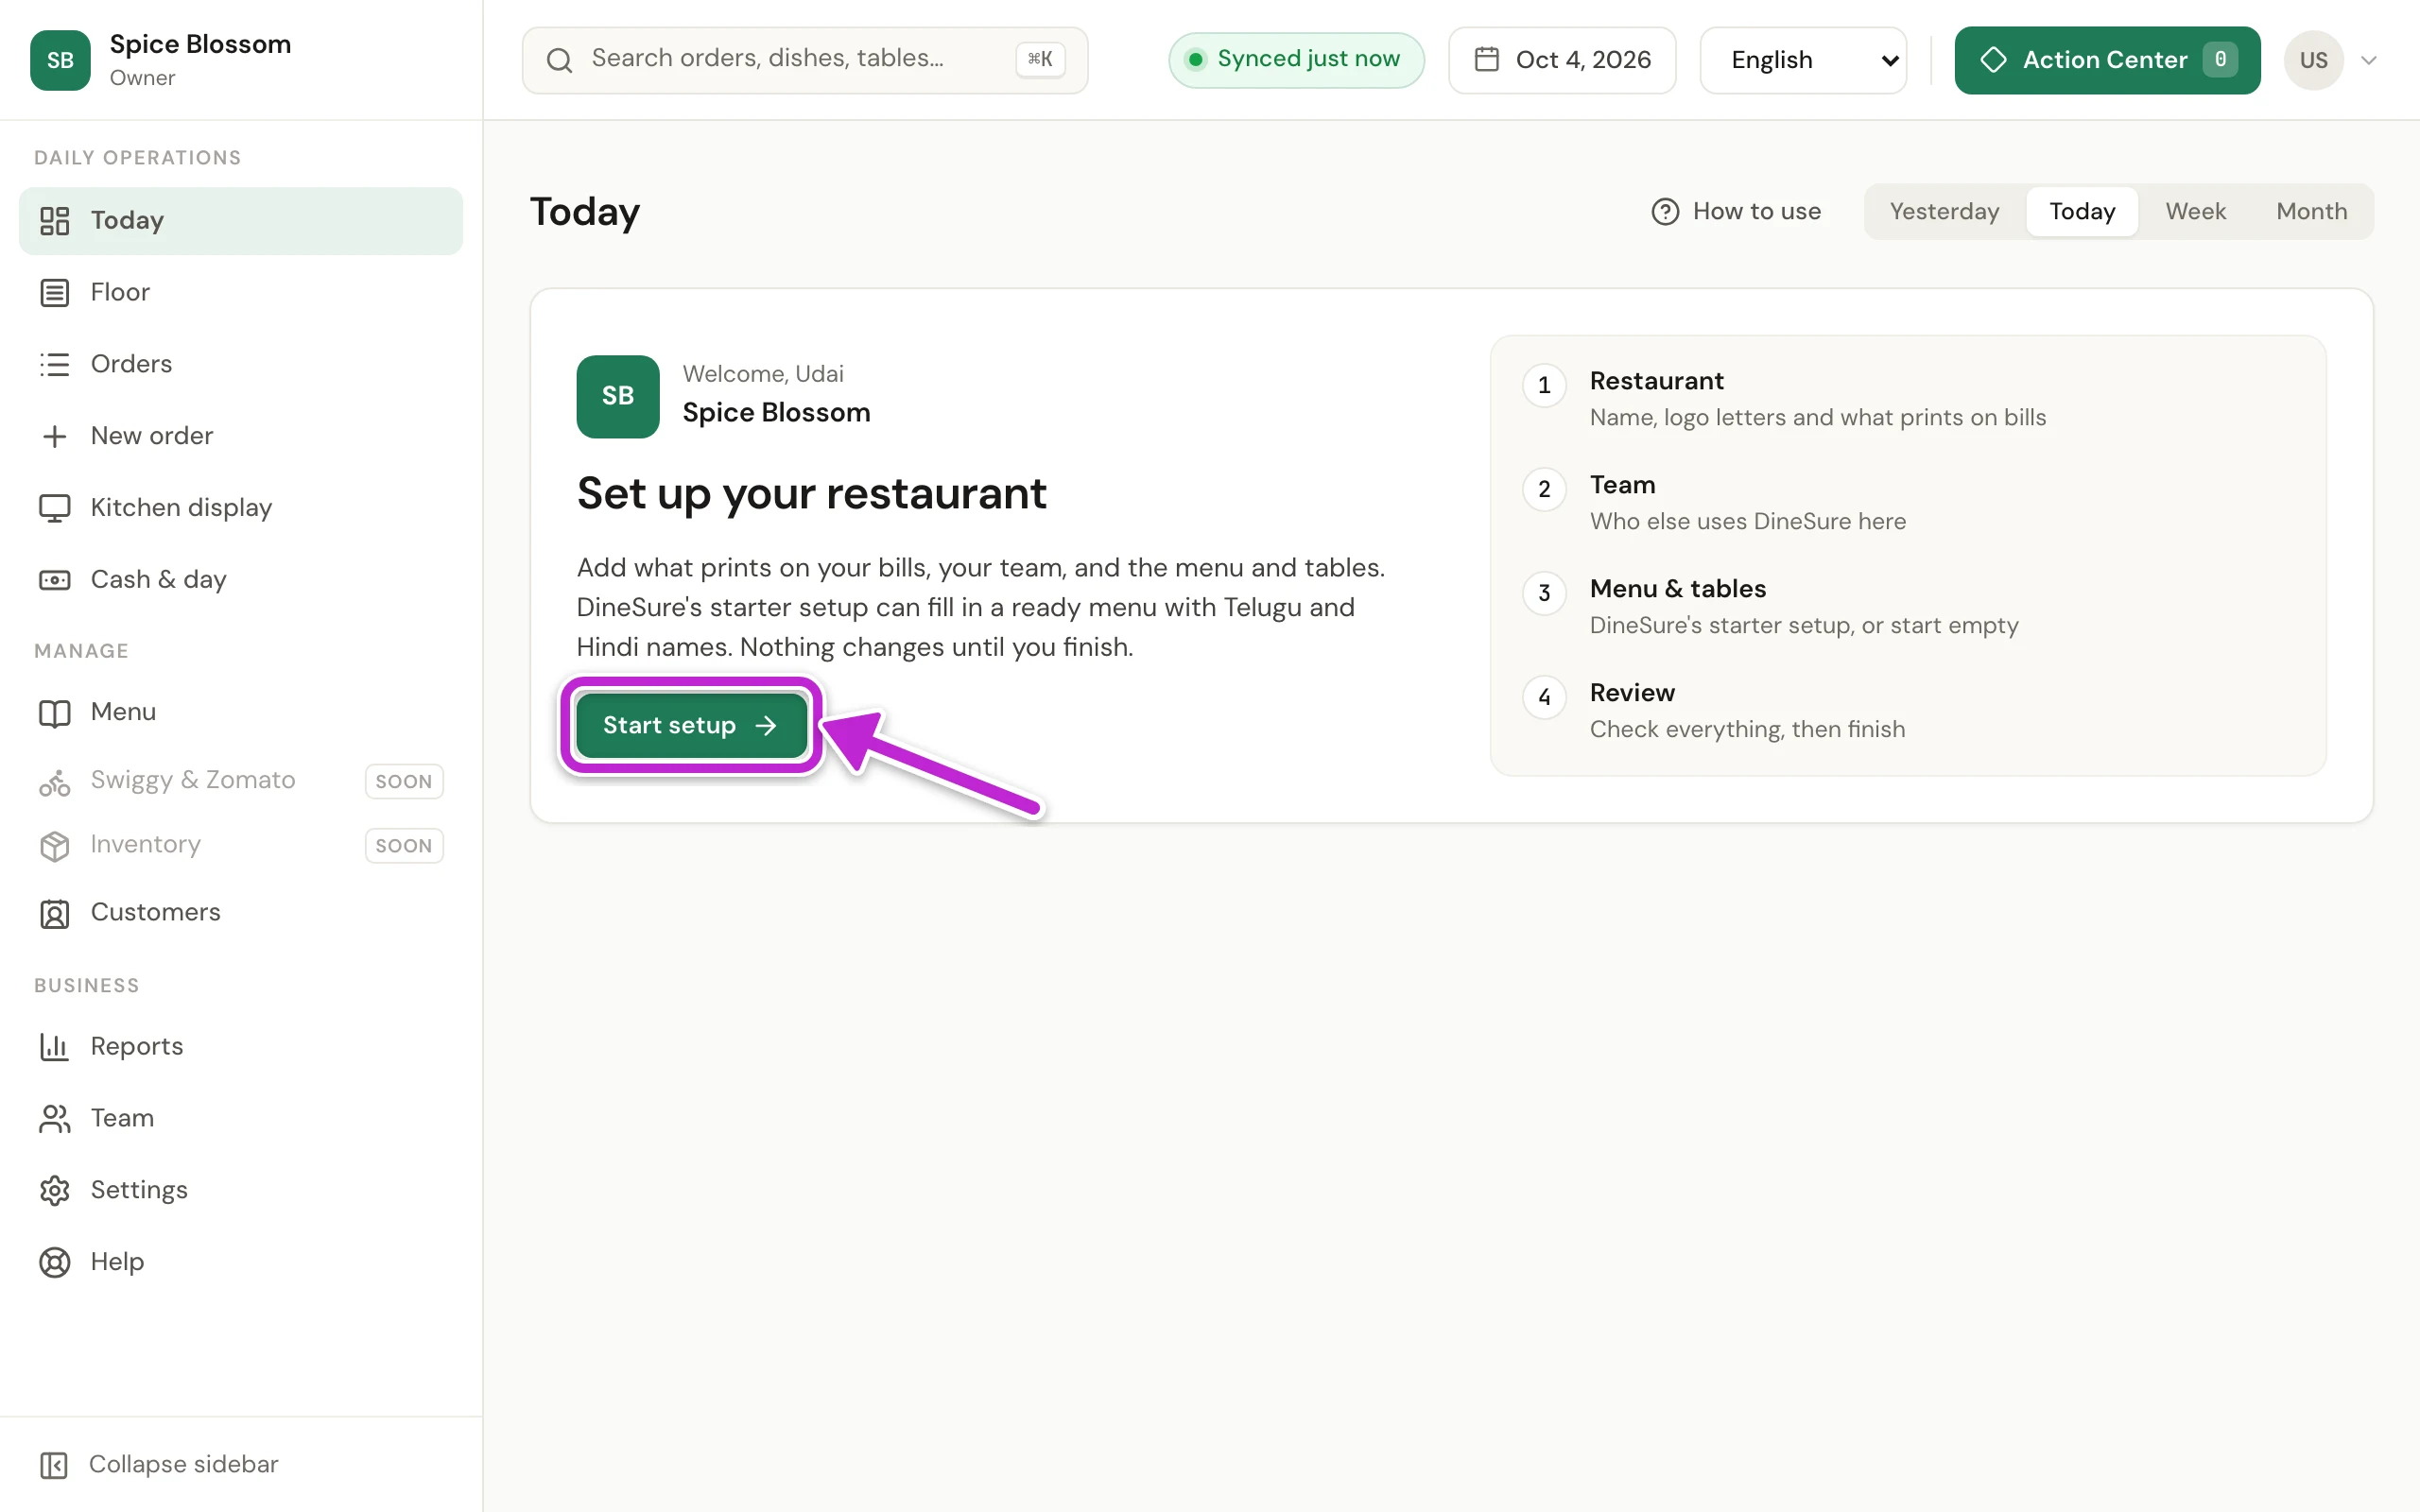
On Today, find the box Set up your restaurant. It shows the four steps: Your restaurant, Team, Menu & tables and Review.
-
Click Start setup.
Step 1: your restaurant
Section titled “Step 1: your restaurant”-
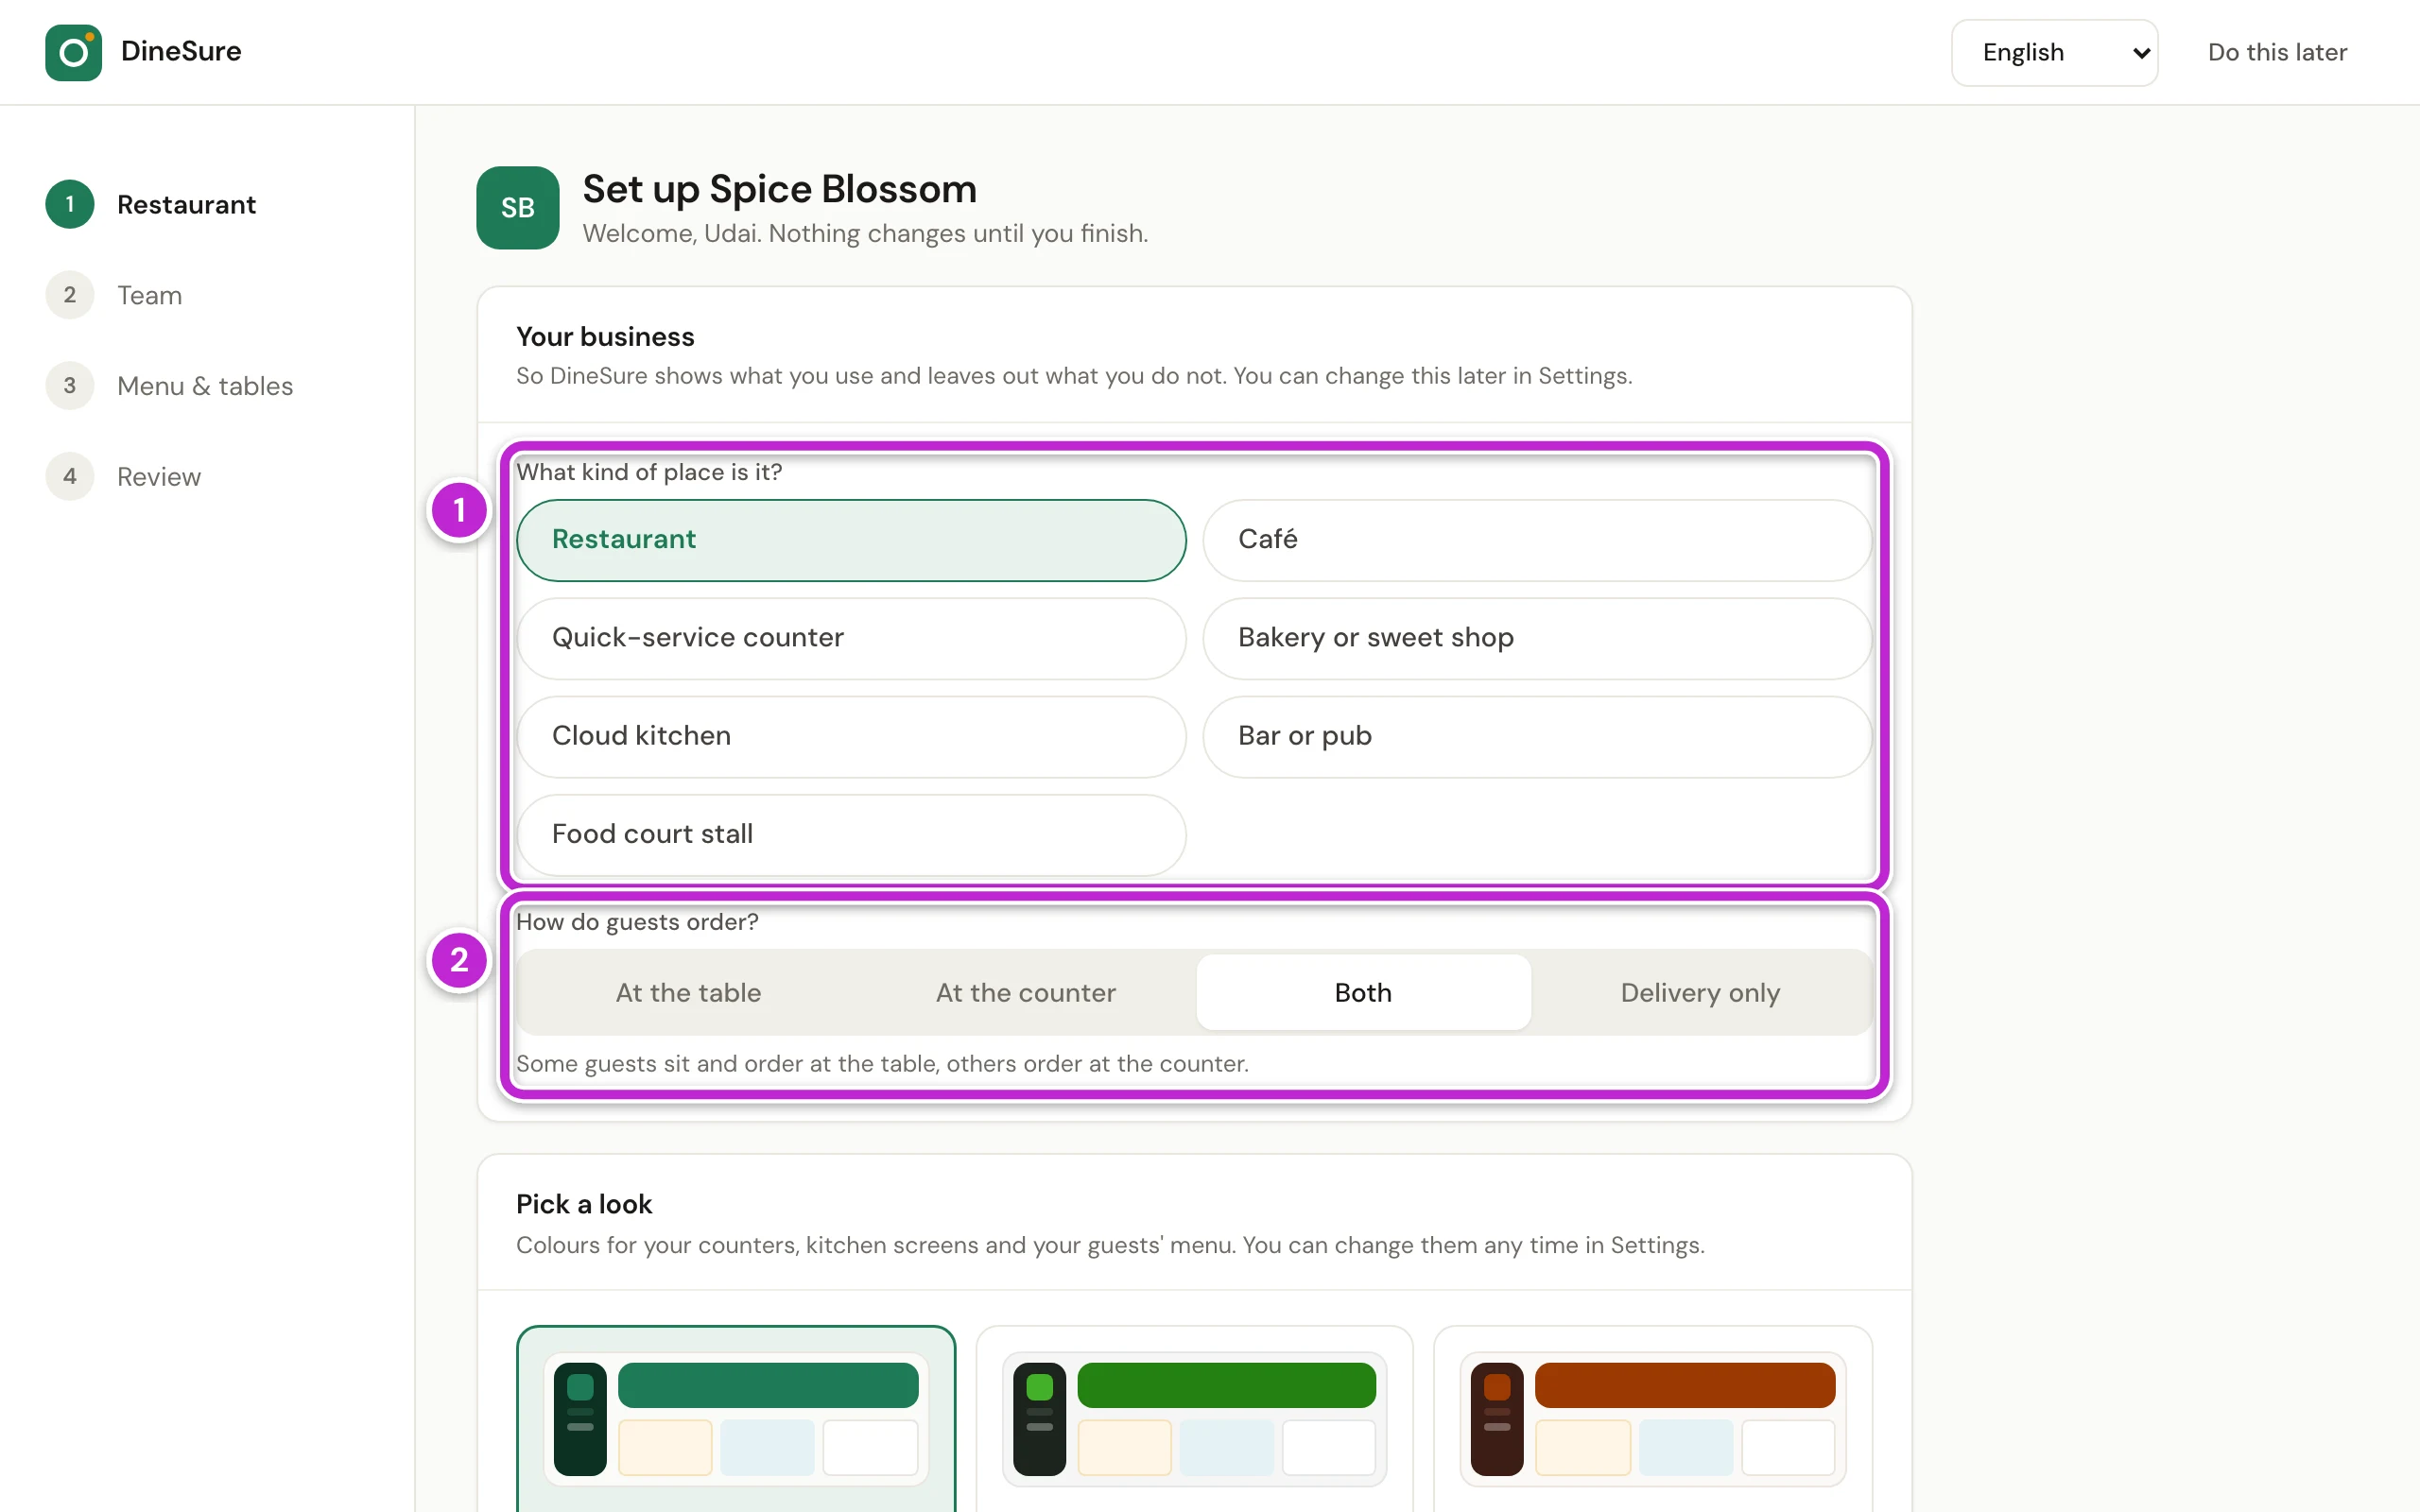
Under What kind of place is it? (1), click the kind of place you run, for example Restaurant.
-
Under How do guests order? (2), click how guests order: At the table, At the counter, Both or Delivery only. DineSure then shows the things you use and leaves out the rest. You can change this later in Settings.
-
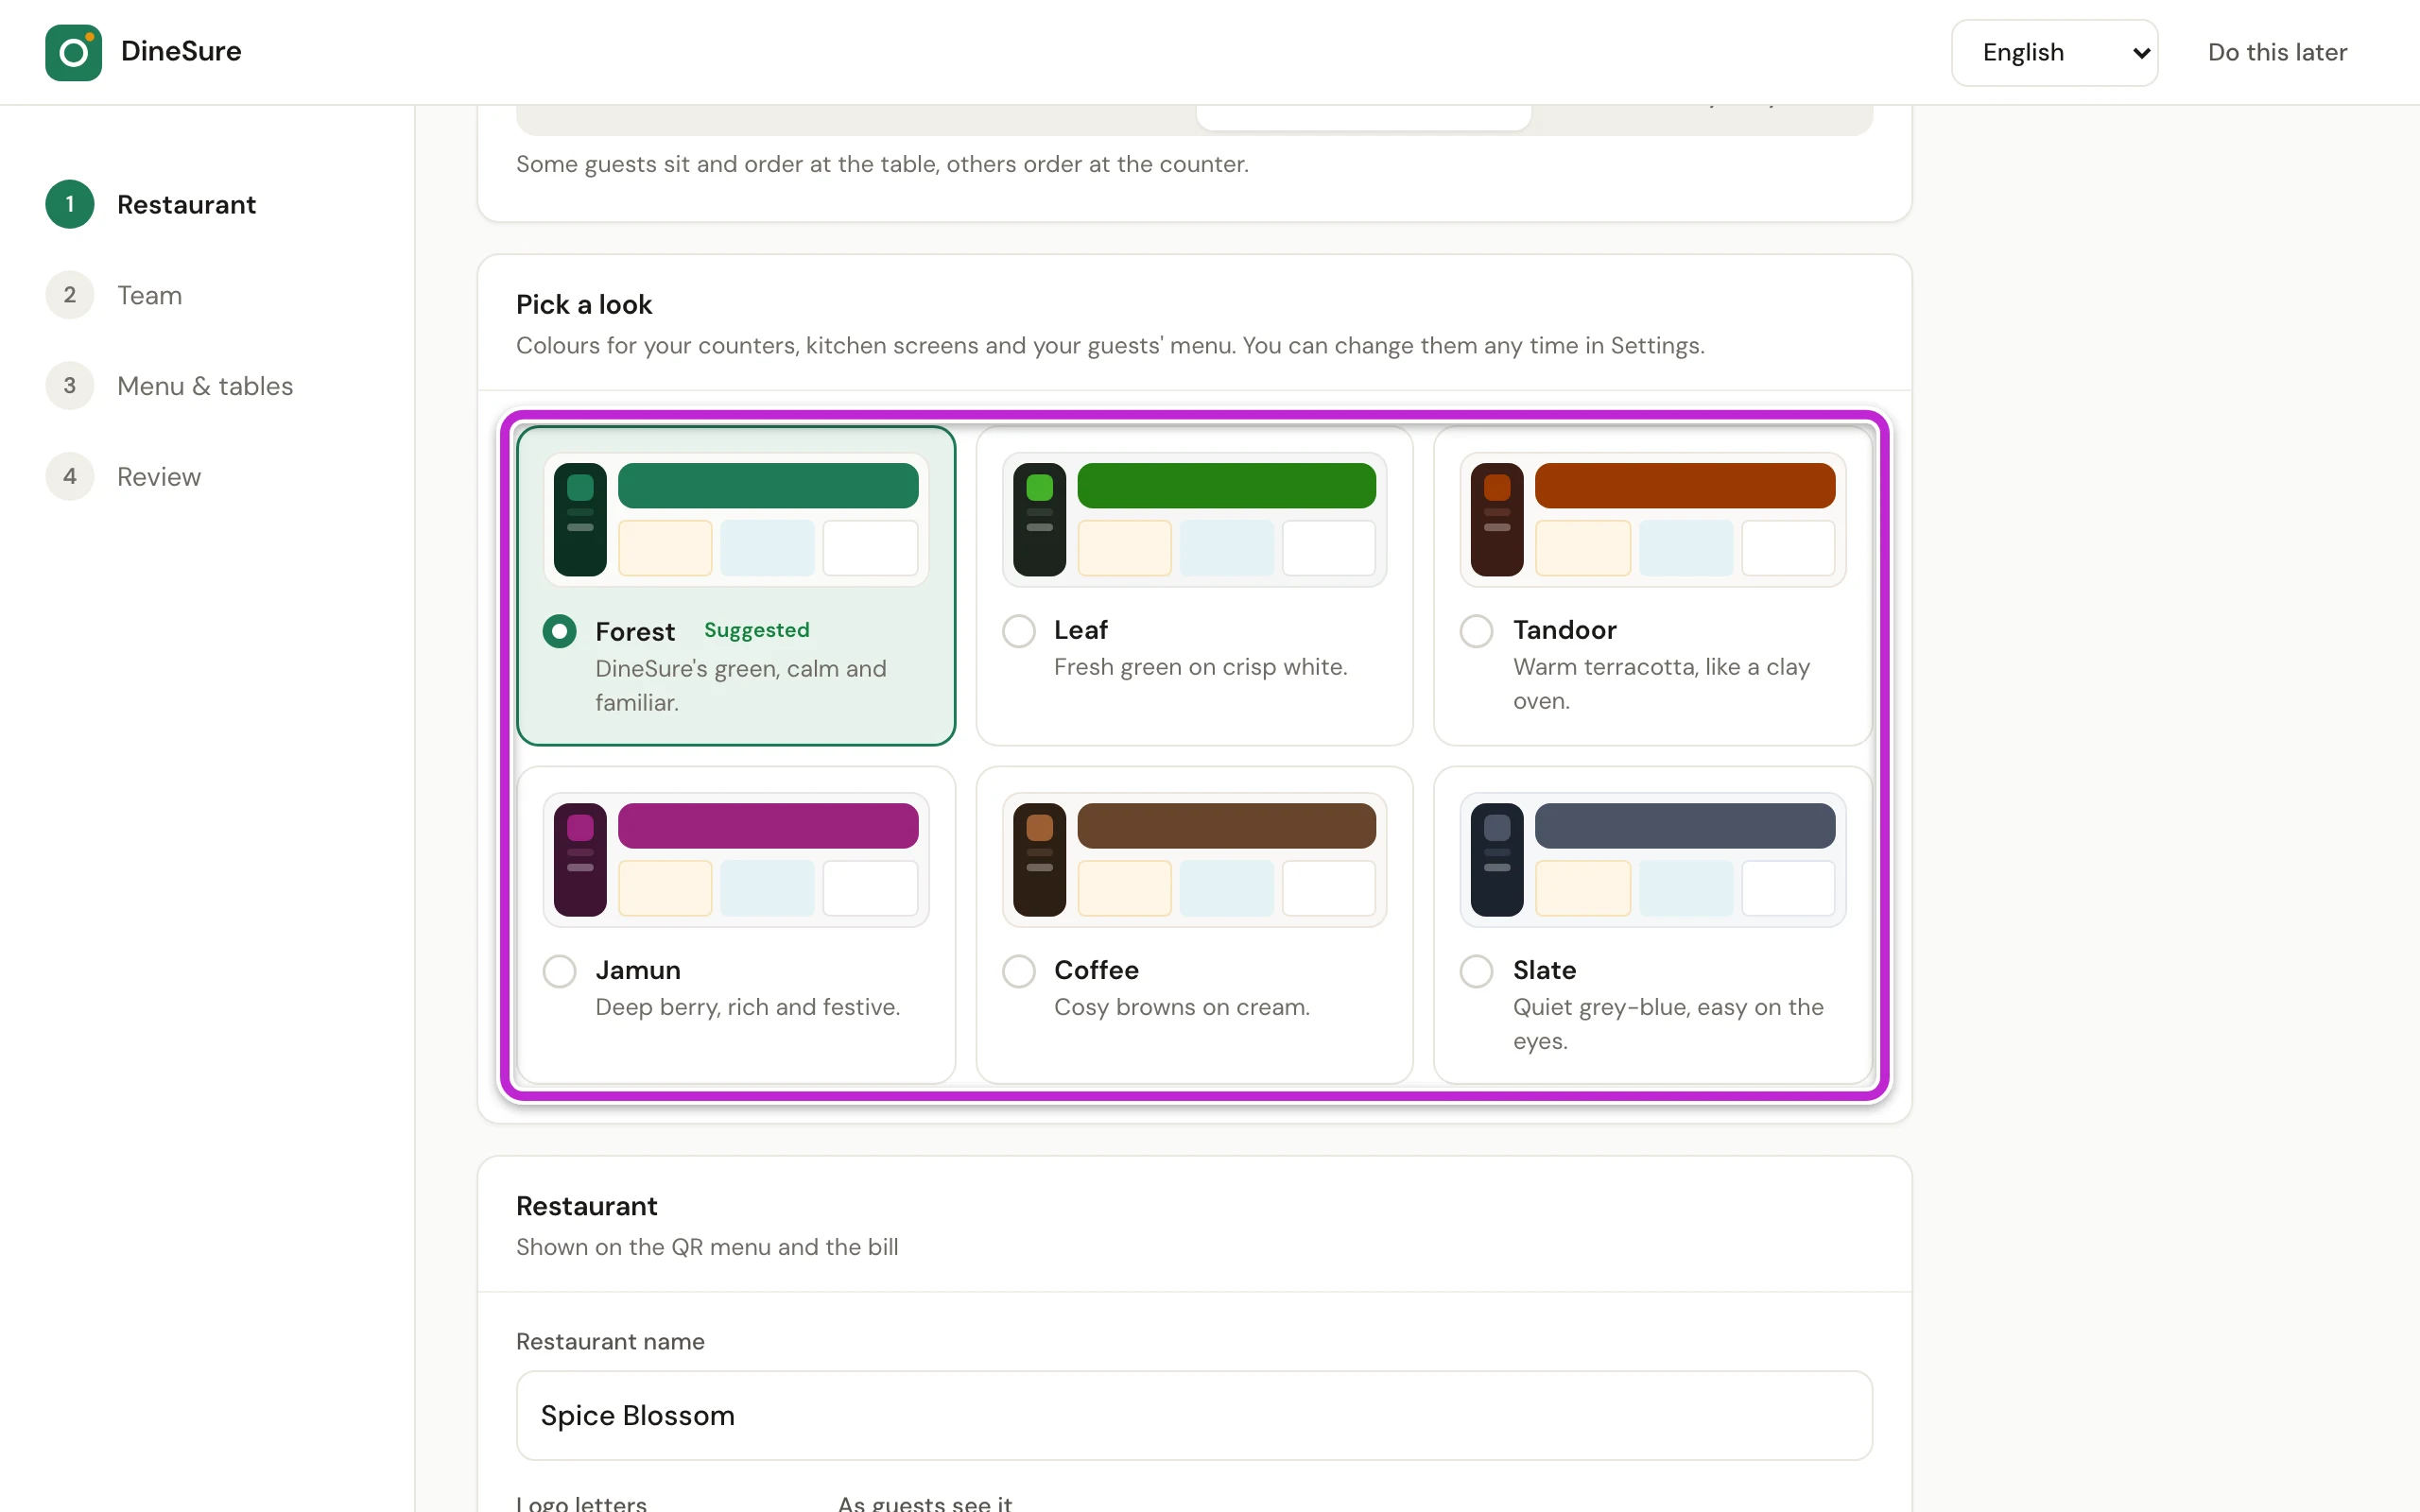
Under Pick a look, click the colours you like. They are used on your counters, kitchen screens and your guests’ menu. You can change them any time in Settings.
-
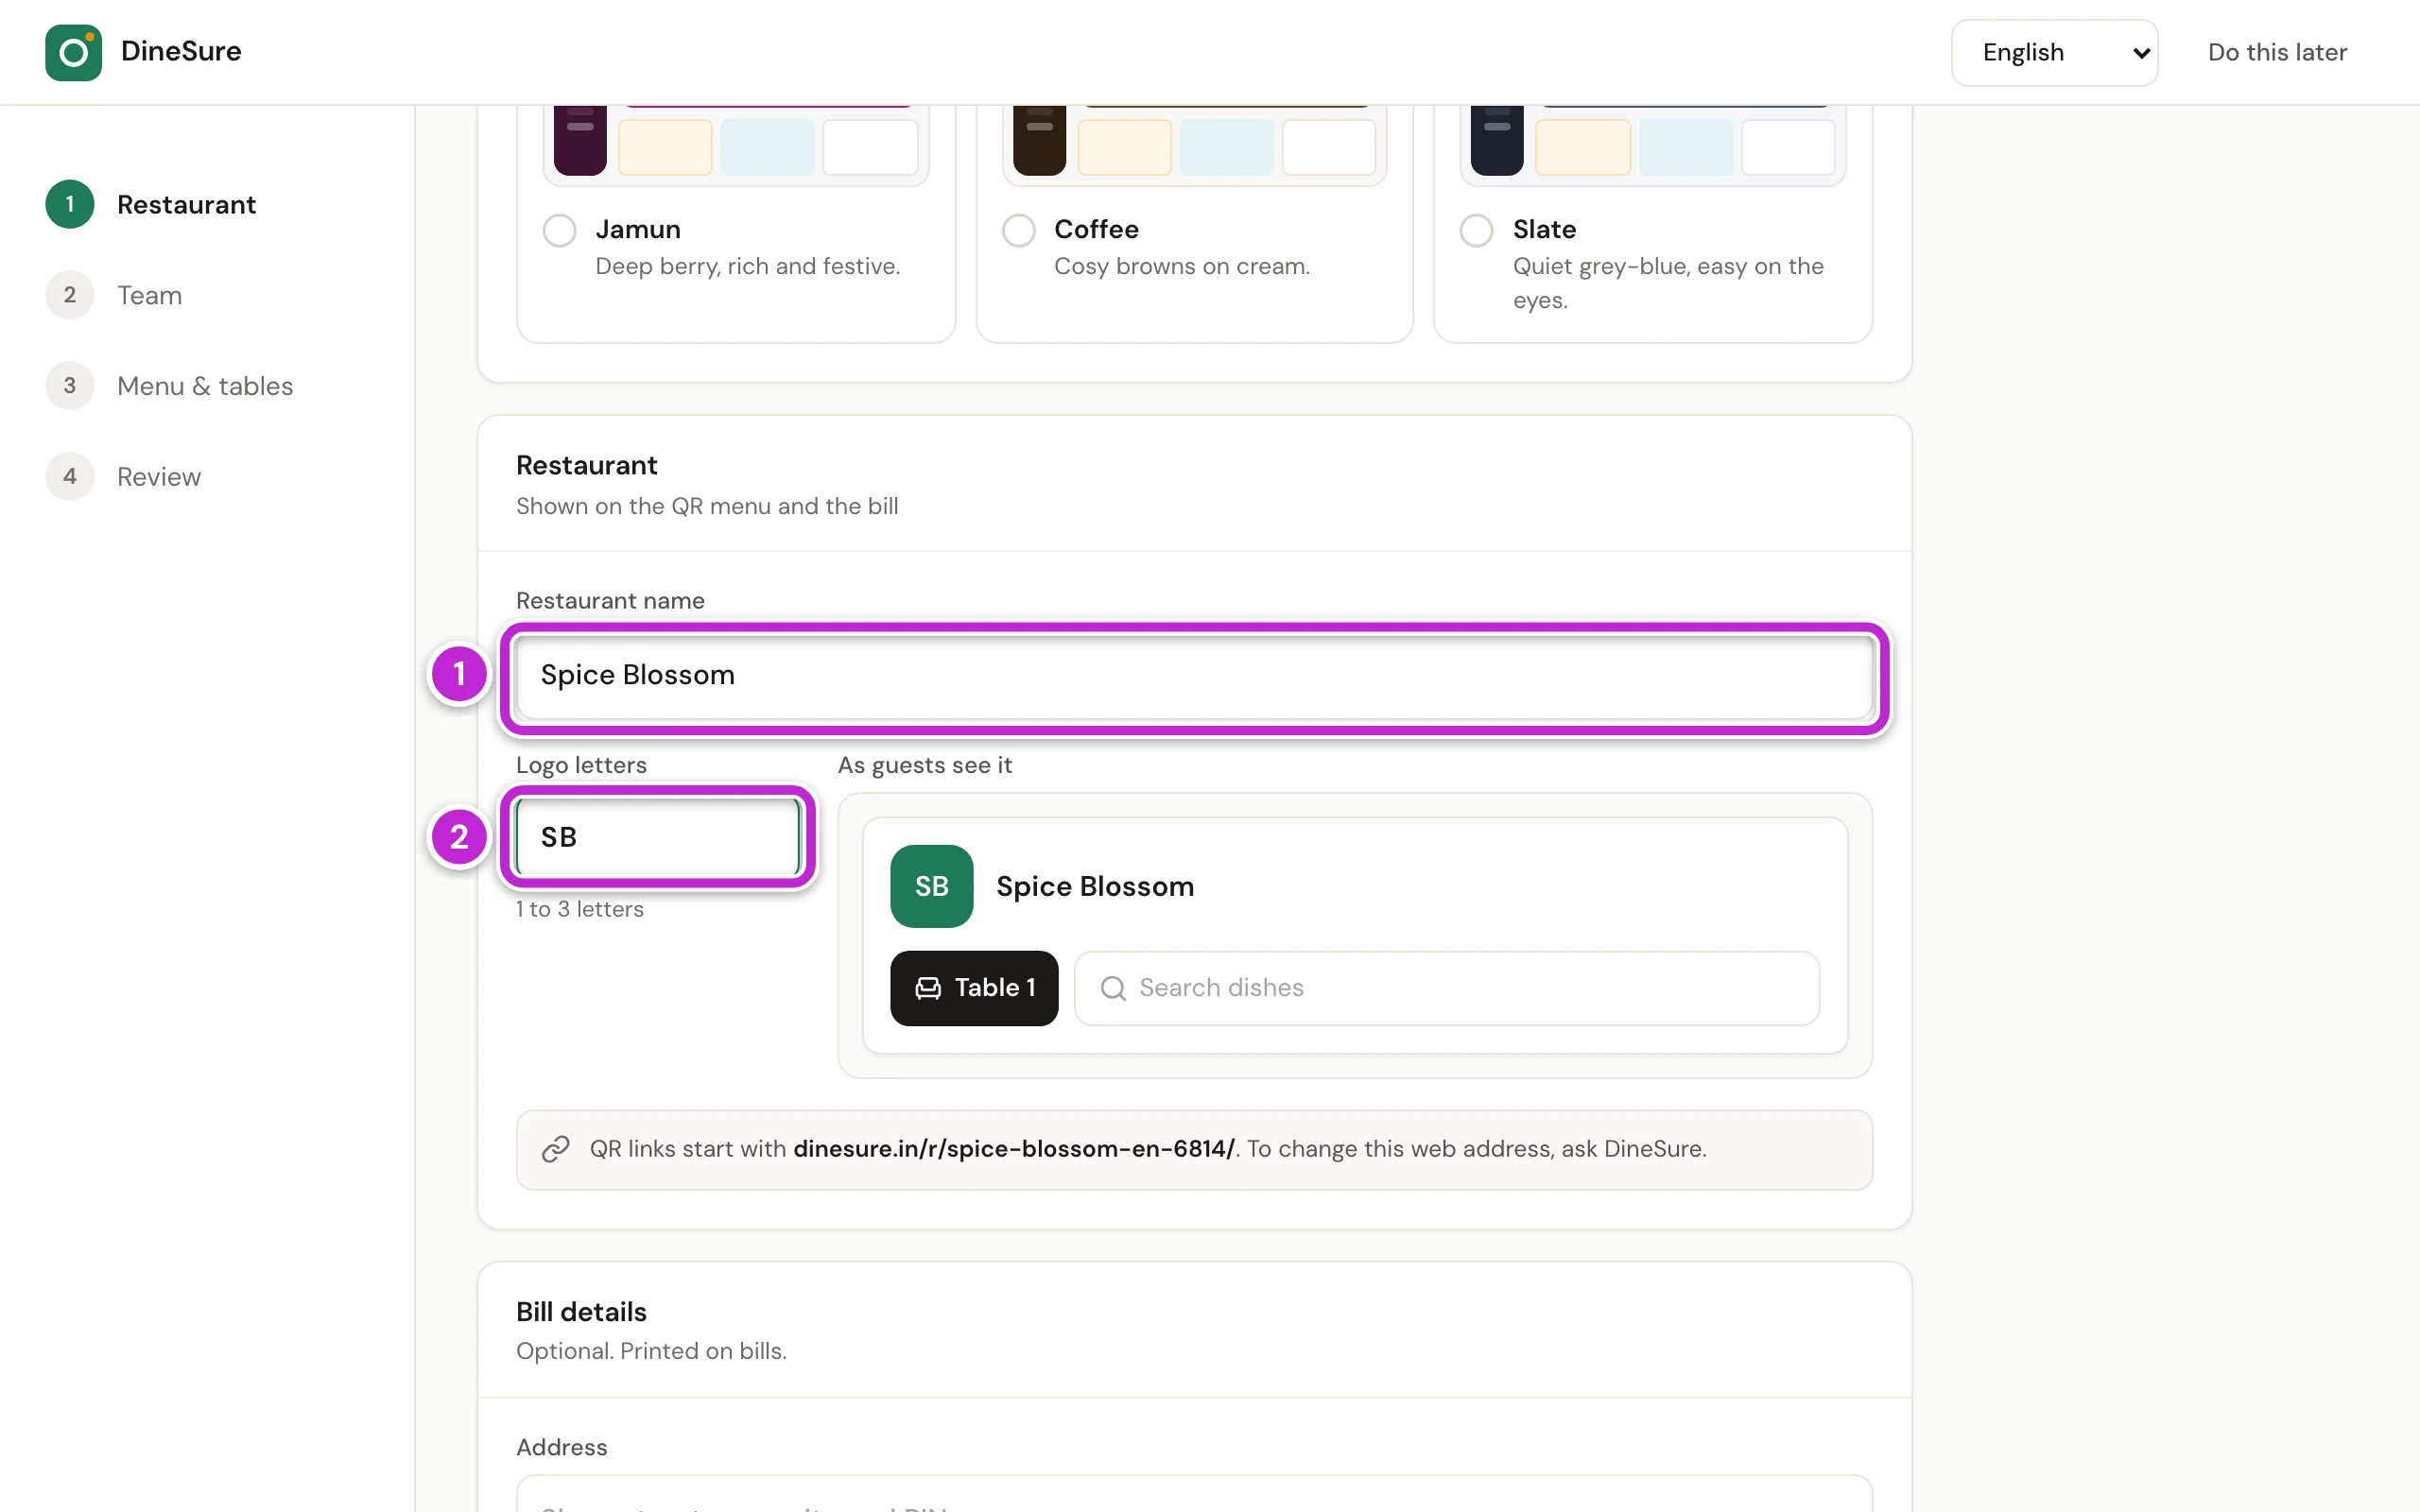
Check Restaurant name (1). Guests see this name on the QR menu, and it prints on the bill.
-
Type one to three letters in Logo letters (2), for example the first letters of the name.
-
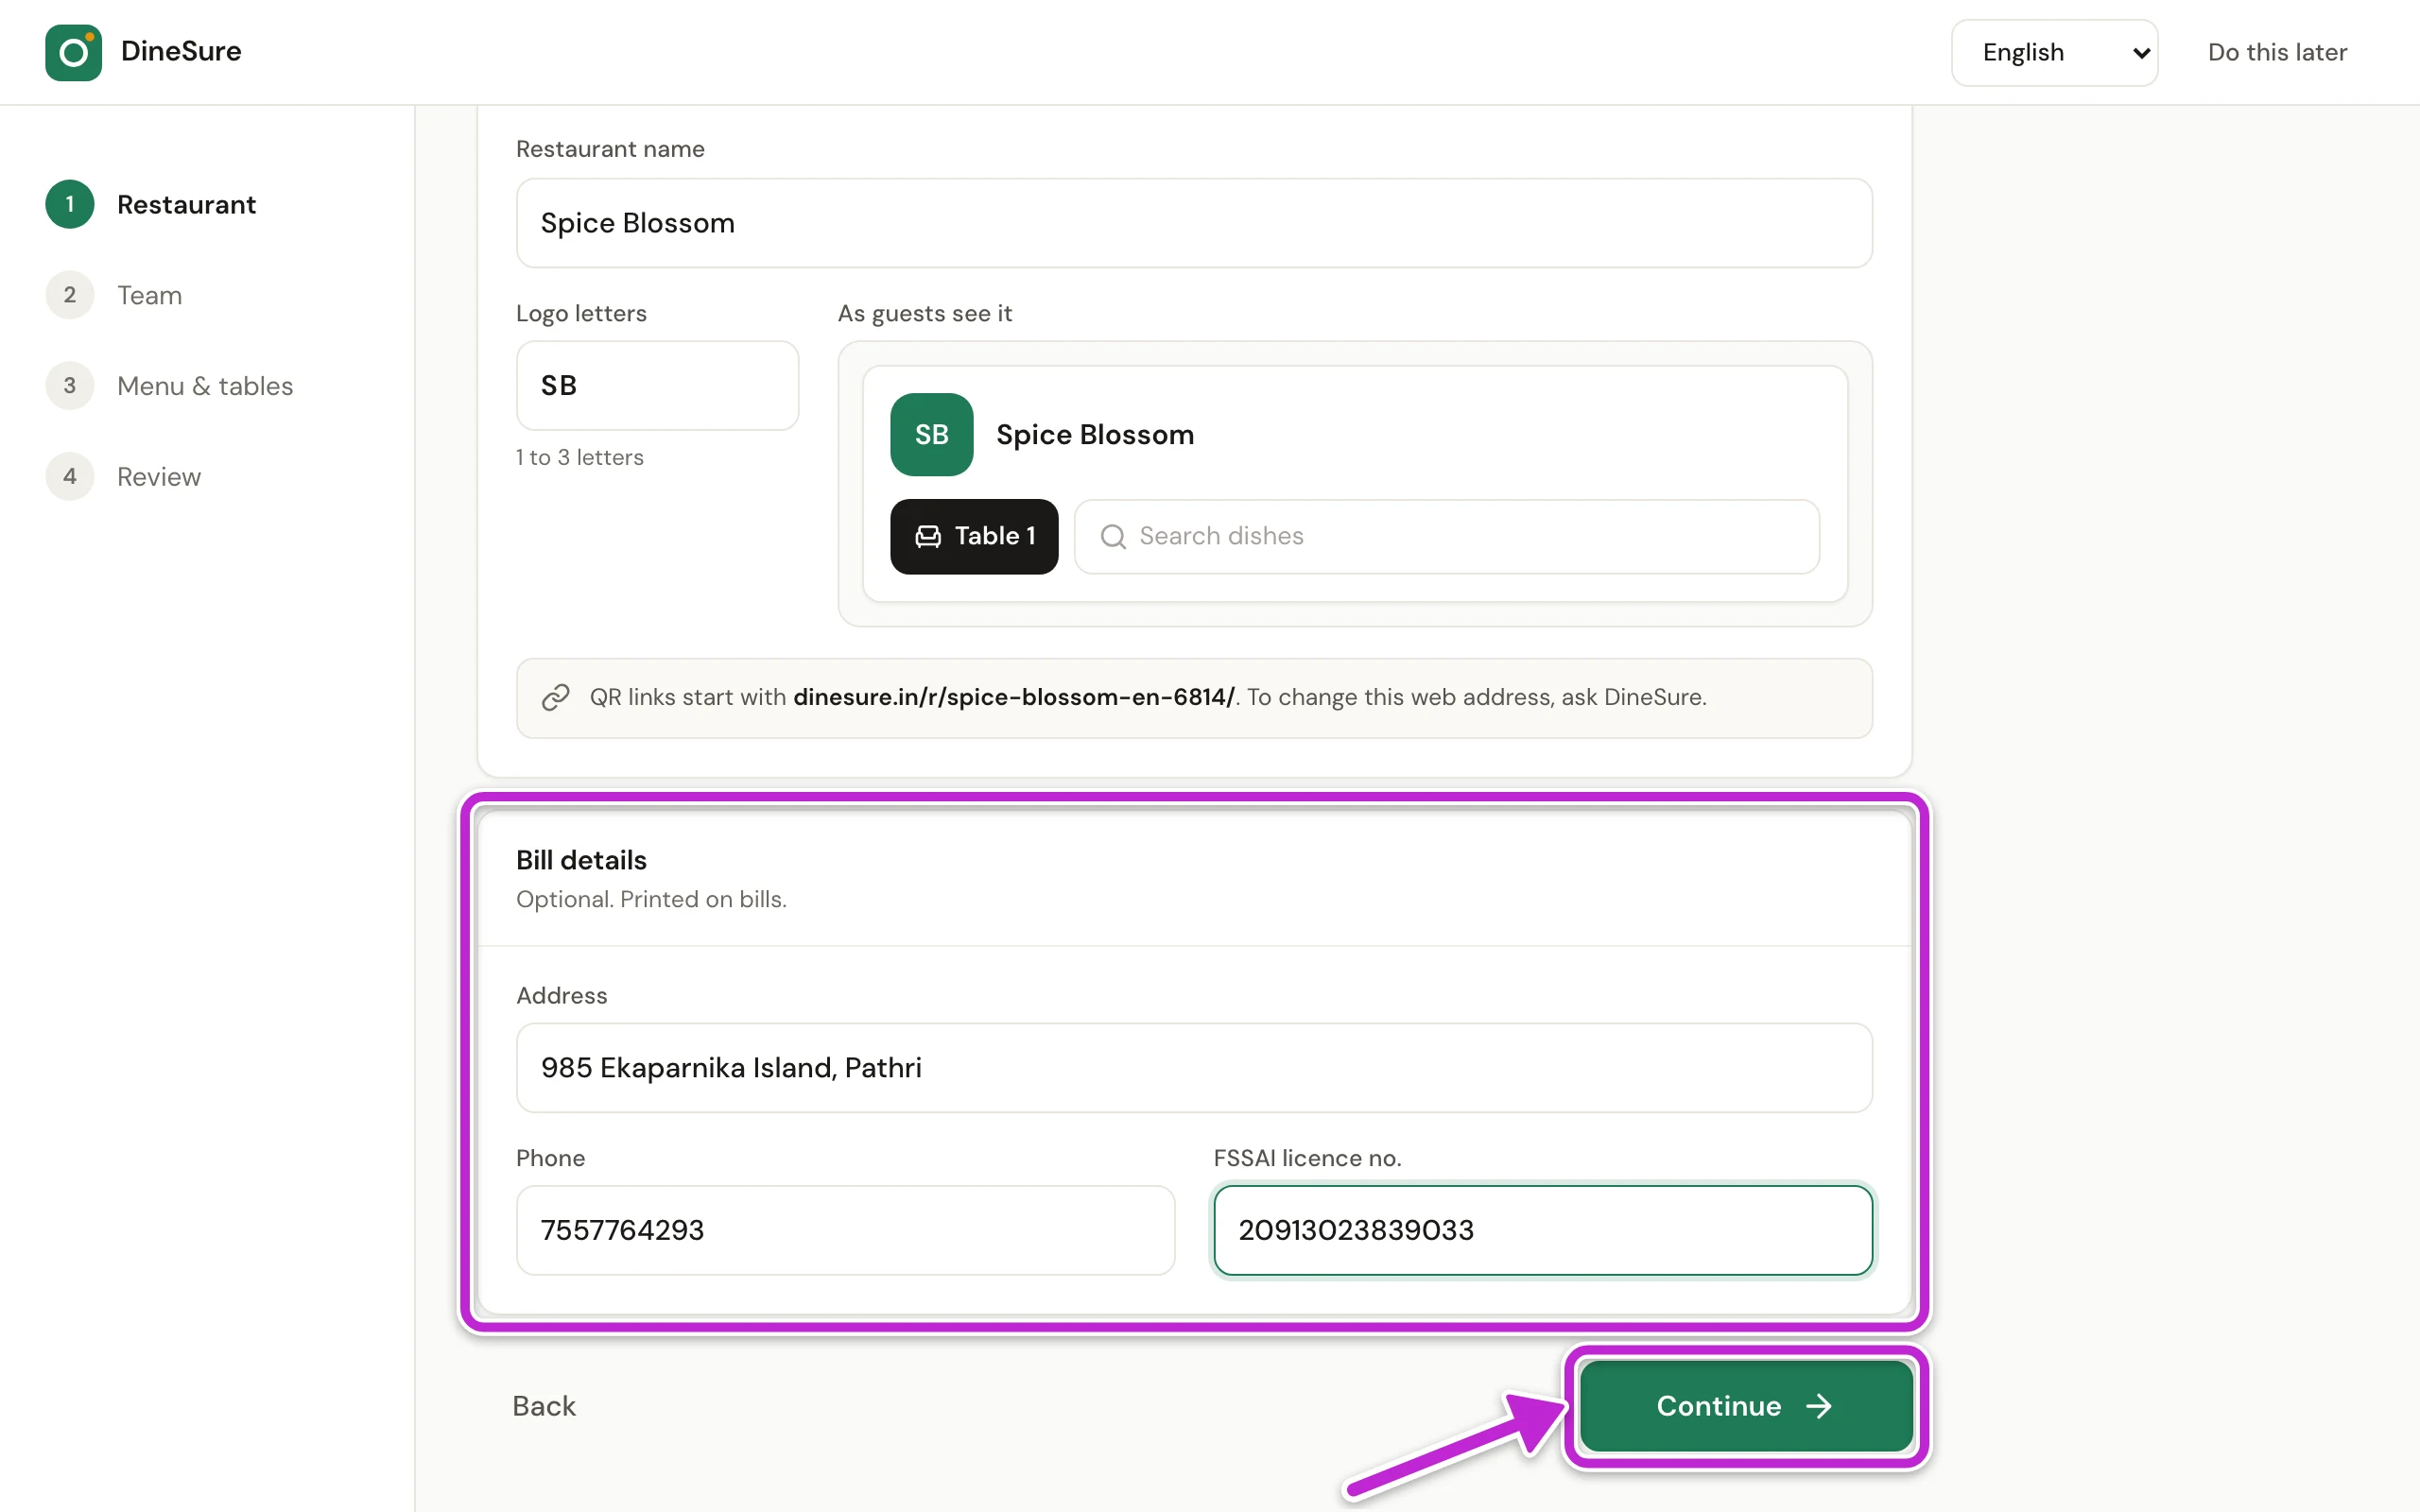
Under Bill details, type your Address, Phone and FSSAI licence no.. These print on your bills. They are optional, and you can add them later in Settings.
-
Click Continue.
Step 2: your team
Section titled “Step 2: your team”Your own name is already on the team as the owner. Add everyone else who uses DineSure here. You can also do this later in Settings (Add your team).
-
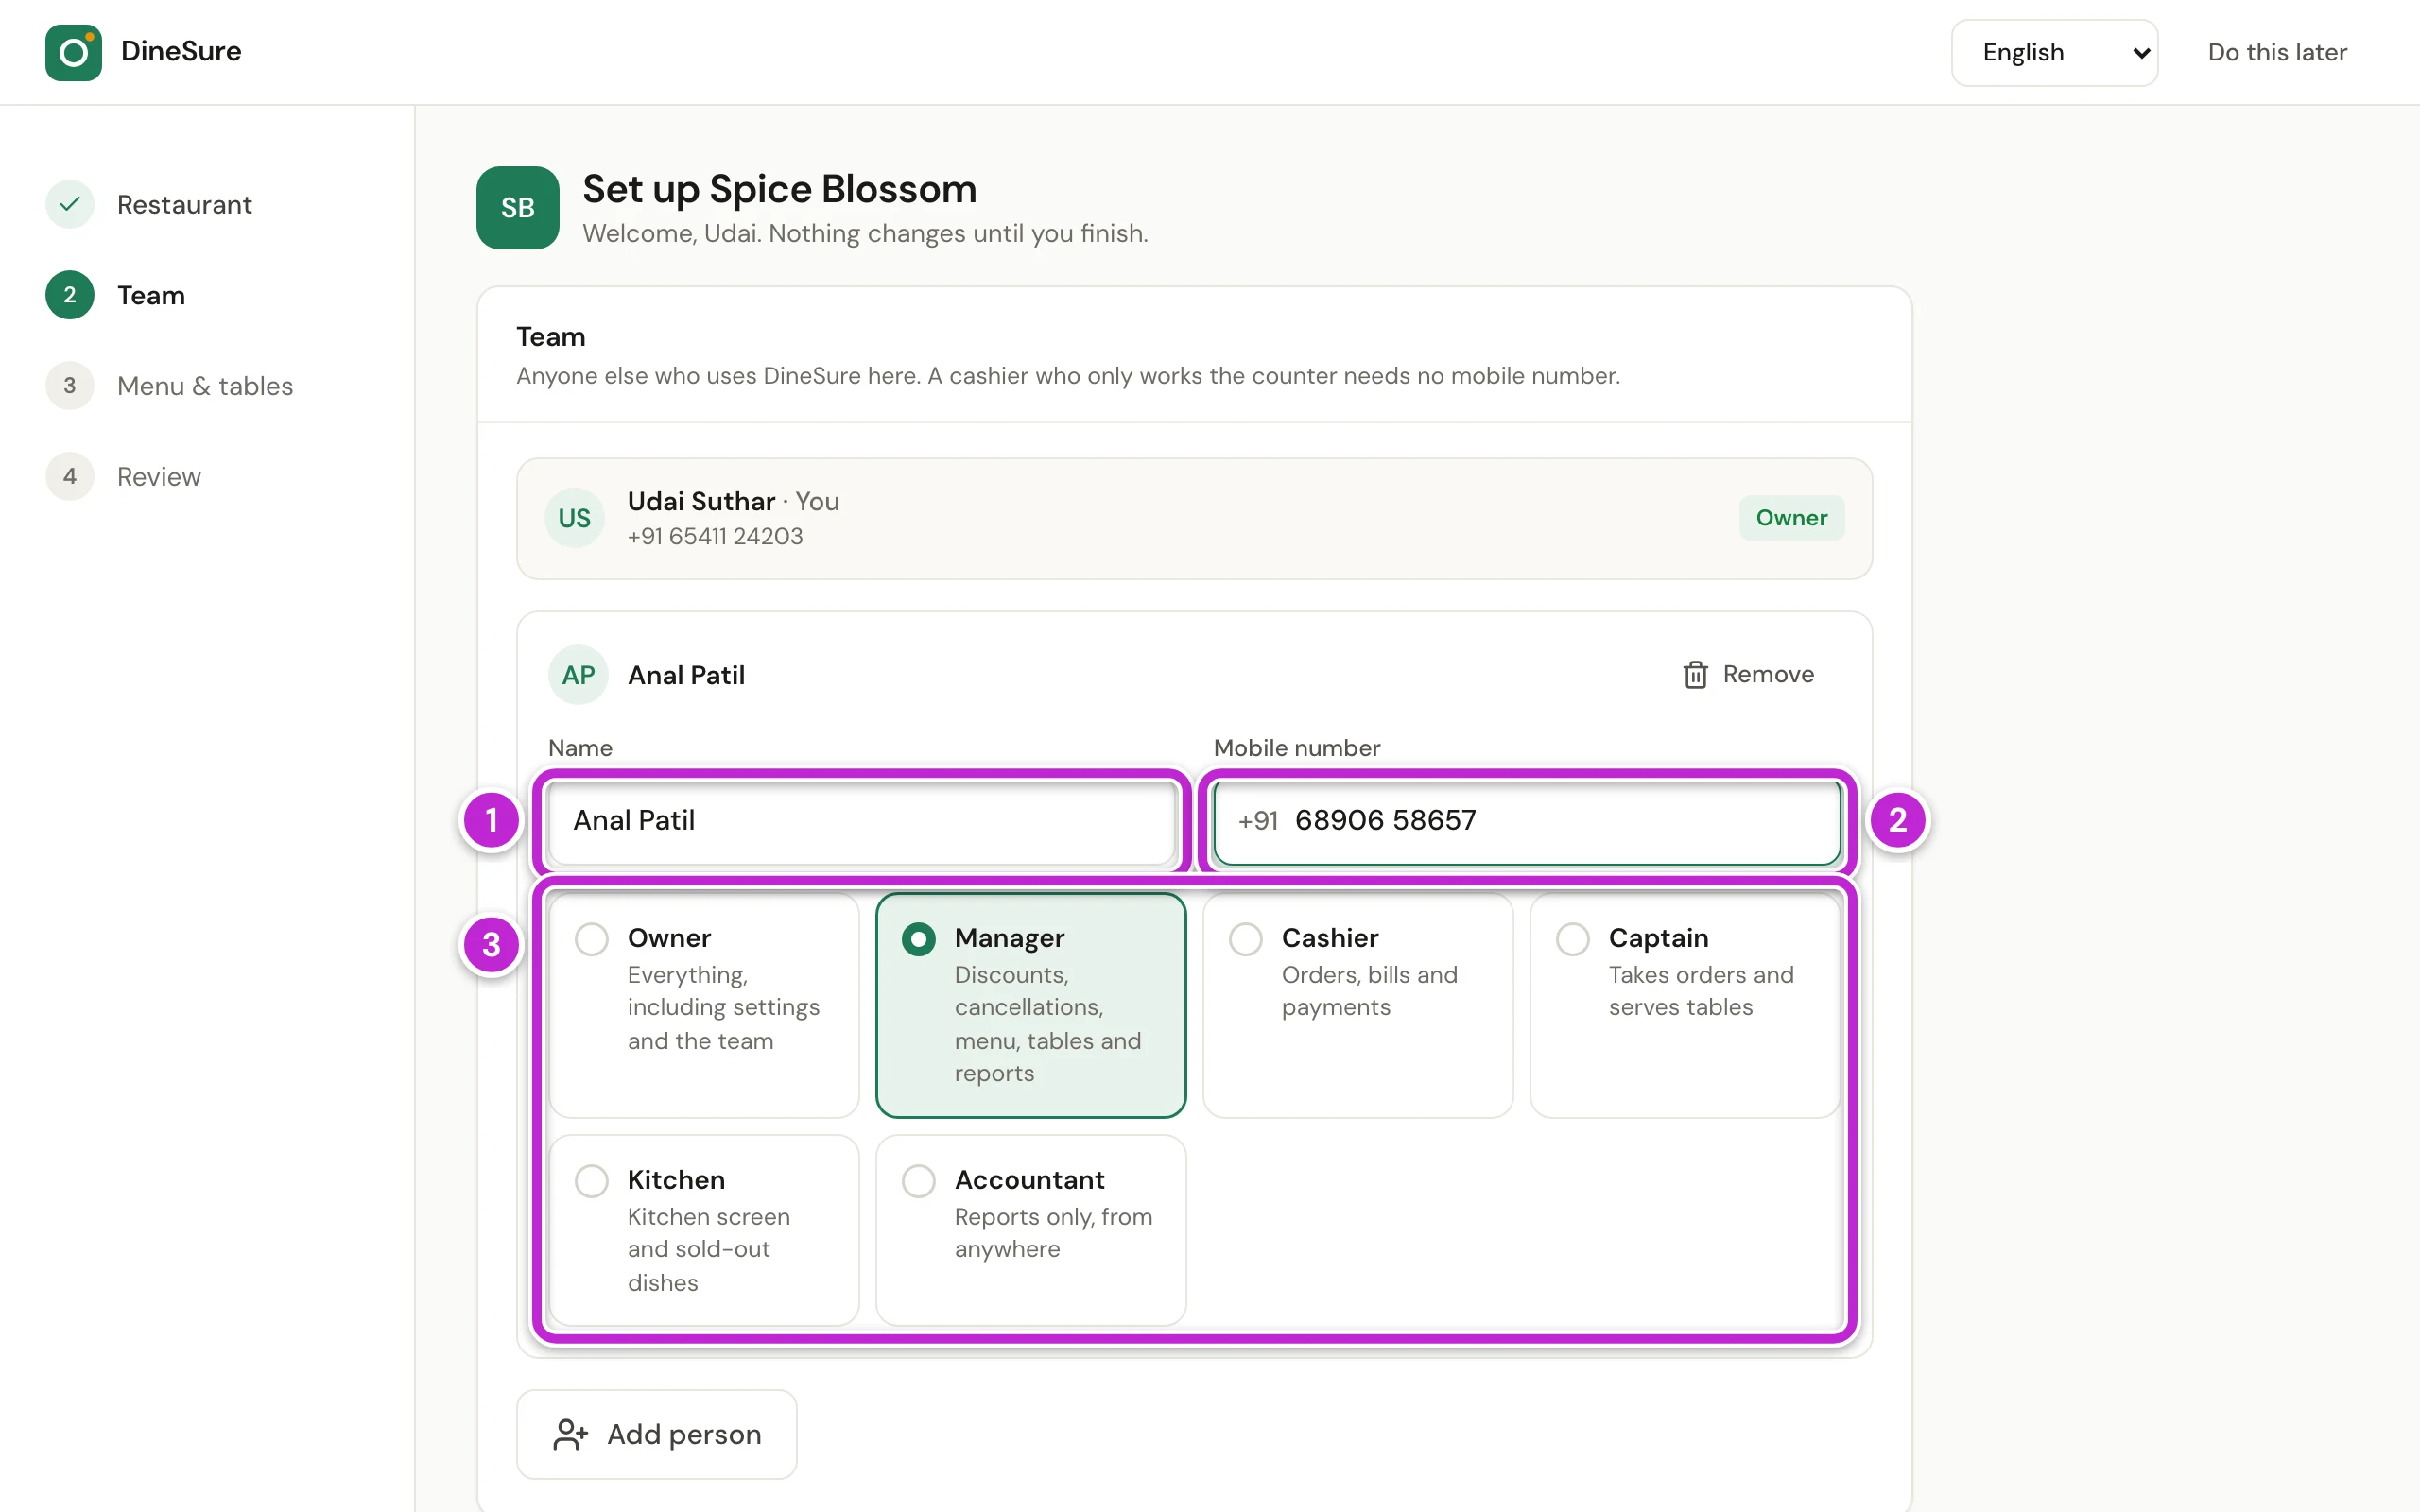
Type the person’s Name (1).
-
Type their Mobile number (2). Owners, managers, captains and accountants need one, because they sign in with it. A cashier or a kitchen person who only works at the counter can leave it empty.
-
Click their role (3): Owner, Manager, Cashier, Captain, Kitchen or Accountant.
-
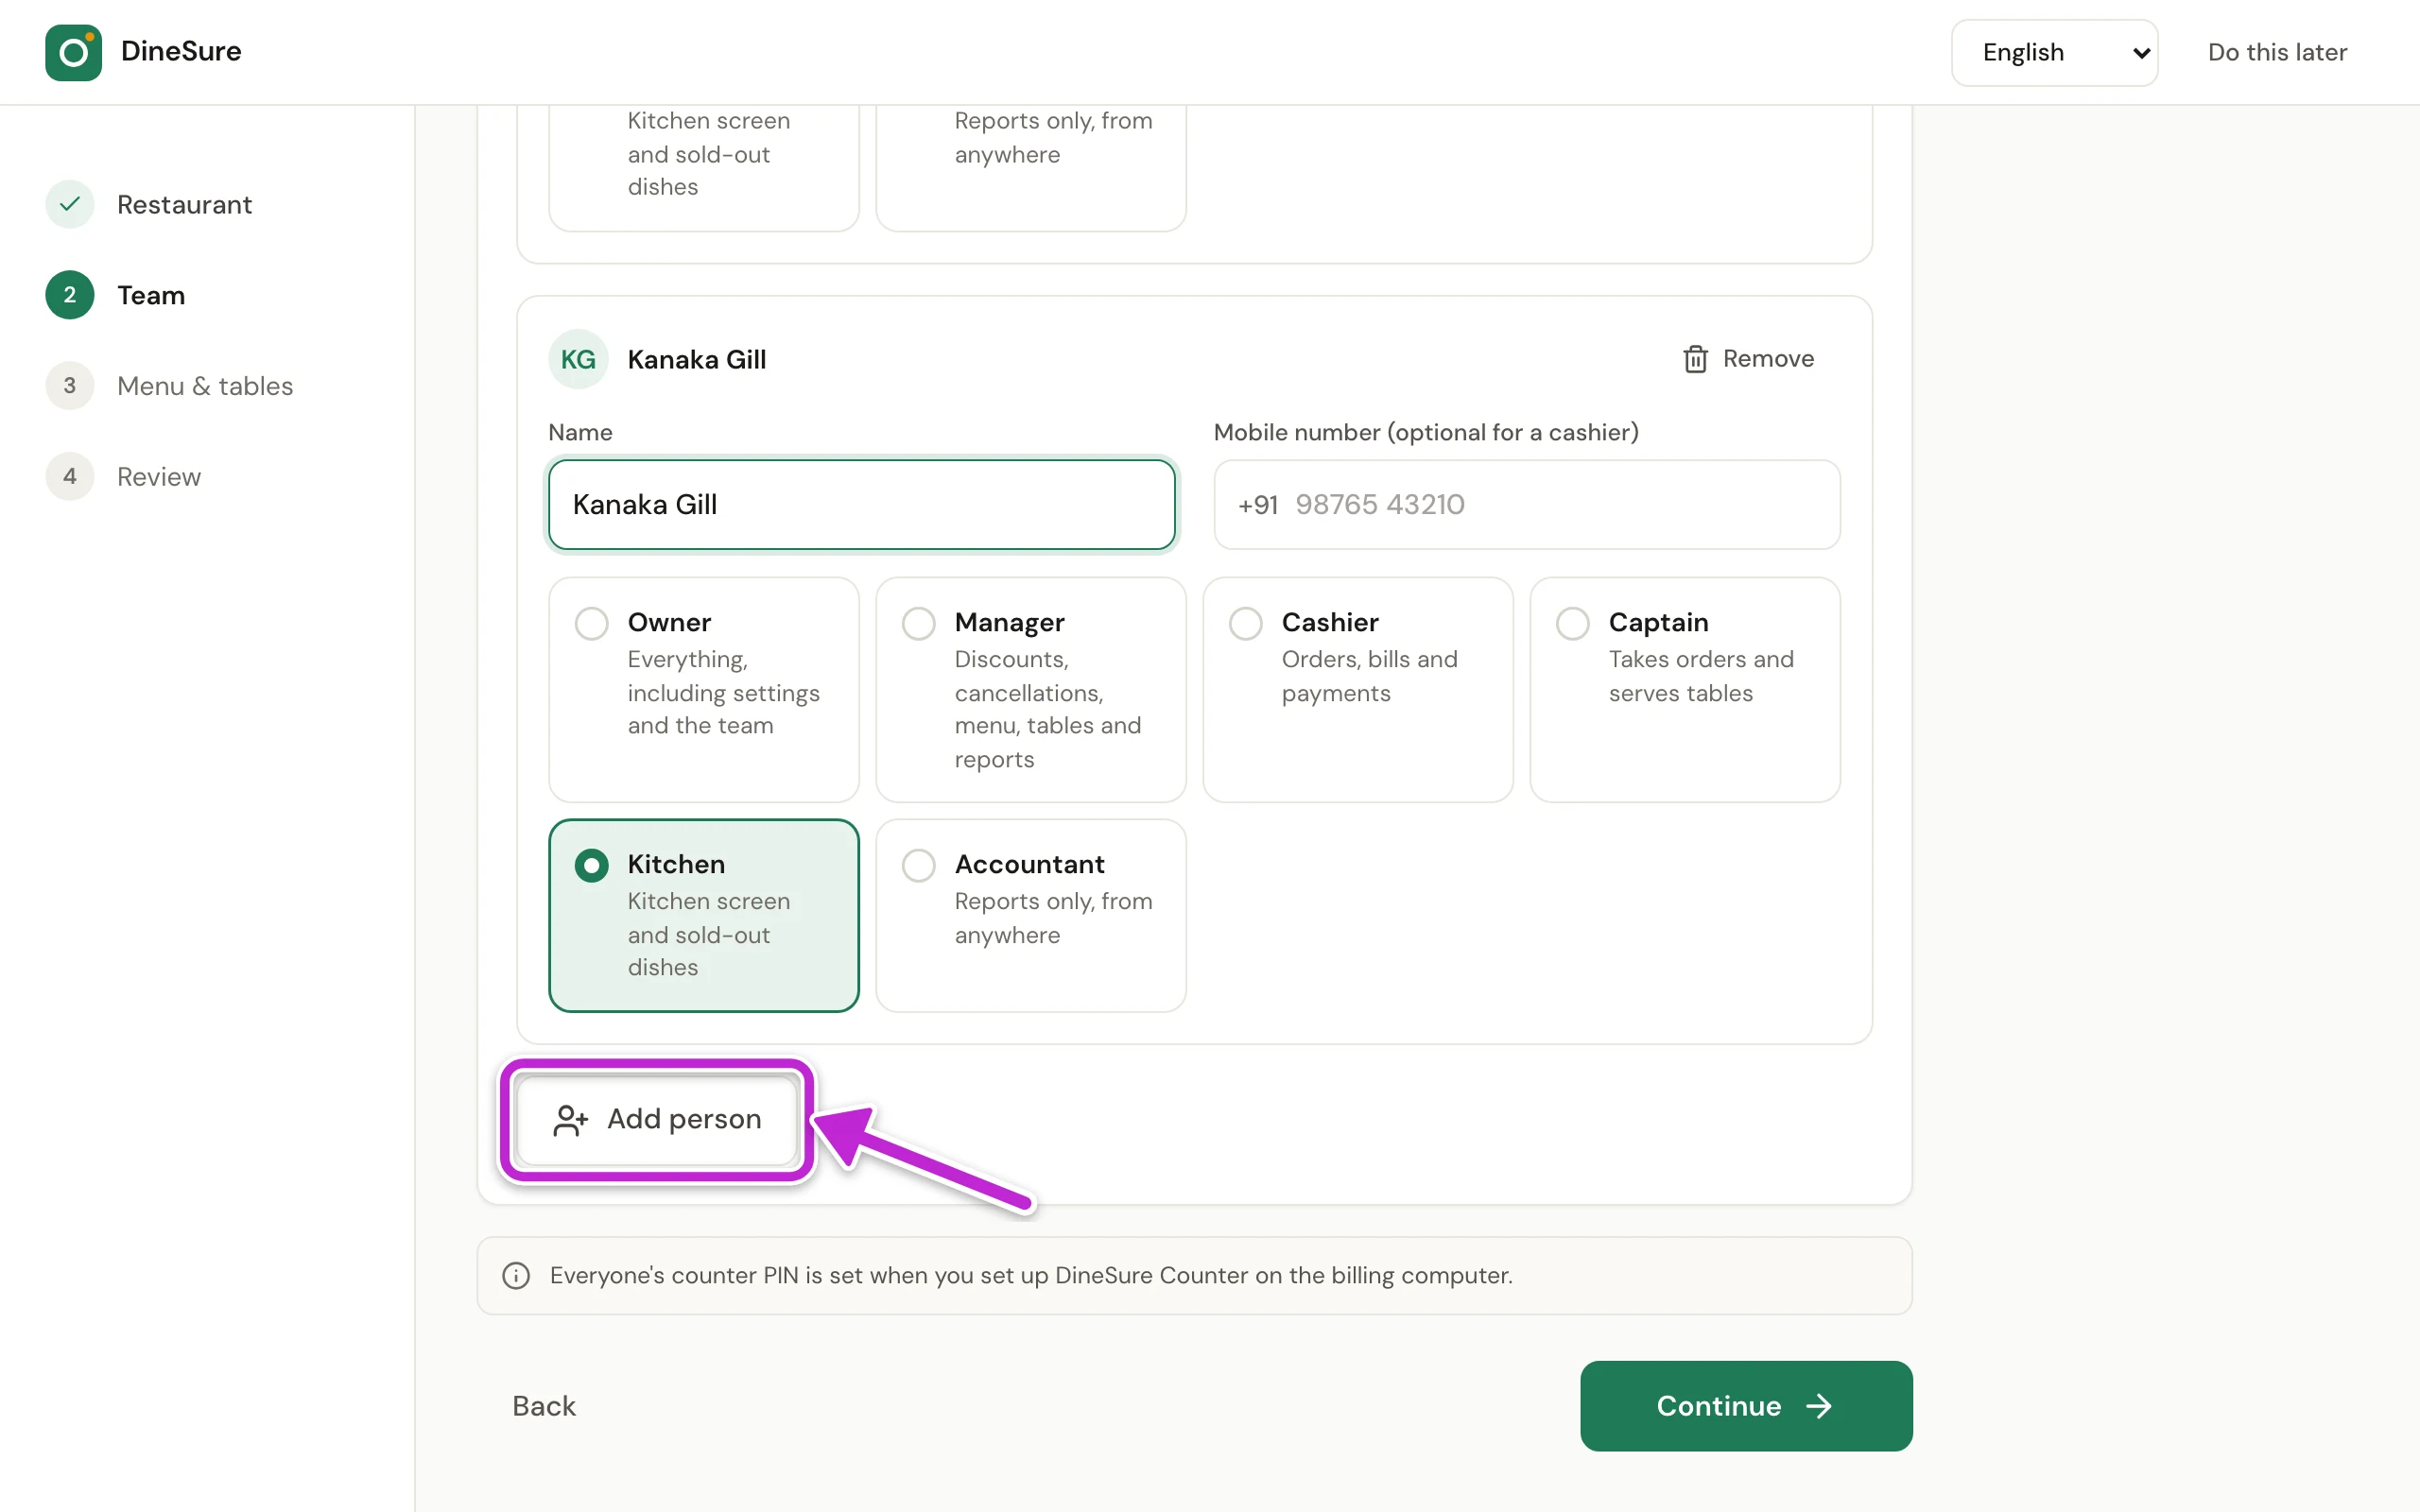
Click Add person for the next person, and fill in their card the same way. To take someone off, click Remove on their card.
-
Click Continue.
Step 3: menu and tables
Section titled “Step 3: menu and tables”-
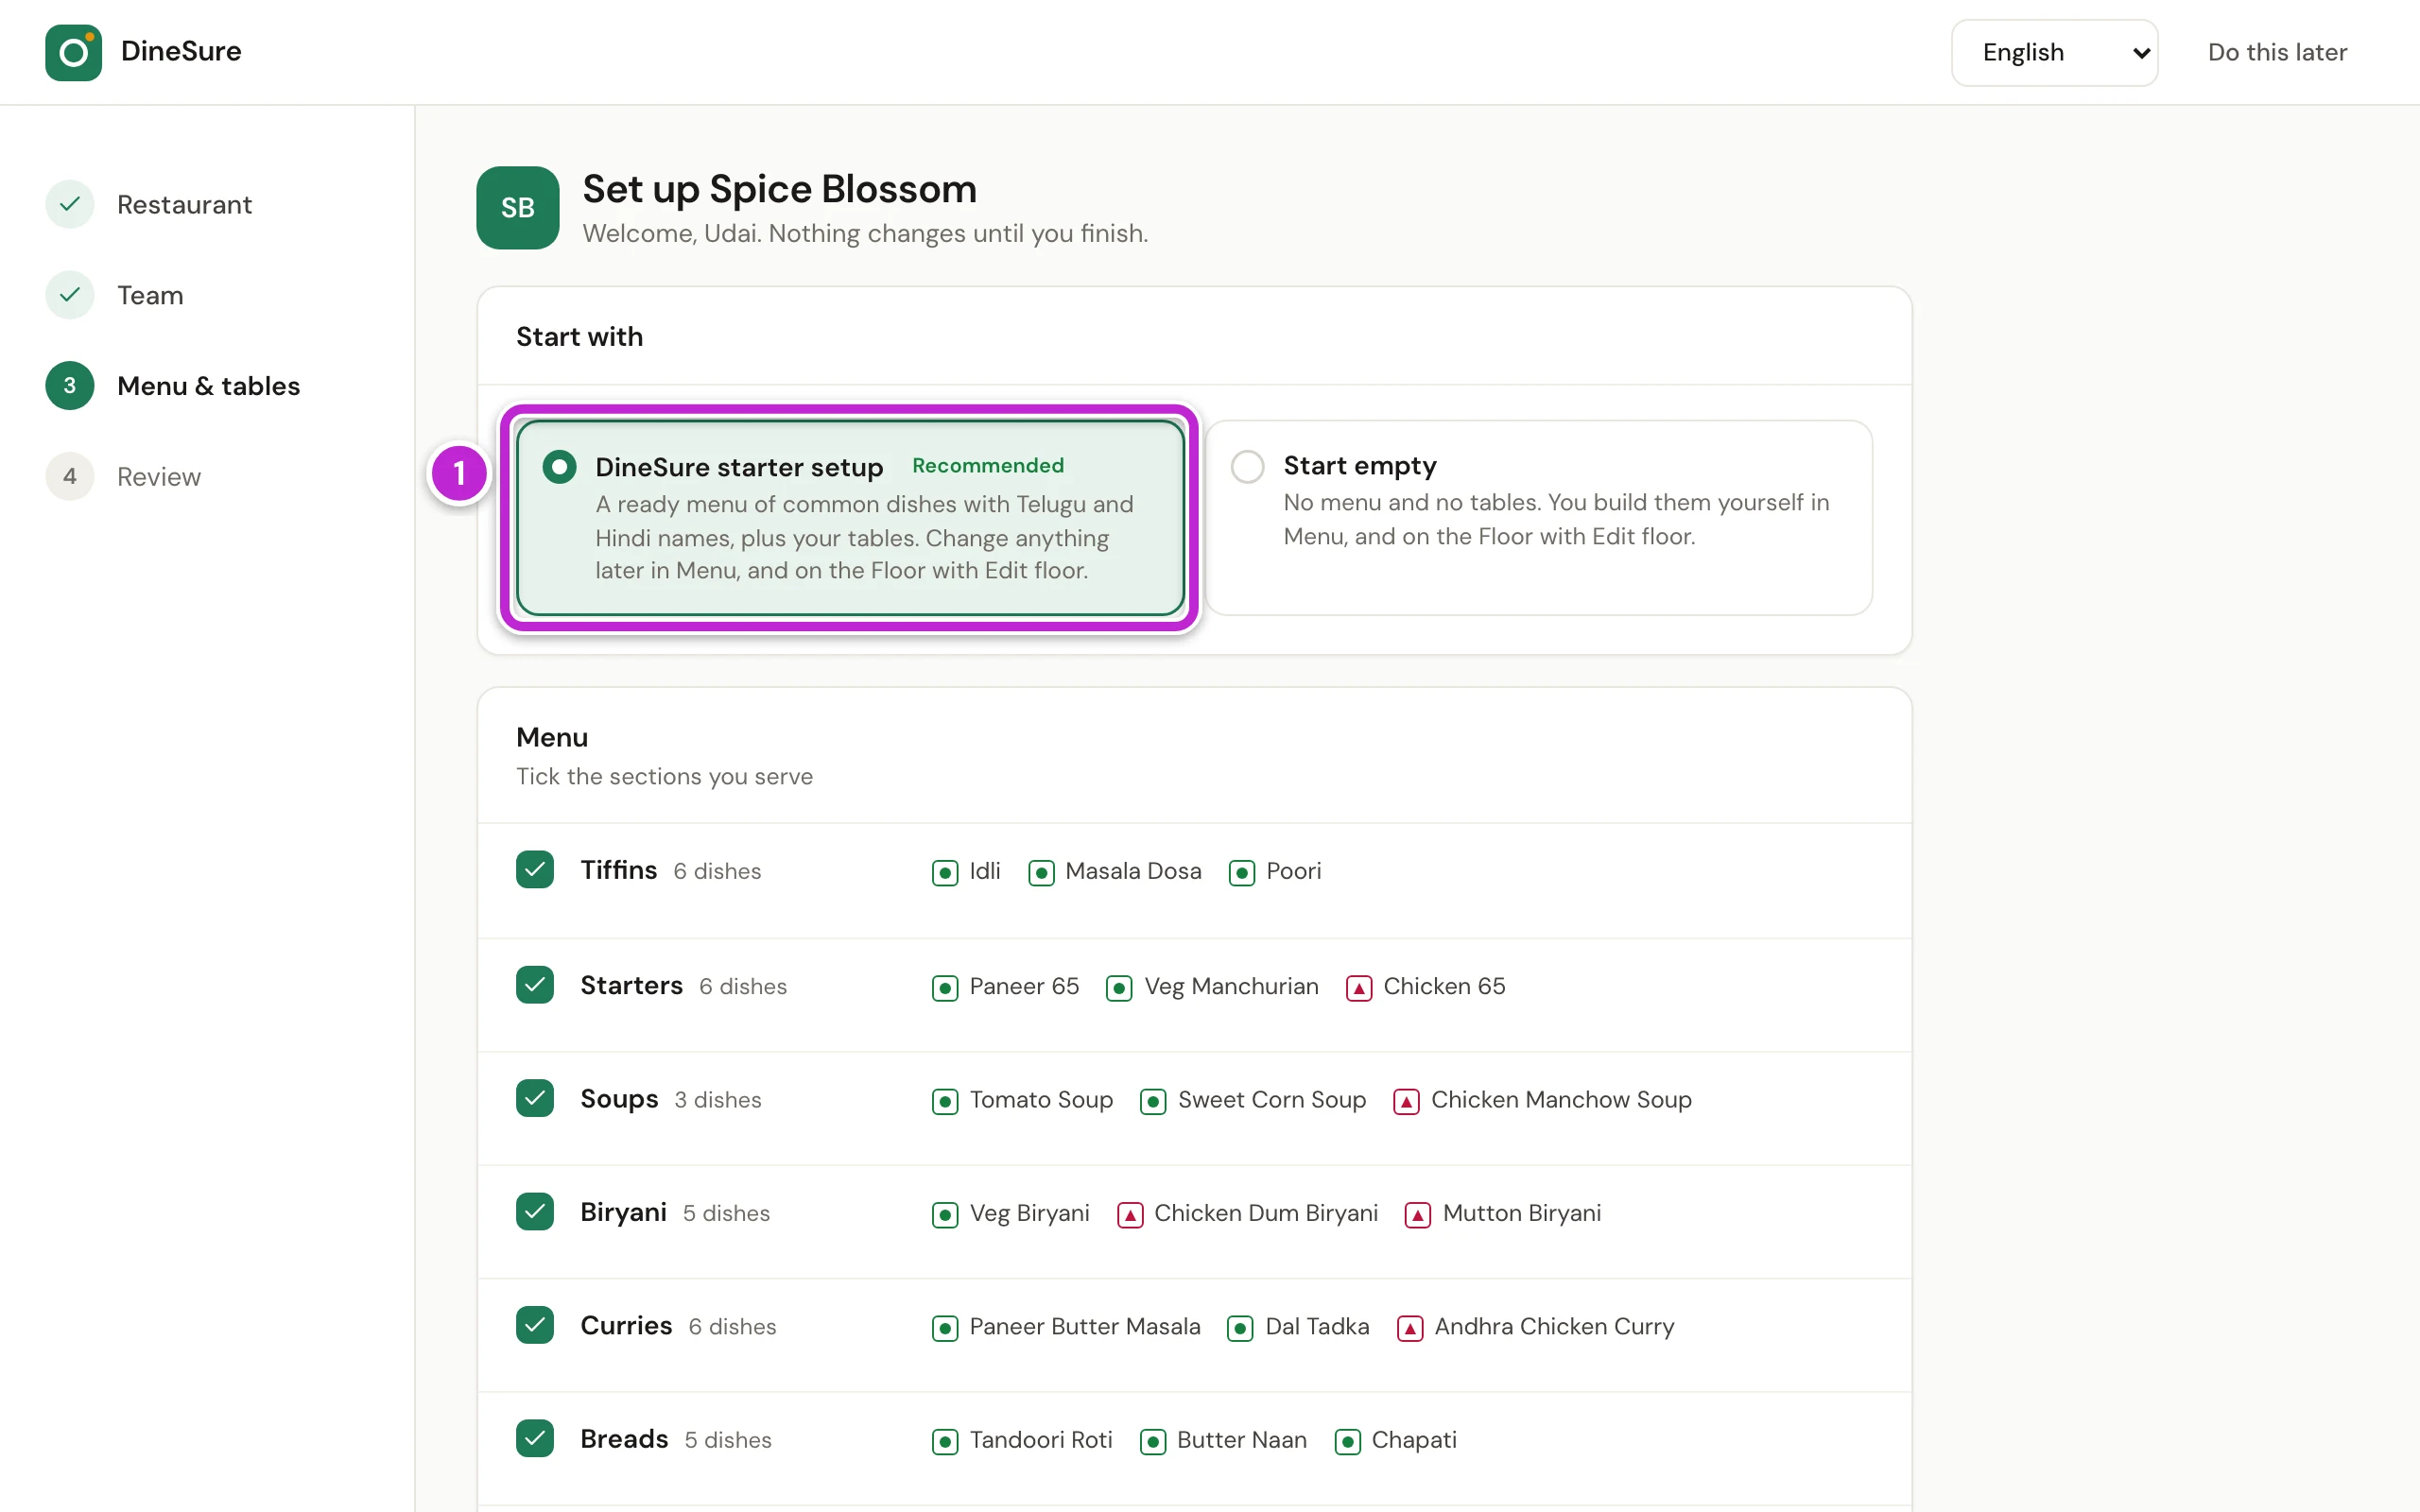
Under Start with, click DineSure starter setup (1) to get a ready menu of common dishes with Telugu and Hindi names, and your tables. Click Start empty only if you want to type every dish yourself.
-
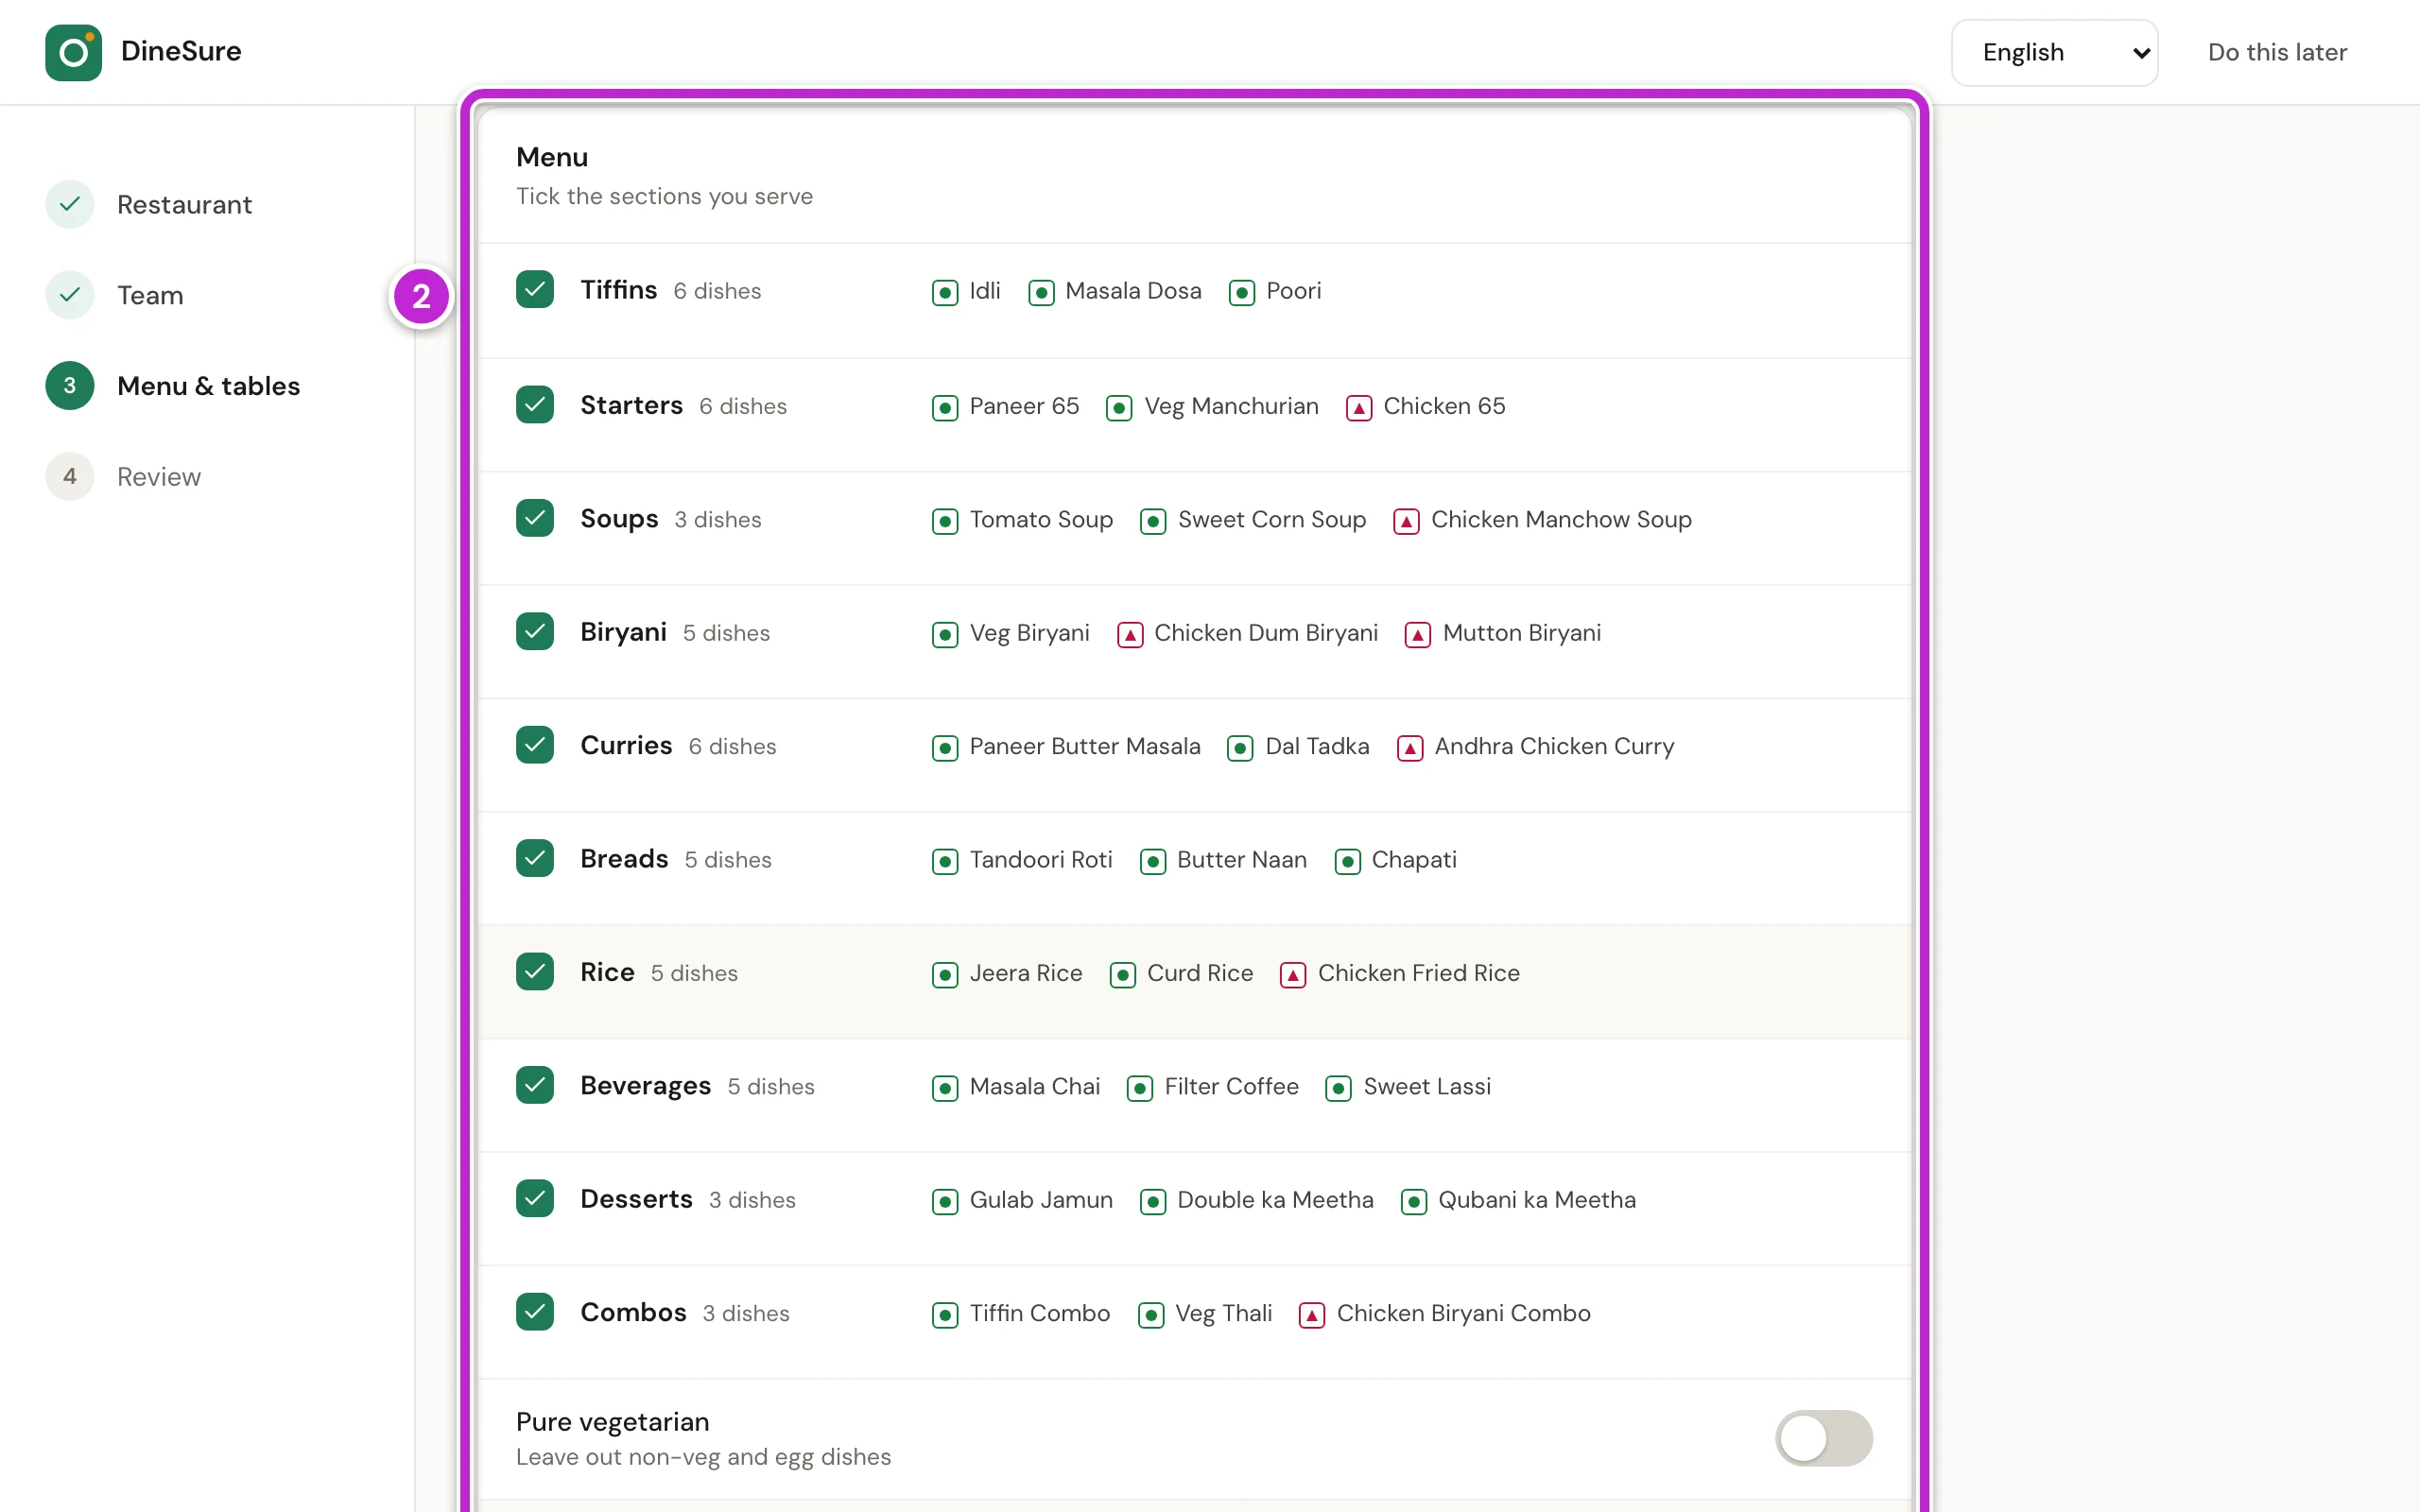
In the Menu box (2), tick the sections you serve and untick the rest. Turn on Pure vegetarian if you serve no non-veg or egg dishes. Click Preview menu to see the dishes and their prices.
-
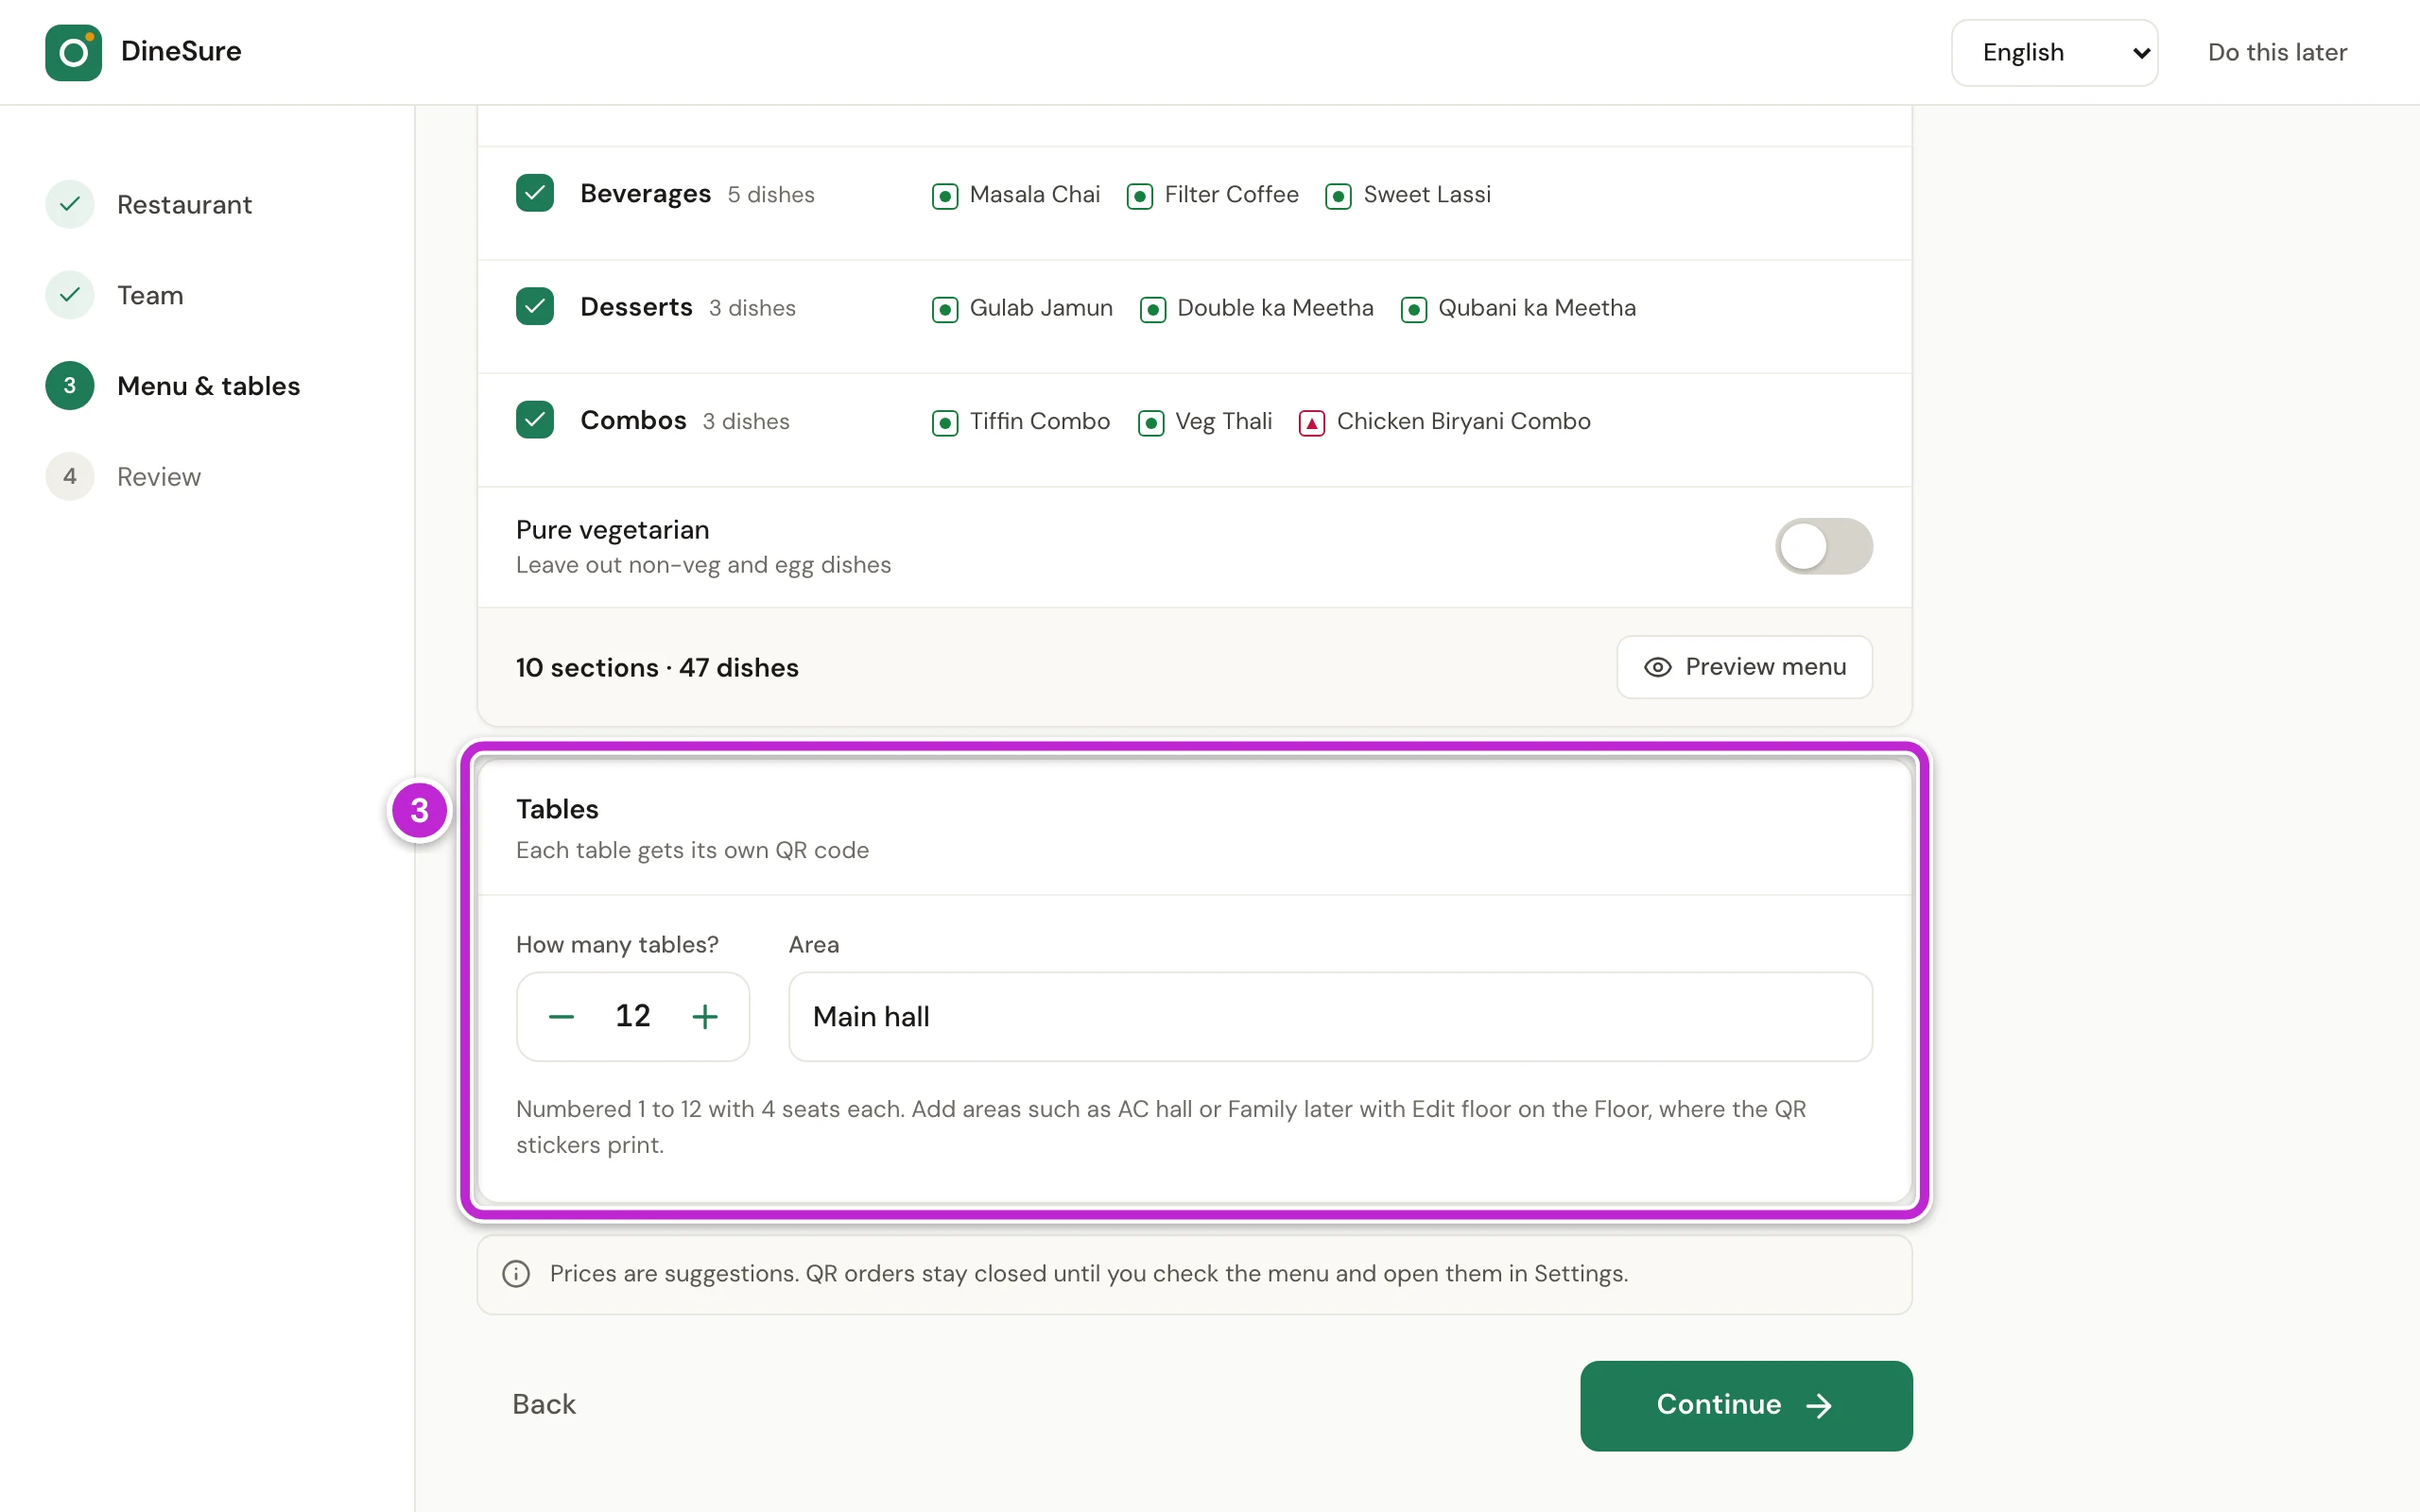
In the Tables box (3), set How many tables? with the minus and plus buttons. Each table gets its own QR code.
-
Check the Area name, for example Main hall. You add more areas, such as an AC hall, later on the Floor.
-
Click Continue.
The starter menu is a starting point, not your final menu. Its prices are suggestions. After setup, change the dishes, names and prices to your own on the Menu page (Add your menu), and change the tables and areas with Edit floor (Arrange tables and print QR stickers).
Step 4: review and finish
Section titled “Step 4: review and finish”-
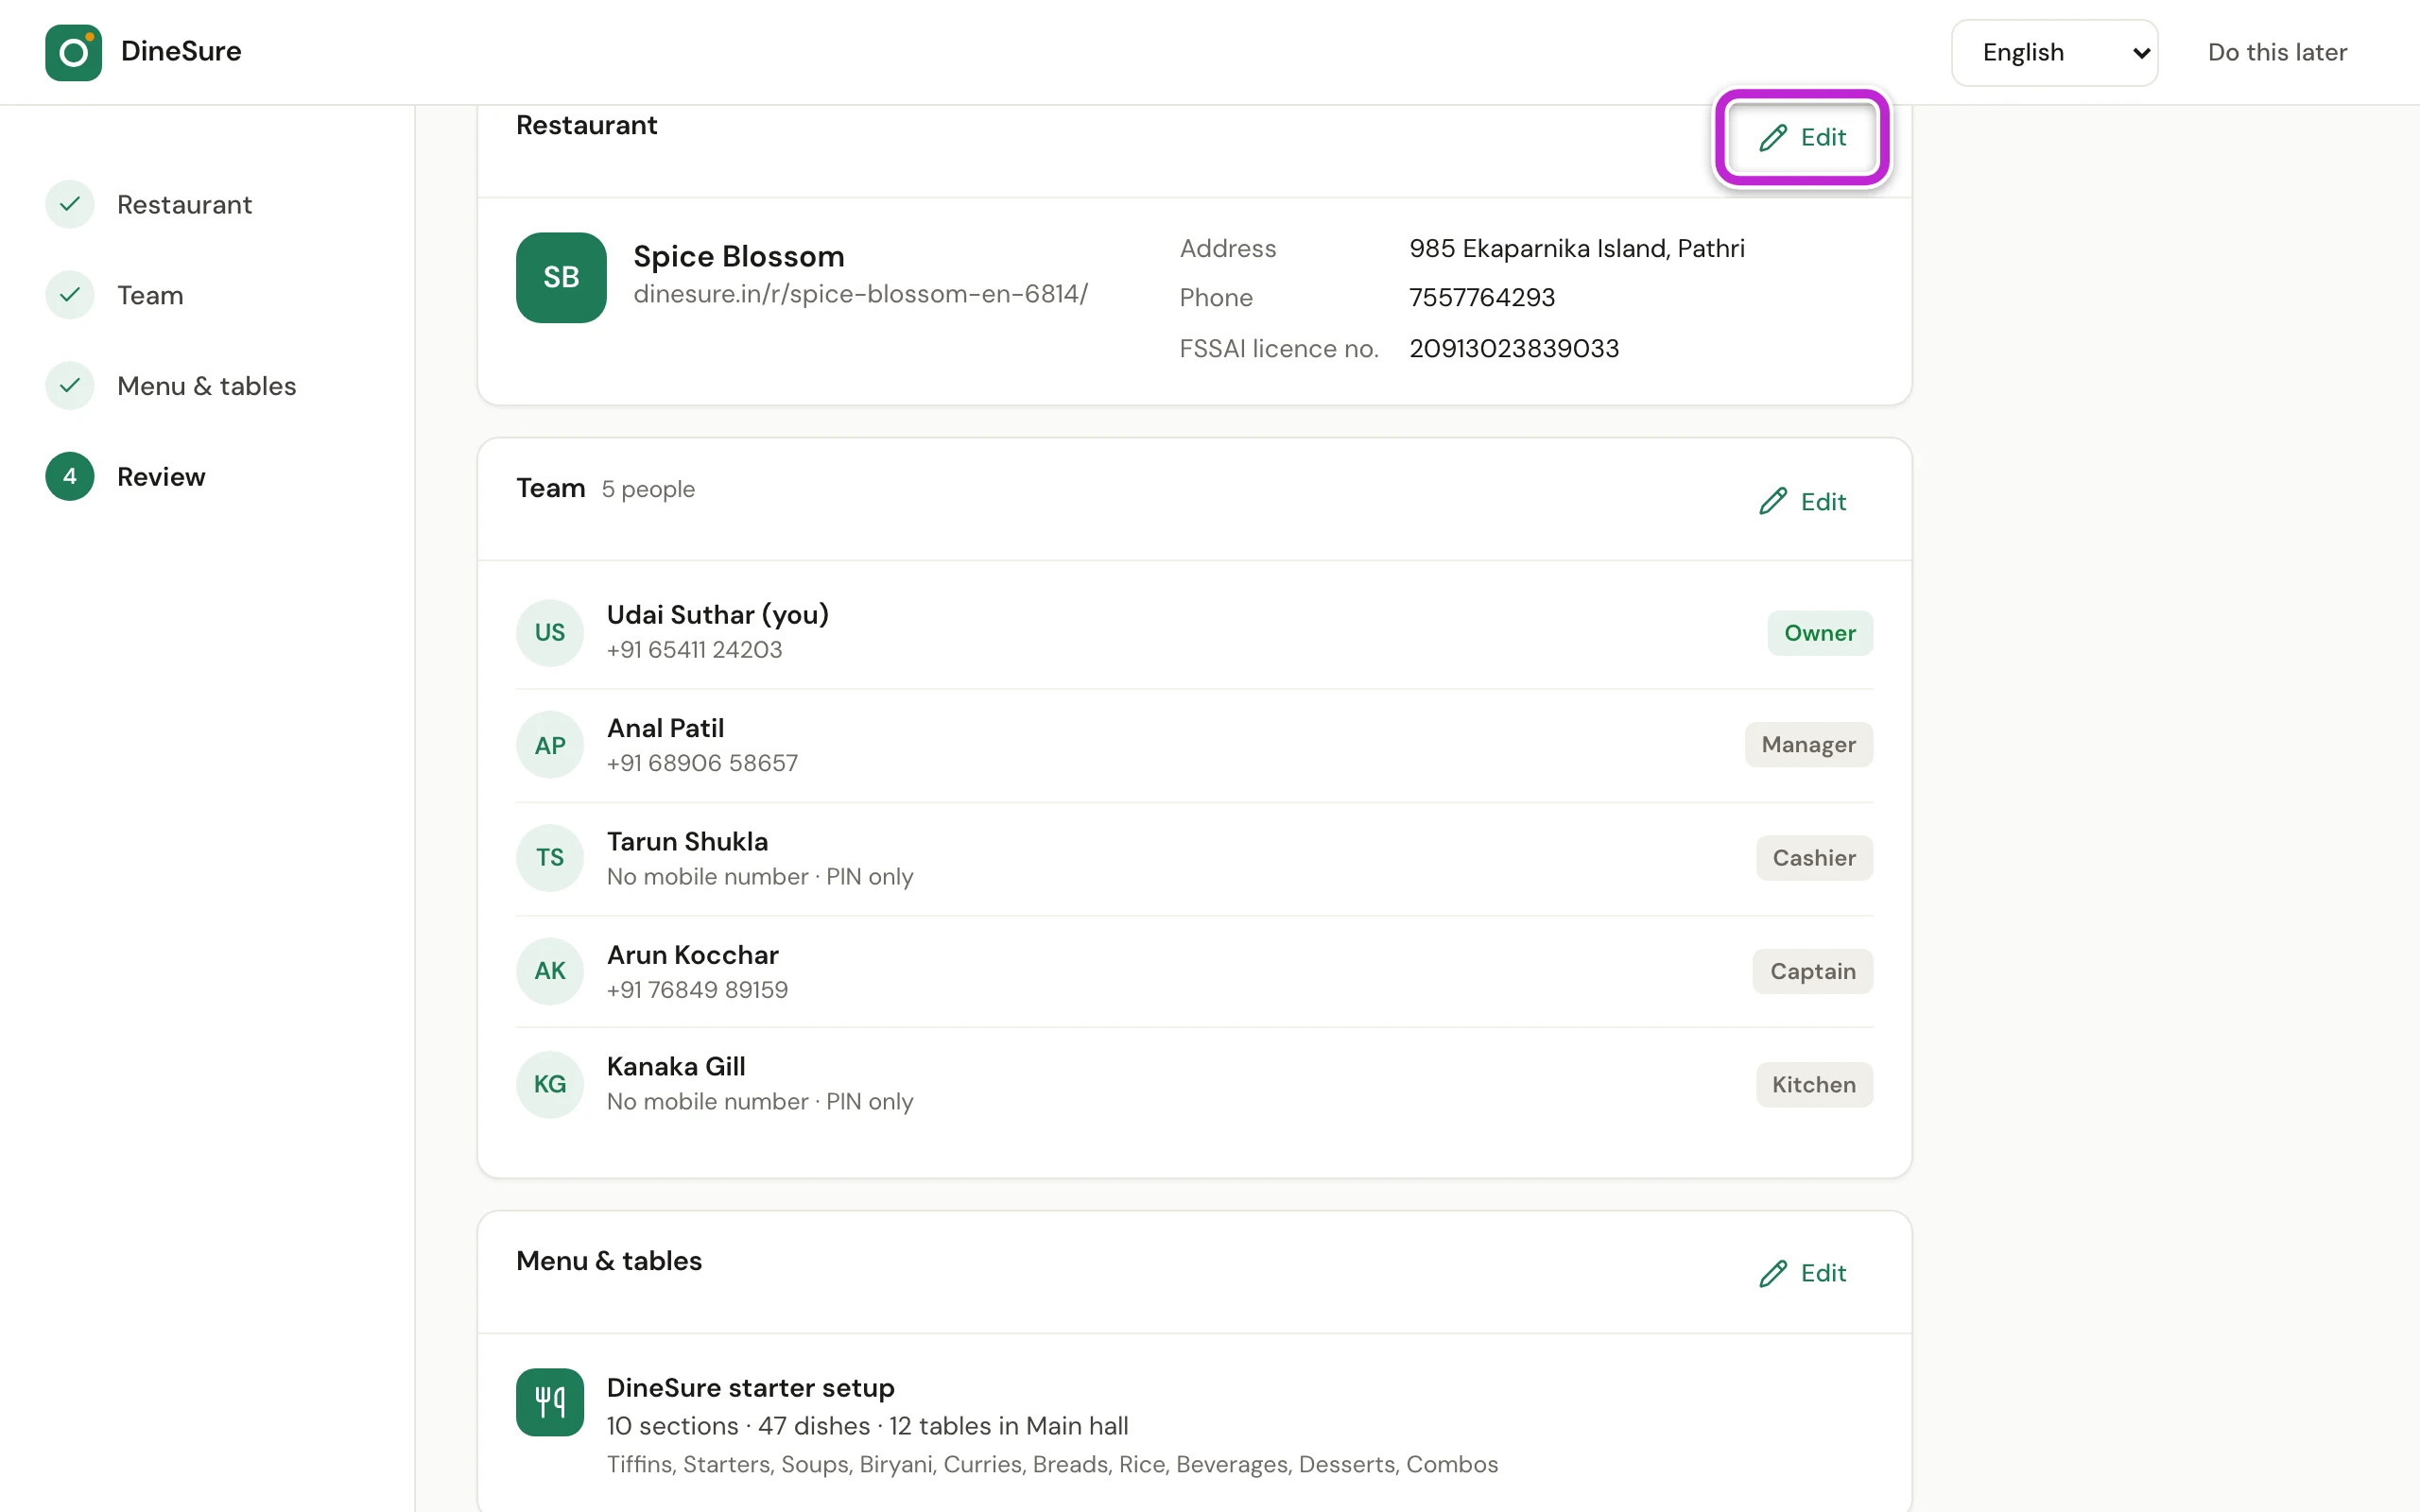
Read the summary of your restaurant, your team, and your menu and tables. People without a mobile number show No mobile number · PIN only.
-
To change something, click Edit on its box. DineSure takes you back to that step. Click Continue to review to come back.
-
Below the summary, Set for you lists what DineSure sets at the start. For example, QR orders stay closed until you open them, and the counter accepts each QR order first. You can change these in Settings.
-
Click Finish setup.
Your restaurant is ready
Section titled “Your restaurant is ready”DineSure sets everything up at once and shows that your restaurant is ready, with the number of people, dishes and tables.
-
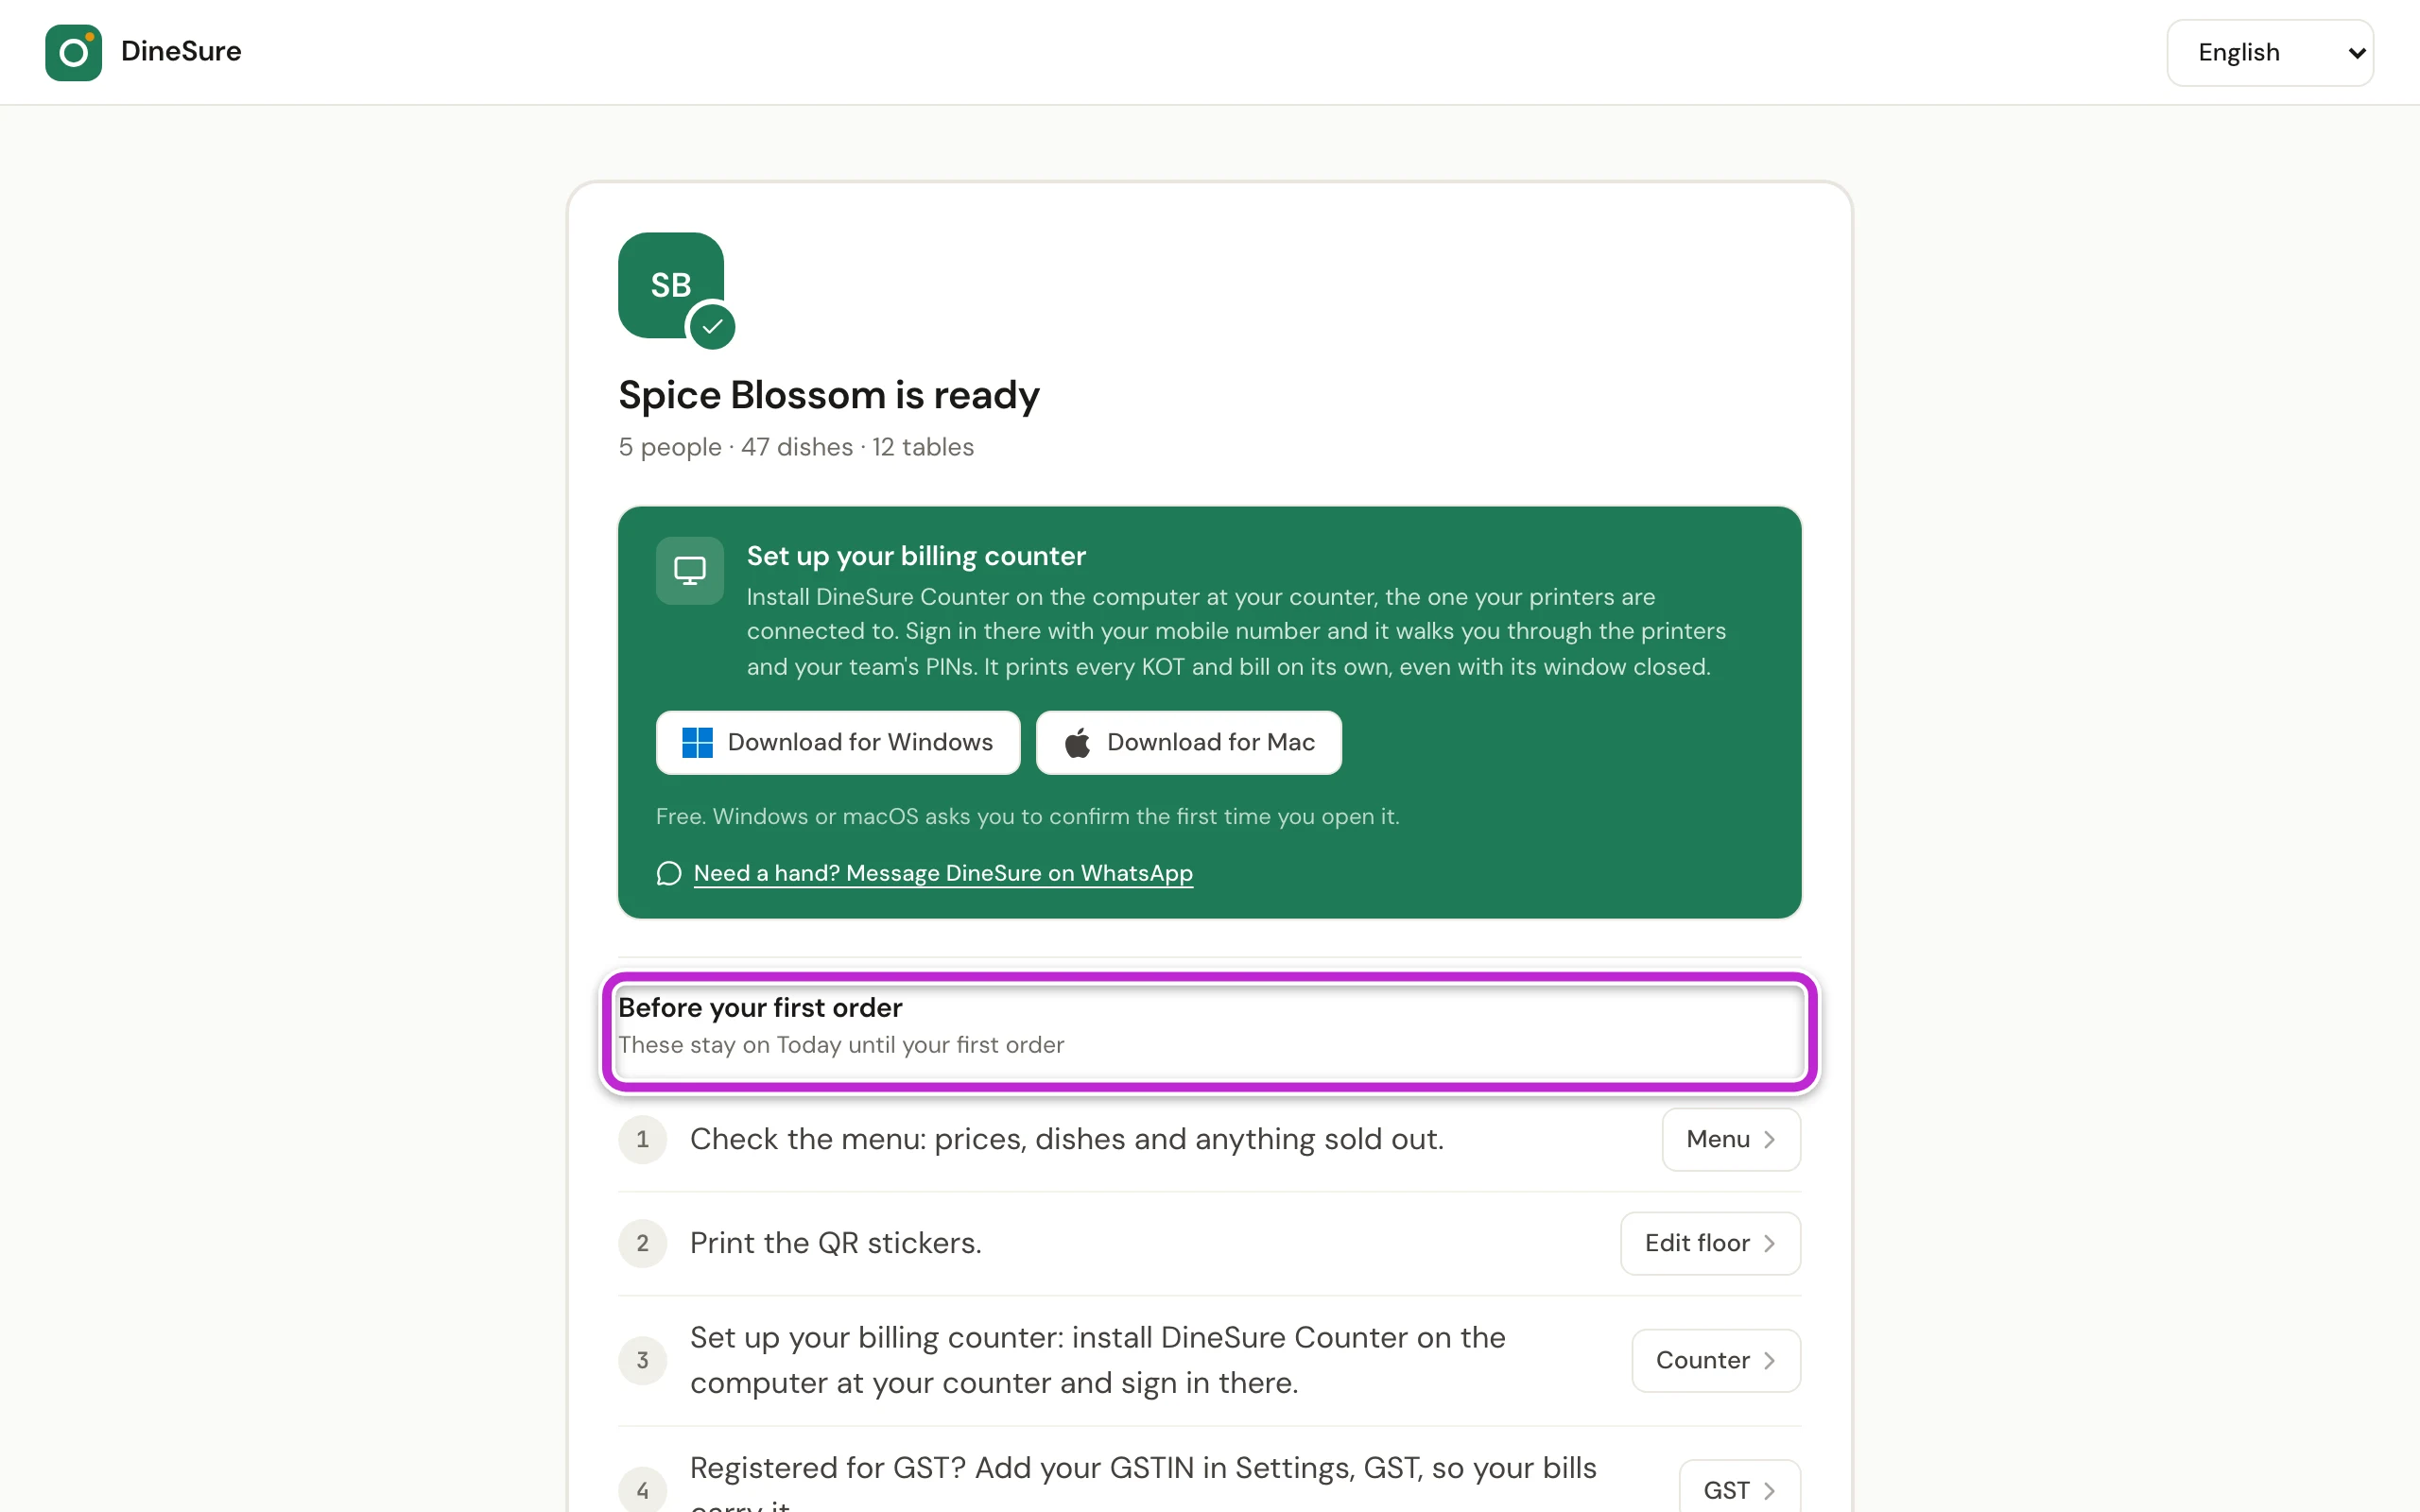
Under Set up your billing counter, you can download DineSure Counter for the computer at your counter: click Download for Windows or Download for Mac. See Set up the billing counter and printers.
-
Read the list Before your first order. It shows what is left to do before guests order.
-
Click Go to Today. In DineSure Counter, click Set up this counter instead.
Before your first order
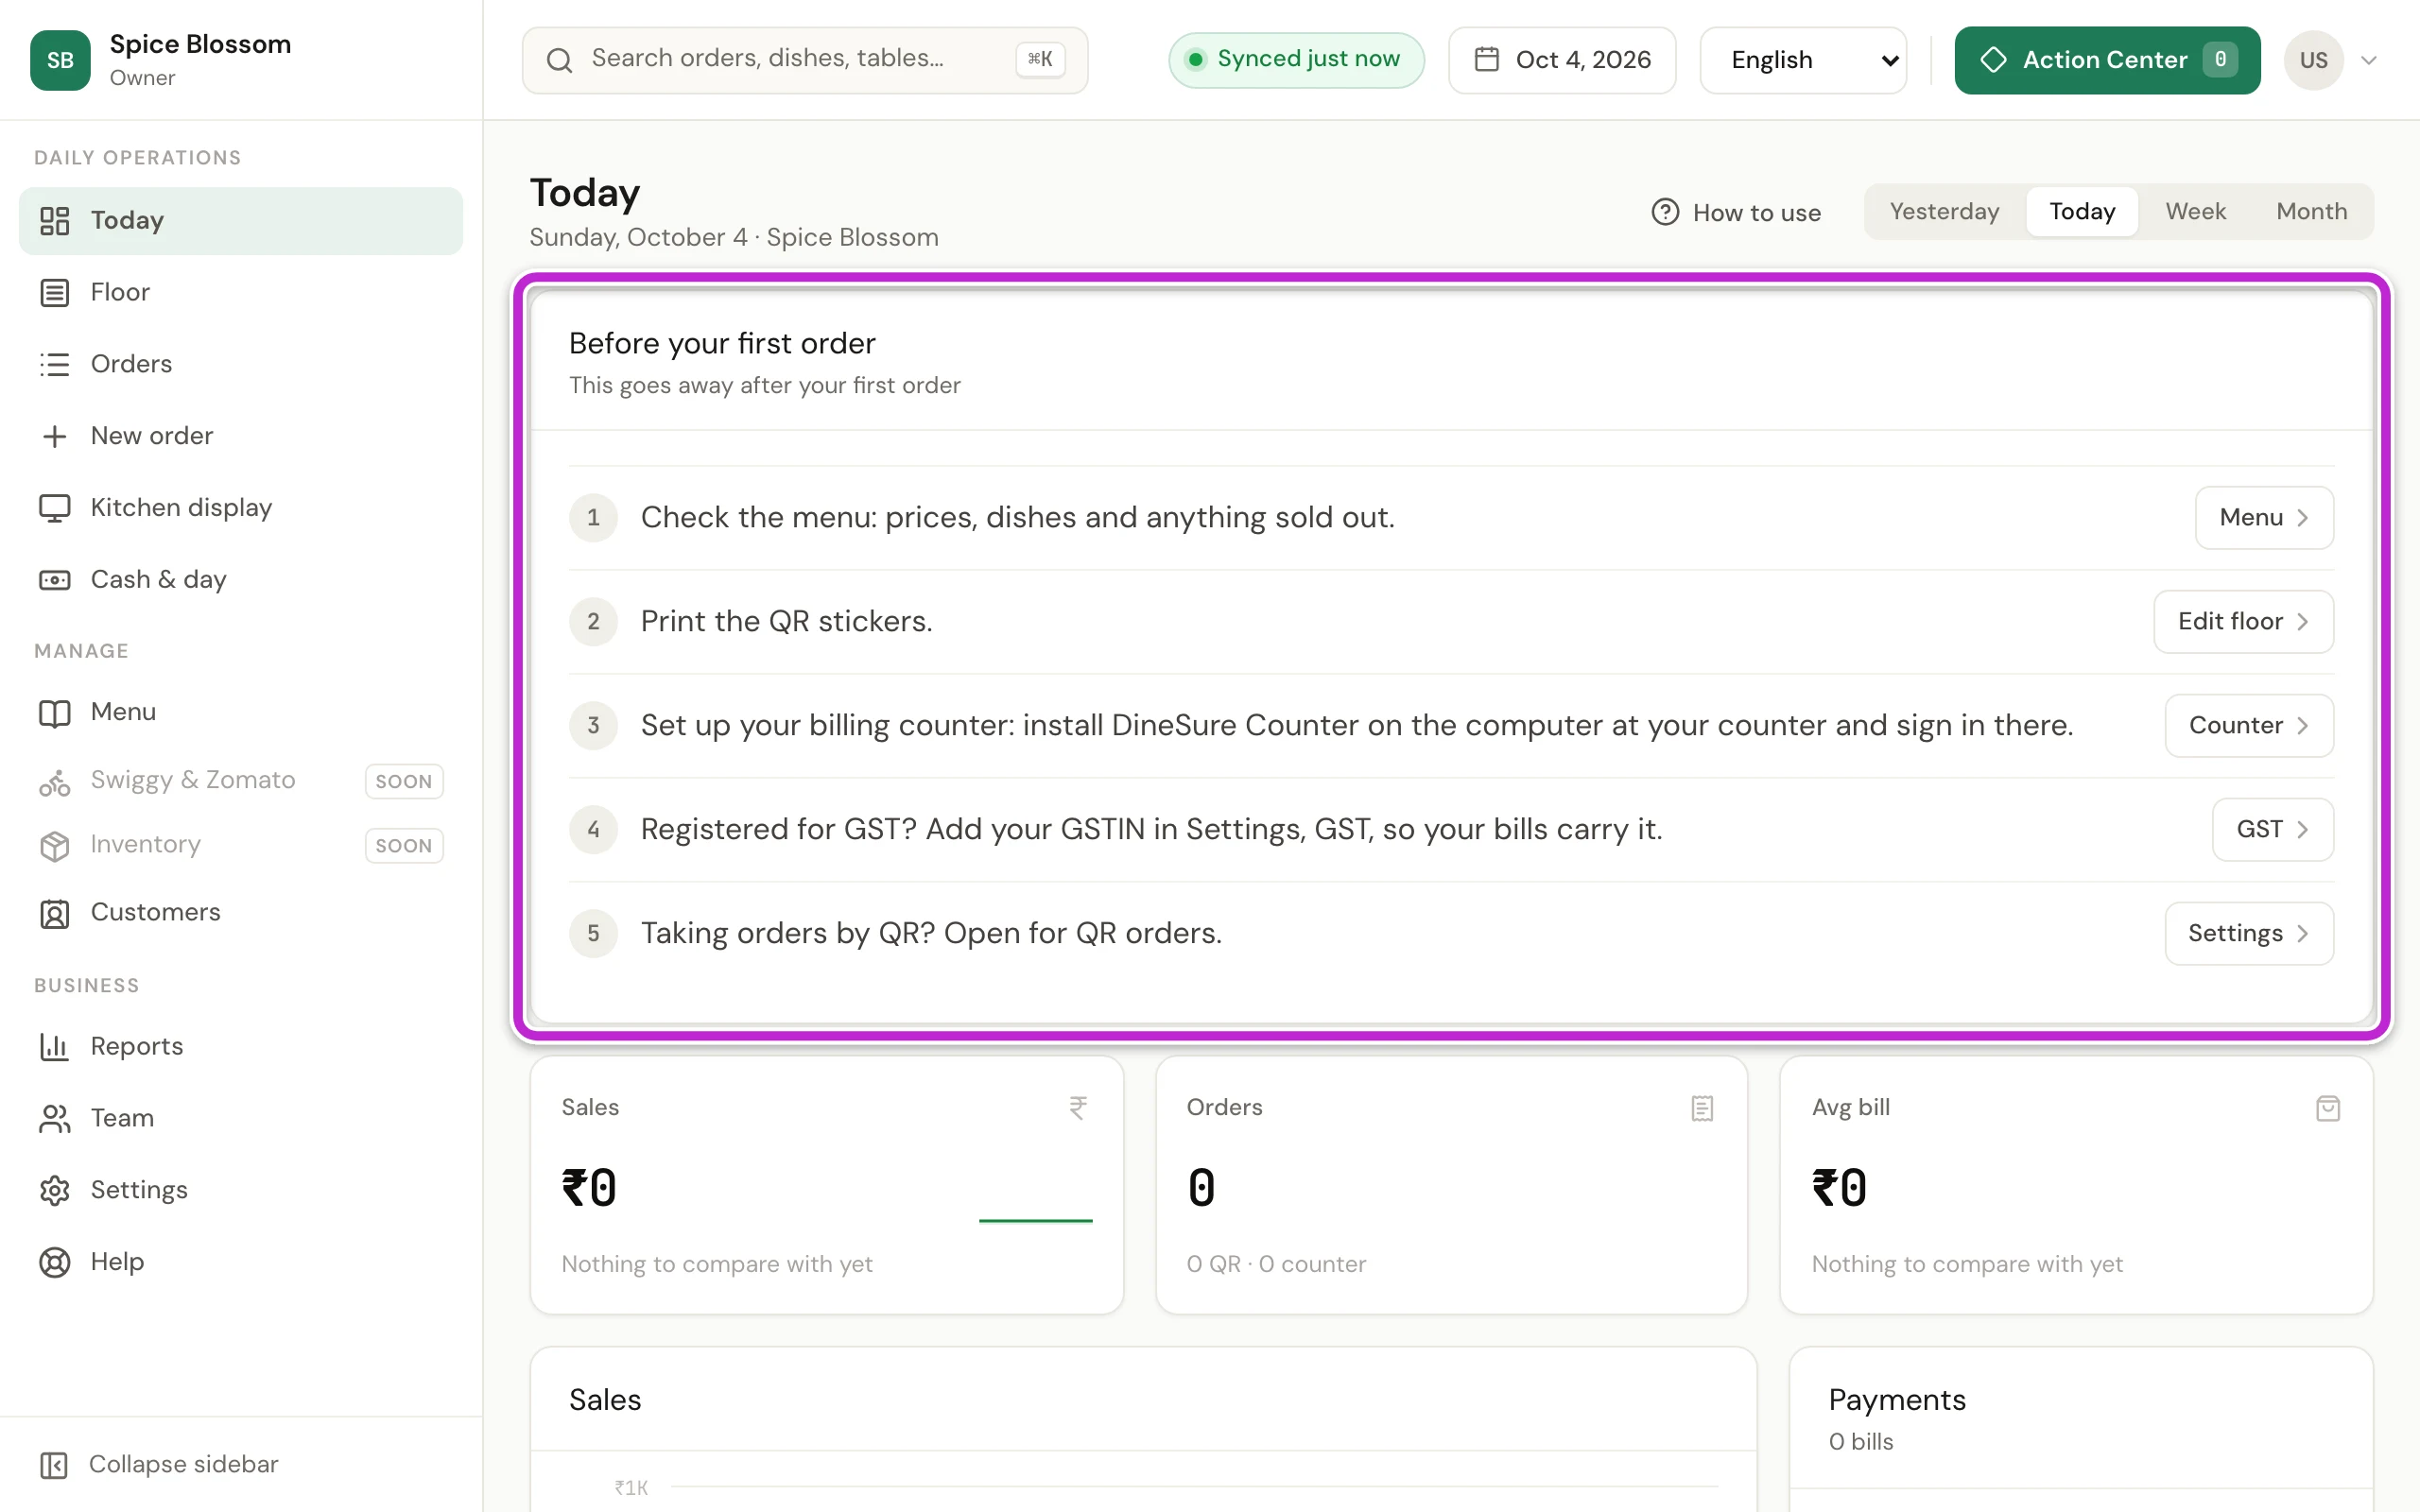
Section titled “Before your first order”Today keeps a box Before your first order until your first order. Each line has a button that takes you to the right place.
-
Click Menu to check the dishes, prices and anything sold out (Add your menu).
-
Click Edit floor to print the QR stickers for your tables (Arrange tables and print QR stickers).
-
Click Counter to set up the billing counter (Set up the billing counter and printers).
-
If you are registered for GST, click GST to add your GSTIN, so your bills carry it (GST and bill details).
-
If you take orders by QR, click Settings to open for QR orders (Accept QR orders).
If something goes wrong
Section titled “If something goes wrong”- No setup box on Today. Only the owner sets up the restaurant. Sign in with the owner’s mobile number.
- Same number as yours. You typed your own mobile number for another person. Type that person’s own number, or leave it empty for a cashier or kitchen person.
- Check the marked fields. A box is empty or wrong. Look for the message under it, fix it, and click Continue again.
- Enter 1 to 3 letters. The logo letters are empty or too long. Type one to three letters.
- An FSSAI licence number has 14 digits, and the first digit is 1 or 2. Check the number on your FSSAI licence and type all 14 digits, or leave the box empty.
- Owners, managers, captains and accountants need a mobile number. Type their number, or choose Cashier or Kitchen if they only work at the counter.
- Tick at least one section, or choose Start empty. Tick the sections you serve, or click Start empty.
- A mobile number is used twice. Two people have the same number. Click Change mobile number and give each person their own number. Nothing was set up yet, so click Finish setup again after the change.
- Setup didn't finish. The internet connection may have dropped. Check it, then click Try again.
- Leave setup? You clicked Do this later or tried to leave. What you typed is not saved yet. Click Keep editing to stay, or leave and start again later from Today.
- Setup is already finished. Your restaurant is set up. Change things on the Menu page, on the Floor with Edit floor, and in Settings.